Summer wouldn't be complete without a deliciously smoked rack of BBQ ribs! If you're cooking out this weekend make sure to put these on the menu!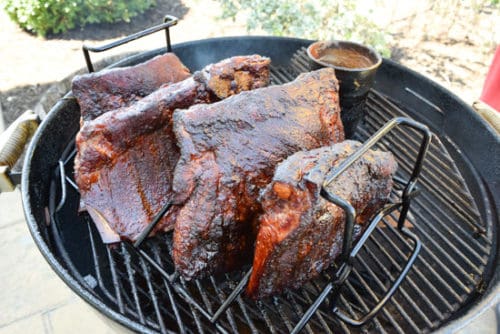
**Post written by The BBQ Brothers. For all meat prep, grill set up, temperature and humidity control, recommended tools, and techniques for The BBQ Brothers recipes, check out The BBQ Brothers Beginner's Guide To Grilling first, then get to cookin!
This recipe is for competition style ribs which means when you bite into them the meat stays on the bone. If you prefer your ribs to be of the "fall off the bone" variety, check out our 3-2-1 BBQ Ribs Recipe instead. And as usual, we recommend using our All Purpose BBQ Rub for either one!
BBQ RIBS (COMPETITION STYLE)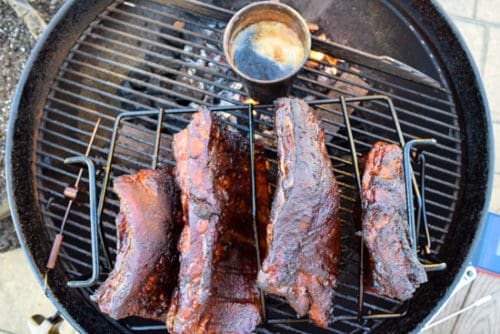
When it comes to preparing the ribs, the first thing that you want to do after you take them out of the package and rinse them off is to dry them very well. This will make them easier to handle and it will help with our next step.
The next step is always my least favorite and most frustrating but makes a huge difference in the final dish. When you flip your ribs over you'll see a strange waxy almost platic-y membrane. There are two reasons that this has got to go:
- First, we've all taken a bite of a delicious, moist, tender rib only to have the succulent meat attached to a papery, gross piece of membrane. It's not the most appetizing thing in the world.
- Second, the whole reason that these types of membranes exist in the animal is to keep things (like delicious meat rubs I suspect) away from the muscles of the animal. So since we want our rub to make the most contact as possible with our meat we need the membranes out of there.
So what you'll want to do is take a dry paper towel and find a piece of the membrane that is somewhat loose (or take a butter knife to slide under and pry upwards) and peel off the membrane. If you're lucky you can get it off all in one pull, or if you're not, you will need to go back for more.
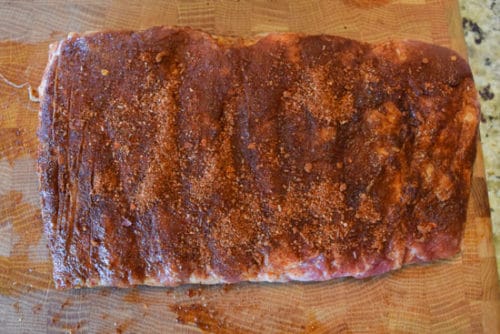
Once you get the membrane removed it's almost time for the rub down. Before you do that we'll want to make sure that our rub sticks to the meat as much as possible. Coat the ribs with either vegetable oil (Matthew recommended) or yellow mustard (Andrew recommended). Sprinkle the rub onto the meat and pat it in until all of the meat is covered, including the sides. (Make sure you don't actually "rub" it into the meat, as this will cause it to cake up and the smoke won't penetrate the meat well). Cover with saran wrap and put it in the fridge overnight. 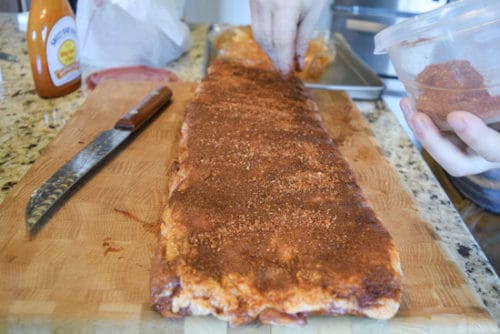
 When it's time to put your ribs onto the smoker you can put them on pretty much any way that they will fit and also gives good circulation for the smoke and heat to envelop the ribs. If you have a smaller set up you can use a roasting rack upside down to put your ribs into like they are meaty little envelopes.
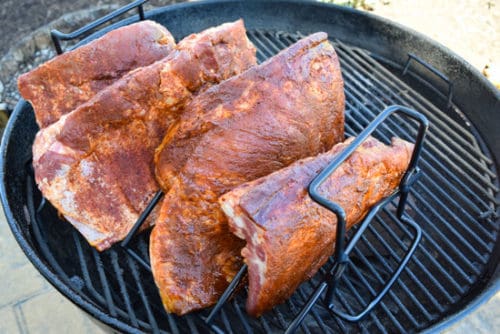 Once your meat is on the grill and your temperature is stabilized around 225 F, sit back, crack open a cold beer (or carb free refreshment), crank some tunes and get ready to wait. One of the best and worst things about BBQ is that you're going to have a lot of time to sit around and do nothing.
For two racks of St. Louis cut ribs you're looking at 5 to 6 hours in the smoker. You can speed up this process by using the Texas Crutch:
- This means that after 2 to 3 hours you wrap your ribs in foil with a little bit of liquid and put them either back on the smoker or into the oven. You can use the oven since they are wrapped and additional smoke won't make any difference at this point anyway.
- This can knock an hour or so off of your cook time with the sacrifice being the outside (or bark) won't be quite as crisp and pronounced as if you left it unwrapped the whole time.
- The Texas Crutch will also make your ribs more tender and fall off the bone, if that is what you're after.
So how do you know when your ribs are finally done? Unlike almost any other BBQ, internal temperature doesn't help us too much because the bones are so close to the meat that they mess with the probe.
To test for doneness you can use the "bend test" which is when you take your tongs and hold your rack of ribs parallel to the ground so they bend. If the bark splits and you have a nice bounce to the meat, you're all good. You can also just cut a piece off and give it a try to see if it's done.
Once your meat is cooked you can either eat them dry (as Matthew prefers) or you can take this time to sauce them before serving. If you do decide to sauce them I always like to throw them back on to the hot side of the grill in order to get the sugars in the sauce to caramelize a bit and make them nice and sticky. Finally, dig in!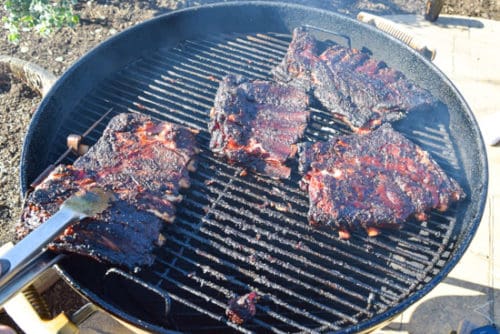
If you're looking for more ribs, try out Spicy Asian Ribs or these 3-2-1 BBQ Ribs (Fall Off the Bone Style)!
Print
BBQ Ribs (Competition Style)
- Prep Time: 15 minutes
- Cook Time: 5-6 hours
- Total Time: 26 minute
- Yield: 2 racks of ribs
- Category: Main Course
- Method: Smoked
- Cuisine: American
Description
Summer wouldn't be complete without a deliciously smoked rack of BBQ ribs! If you're cooking out this weekend make sure to put these on the menu!
Ingredients
Meat used: Two racks of St. Louis cut ribs
Seasoning: The BBQ Brothers All-purpose BBQ Rub
Wood Used: Apple
Grill Temperature: ~225 F
Meat Temperature: None, pass bend test
Smoke time: ~5-6 hours
Instructions
- The first thing that you want to do after you take them out of the package and rinse them off is to dry them very well. This will make them easier to handle and it will help with our next step.
- When you flip your ribs over you'll see a strange waxy almost platic-y membrane. This needs to be removed. So what you'll want to do is take a dry paper towel and find a piece of the membrane that is somewhat loose (or take a butter knife to slide under and pry upwards) and peel off the membrane.
- Coat the ribs with either vegetable oil (Matthew recommended) or yellow mustard (Andrew recommended). Sprinkle the rub onto the meat and pat it in until all of the meat is covered, including the sides. (Make sure you don't actually "rub" it into the meat, as this will cause it to cake up and the smoke won't penetrate the meat well). Cover with saran wrap and put it in the fridge overnight.
- When it's time to put your ribs onto the smoker you can put them on pretty much any way that they will fit and also gives good circulation for the smoke and heat to envelop the ribs. If you have a smaller set up you can use a roasting rack upside down.
- For two racks of St. Louis cut ribs you're looking at 5 to 6 hours in the smoker at 225 F. You can speed up this process by using the Texas Crutch. *See notes.
- To test for doneness you can use the "bend test" which is when you take your tongs and hold your rack of ribs parallel to the ground so they bend. If the bark splits and you have a nice bounce to the meat, you're all good. You can also just cut a piece off and give it a try to see if it's done.
- Once your meat is cooked you can either eat them dry (as Matthew prefers) or you can take this time to sauce them before serving. If you do decide to sauce them I always like to throw them back on to the hot side of the grill in order to get the sugars in the sauce to caramelize a bit and make them nice and sticky. Finally, dig in!
Notes
The Texas Crutch Technique means that after 2 to 3 hours you wrap your ribs in foil with a little bit of liquid and put them either back on the smoker or into the oven.
This can knock an hour or so off of your cook time with the sacrifice being the outside (or bark) won't be quite as crisp and pronounced as if you left it unwrapped the whole time.
The Texas Crutch will also make your ribs more tender and fall off the bone, if that is what you're after.
So let us know what you think....did this recipe smoke the competition or go up in flames? Leave a comment below! 🙂


Leave a Reply