A perfect quick and easy snack, an impressive holiday appetizer, or even a simple Netflix night nibble! Only 50 calories per serving! (Not counting the bread!) 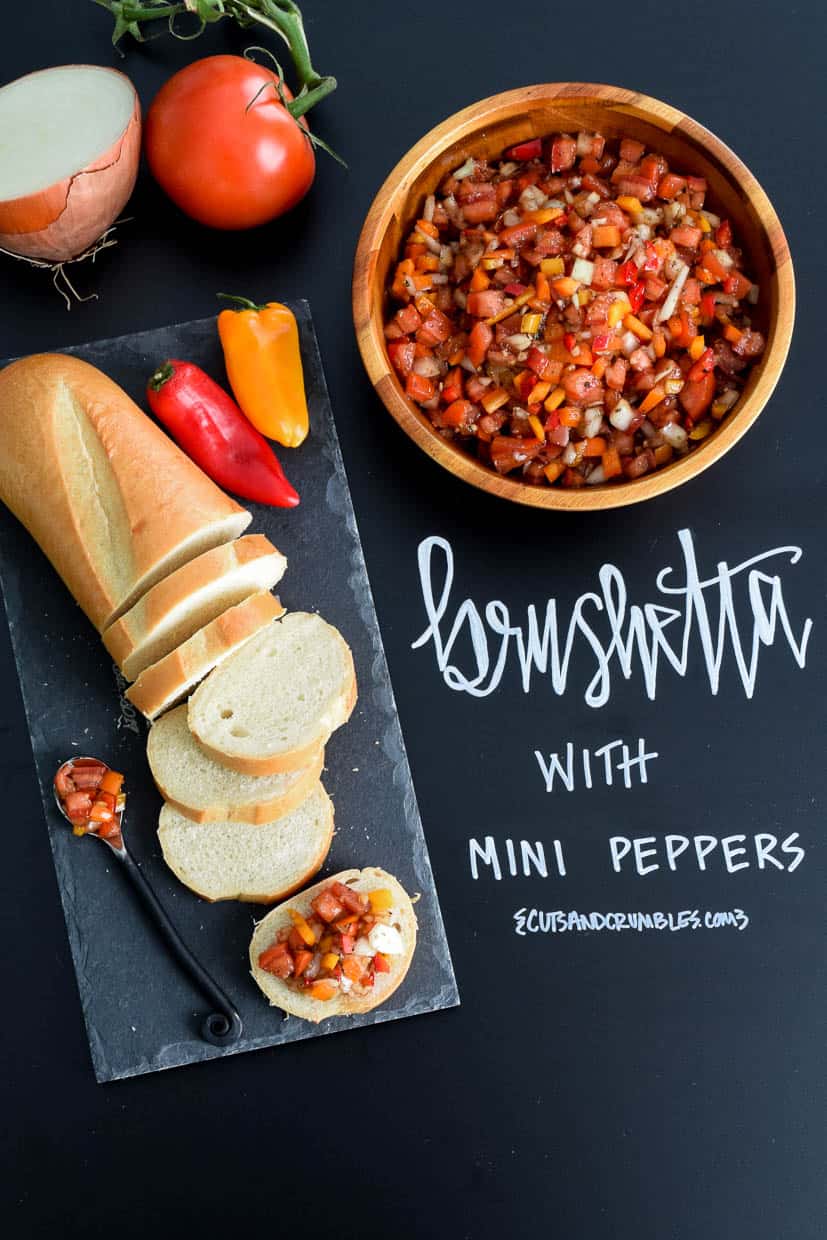
Bruschetta has really worked its way into being a staple in my life since I started dating an Italian man. If you haven't tried this I highly recommend it. The dating an Italian part. And the bruschetta part, too, I suppose. You can whip this together in about 10 minutes and have an incredibly tasty, attractive appetizer (perfect for entertaining any surprise visitors! 🙂 )
My go-to bruschetta recipe always consisted of tomatoes, onions, feta, and basil. It was delicious. Until I discovered this rendition from Andrew, and now mine has been completely forgotten. There's something about the diced mini peppers in his version that gives the bruschetta that extra pop of flavor! Sometimes we will add in some cucumbers, cheese, or homemade cured meats, but I find this recipe to have the best flavor and lowest calories!
BRUSCHETTA WITH MINI PEPPERS
50 calories per serving (not counting the bread)

Before we begin, let's learn about how to choose and store these ingredients!
So how do I choose tomatoes and peppers?
How to choose tomatoes:
- Choose tomatoes that are plump and heavy with smooth, shiny skin. The coloration should be uniform.
- Smell the tomato by the stem. Fresh tomatoes will have a strong, sweet, earthy smell.
- Avoid tomatoes with any blemishes, cuts, wrinkles or soft spots.
How to choose peppers:
- Choose peppers that are firm and glossy and have a deep, vivid color.
- Choose peppers that feel heavy for their size. They should be firm but give slightly when pressed.
- The stems should be fresh and bright green in color.
- Avoid peppers that have any wrinkles, sunken areas, cuts, dark spots or soft spots.
great, now how do I store tomatoes and peppers until I need them?
How to store tomatoes:
- Ripe tomatoes should be kept in a single layer, stem side up, at room temperature, away from sunlight and consumed within a few days.
- Overripe tomatoes should be refrigerated to prevent further ripening and used within 3 days. Before use they should be allowed to reach room temperature to better bring out their flavor.
How to store peppers:
- Store in the refrigerator next to a damp cloth to help keep the pepper hydrated for up to 10 days.
- Store any unripe peppers at 65-70 degrees F for 2 weeks until ripe.
Tip: You can find more tips on seasonal produce selection and storage, plus tons of recipes from fellow food bloggers in my Monthly Seasonal Produce Guides!
perfect! Now how do I make this recipe?
Start out by dicing up 2 medium tomatoes. If you haven't mastered the art of dicing up tomatoes yet, here's a little mini tutorial for ya! 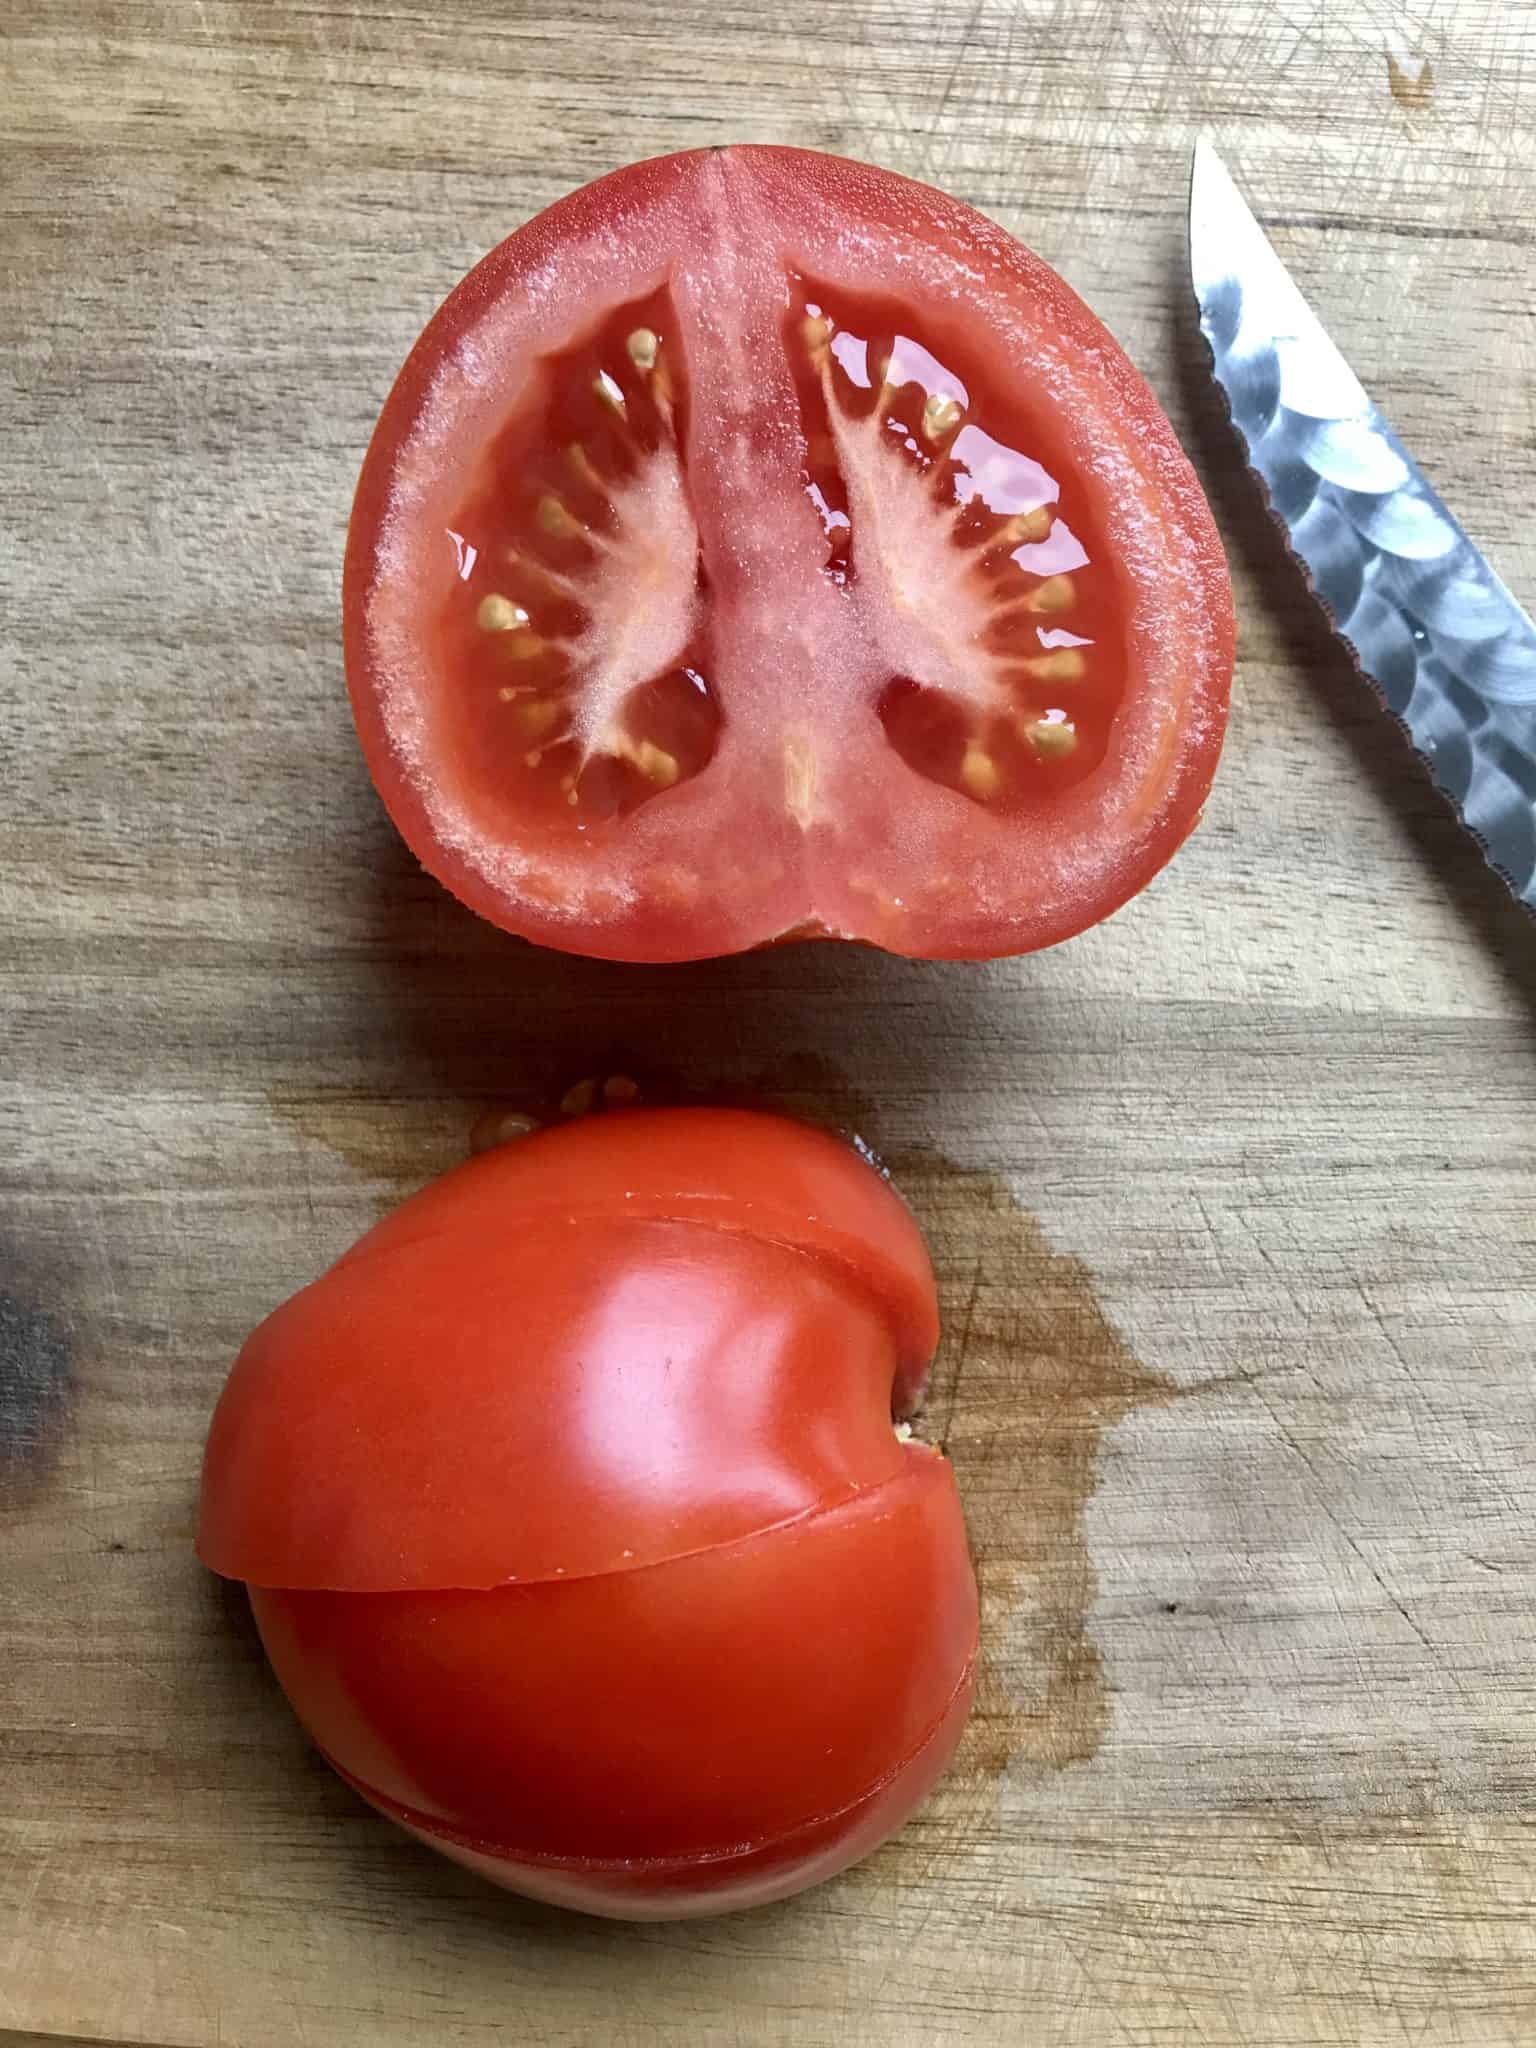 You'll first cut each tomato in half at the stem, then cut each half into quarters.
 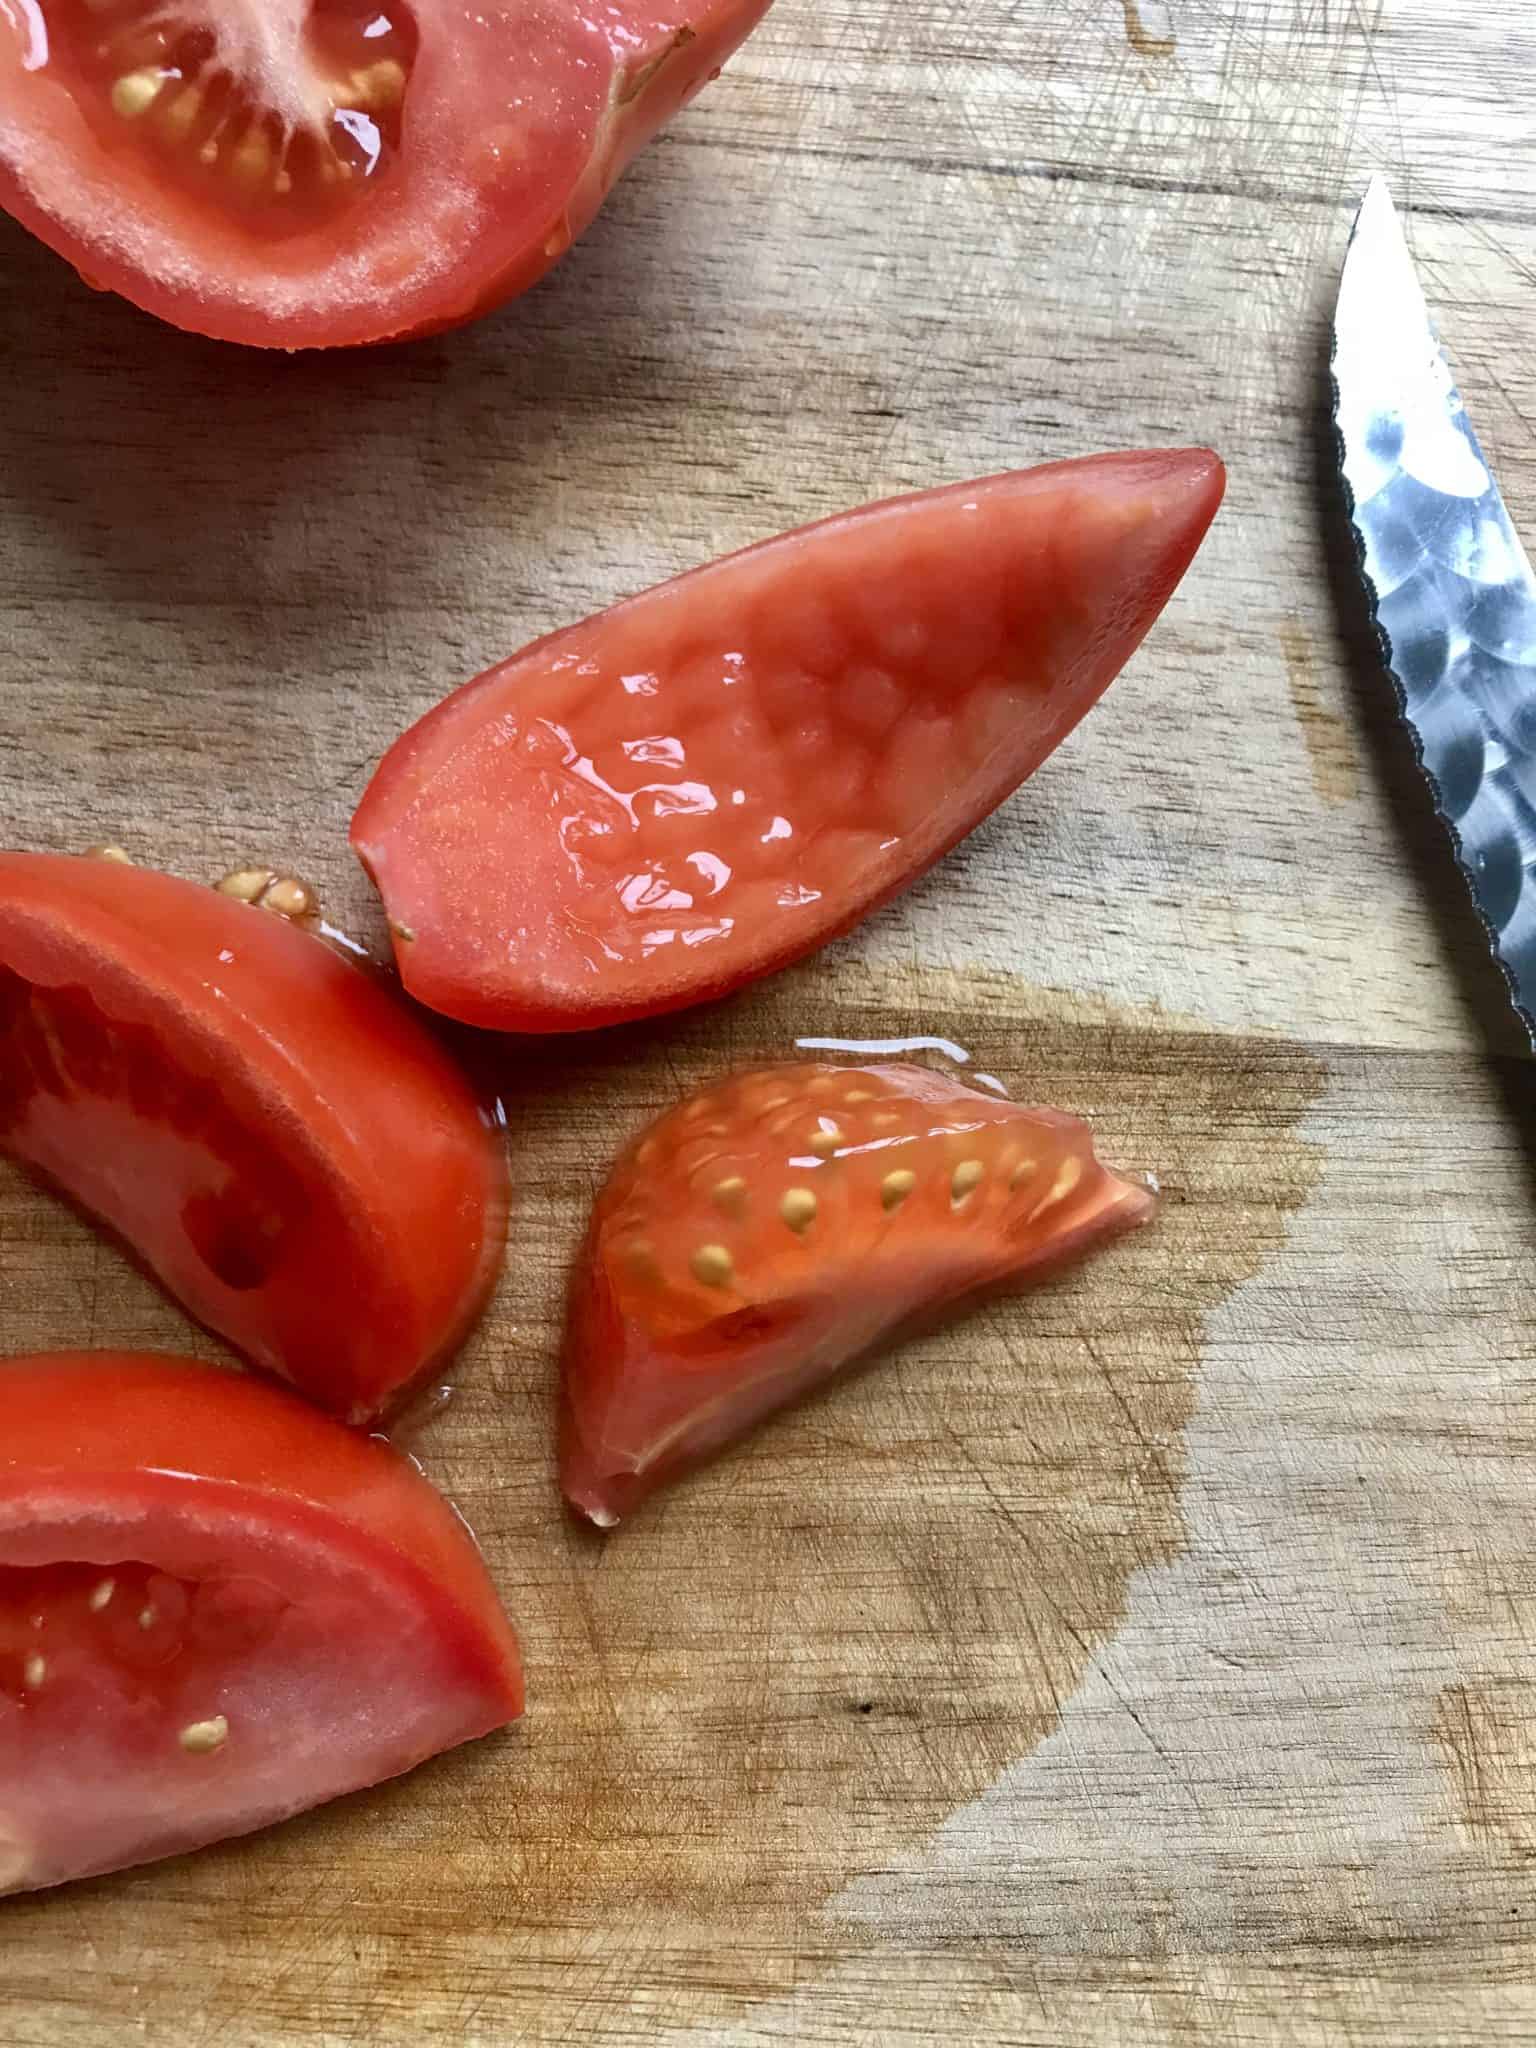 The seeds and juice should easily separate from the outer portion of the tomato by using this technique (This might be obvious to some of you but it took me years to figure out how to dice a tomato without making a juicy mess. Yes, I said years.) You can include the inside of the tomato in the bruschetta if you wish, but I prefer to leave it out because I don't like the seeds!
Next, simply slice each quarter in 3-4 slices, and dice! 

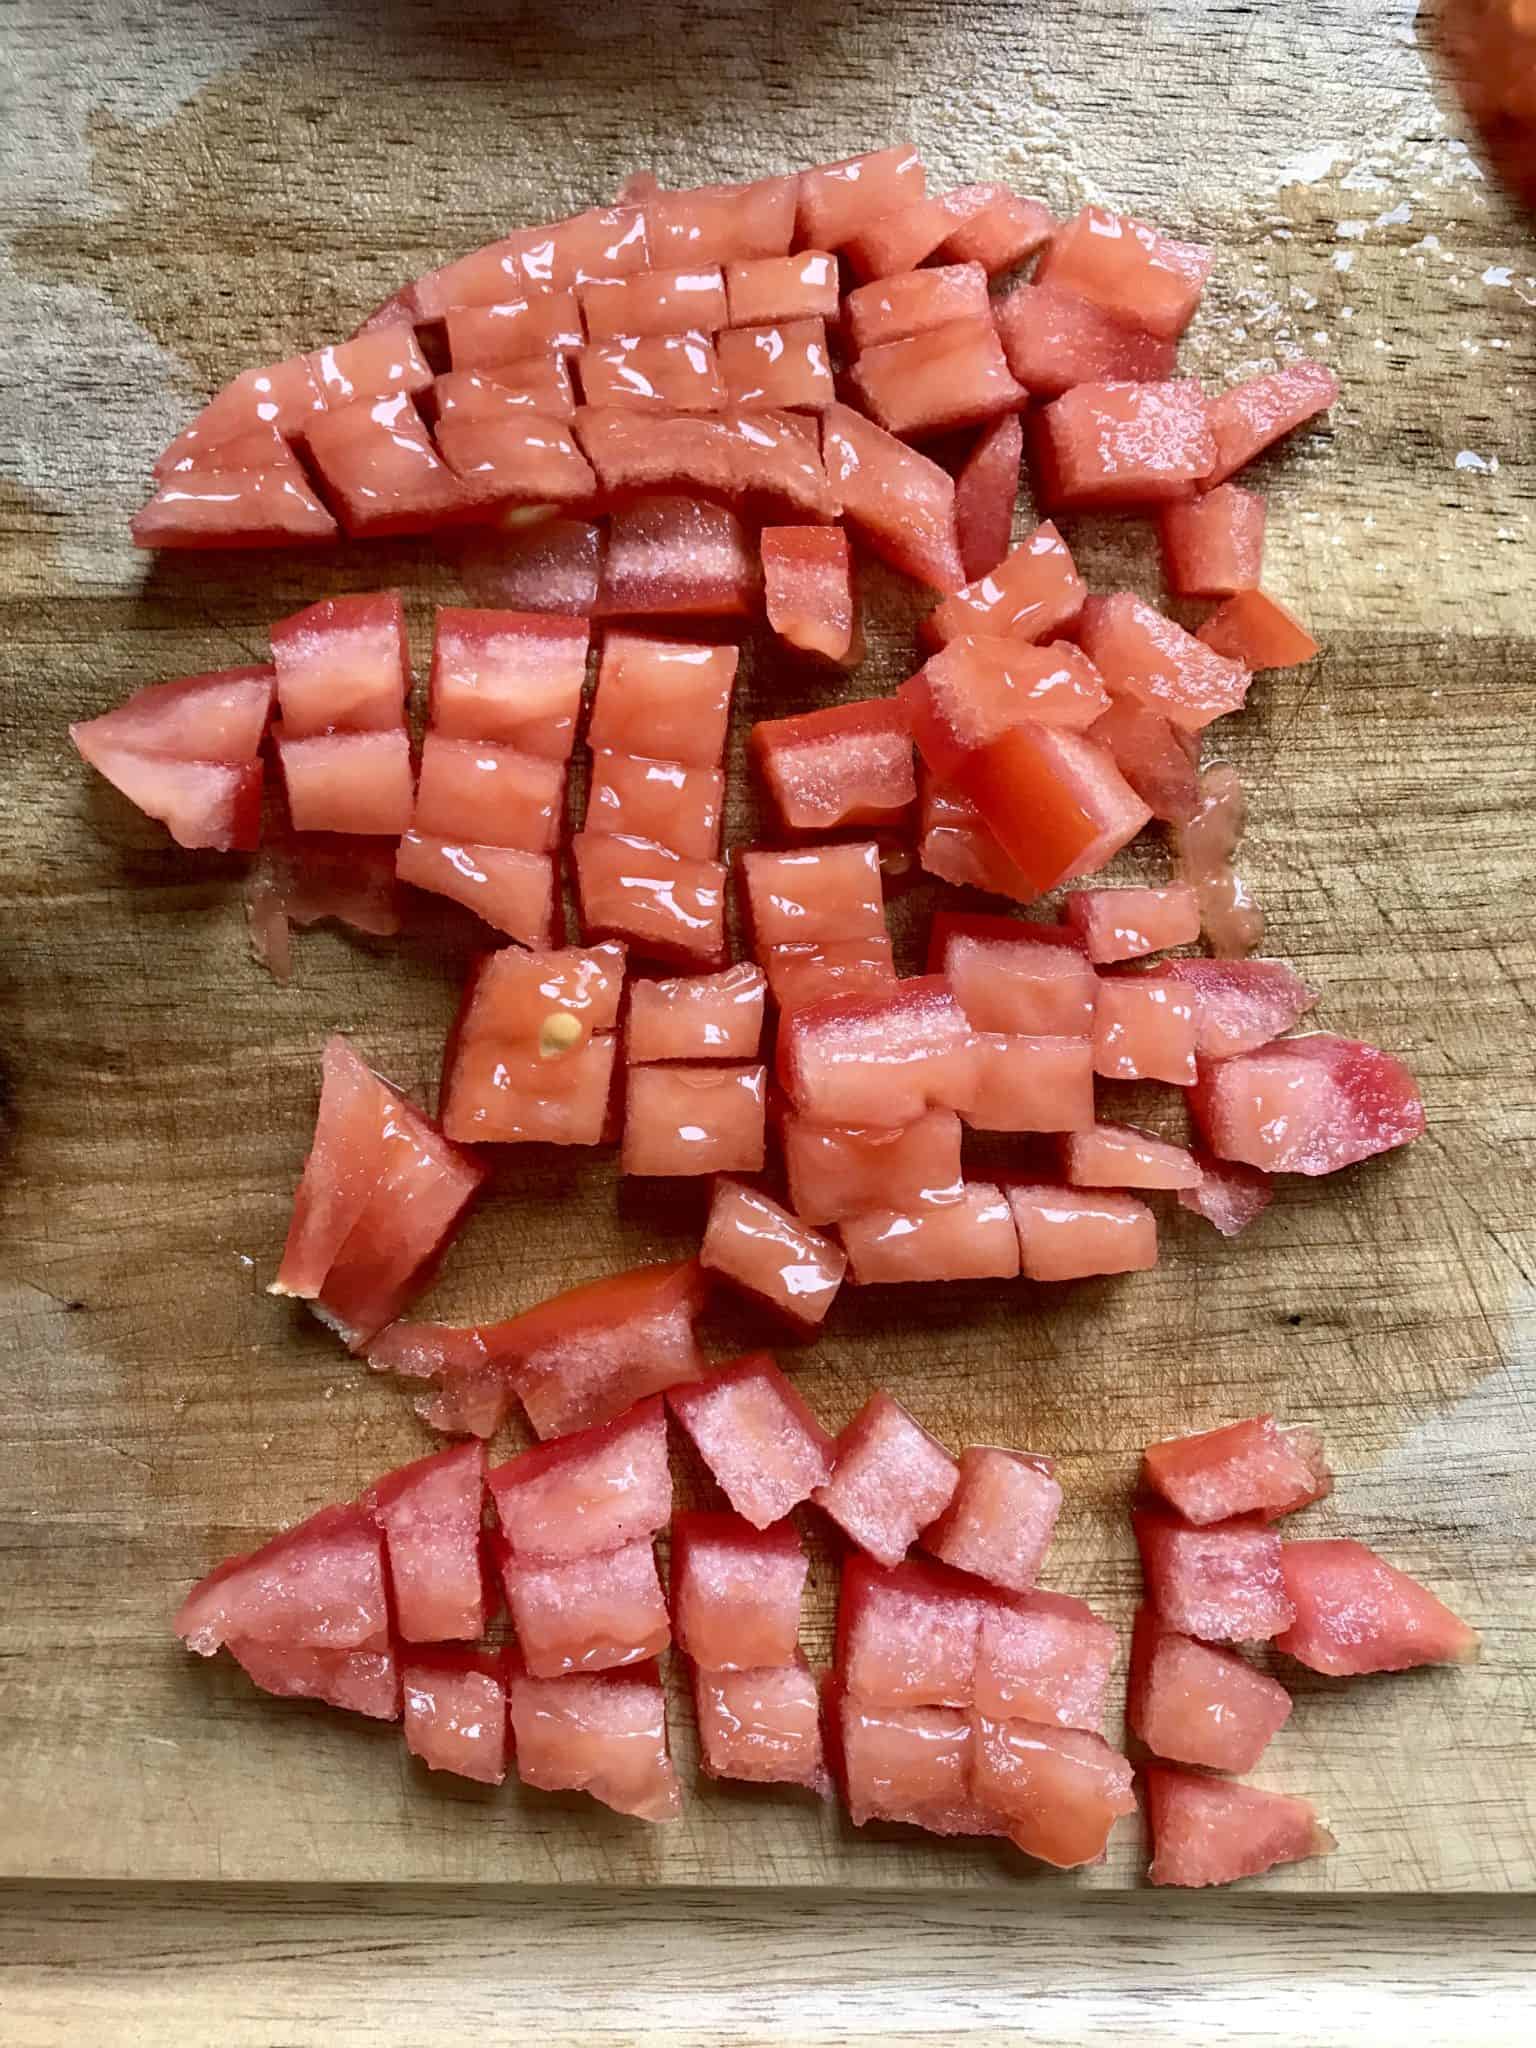 Place the tomato into a bowl then dice ¼ of an onion and add to the tomato. Remove tops and seeds from 3 sweet mini peppers then dice and add to the bowl. Add in 1 teaspoon of minced garlic, 1 tablespoon olive oil, 1 tablespoon balsamic vinegar, ½ teaspoon dried oregano, ½ teaspoon dried basil and salt and pepper to taste. Feel free to add more or less seasonings to your preference, this recipe is extremely customizable!
 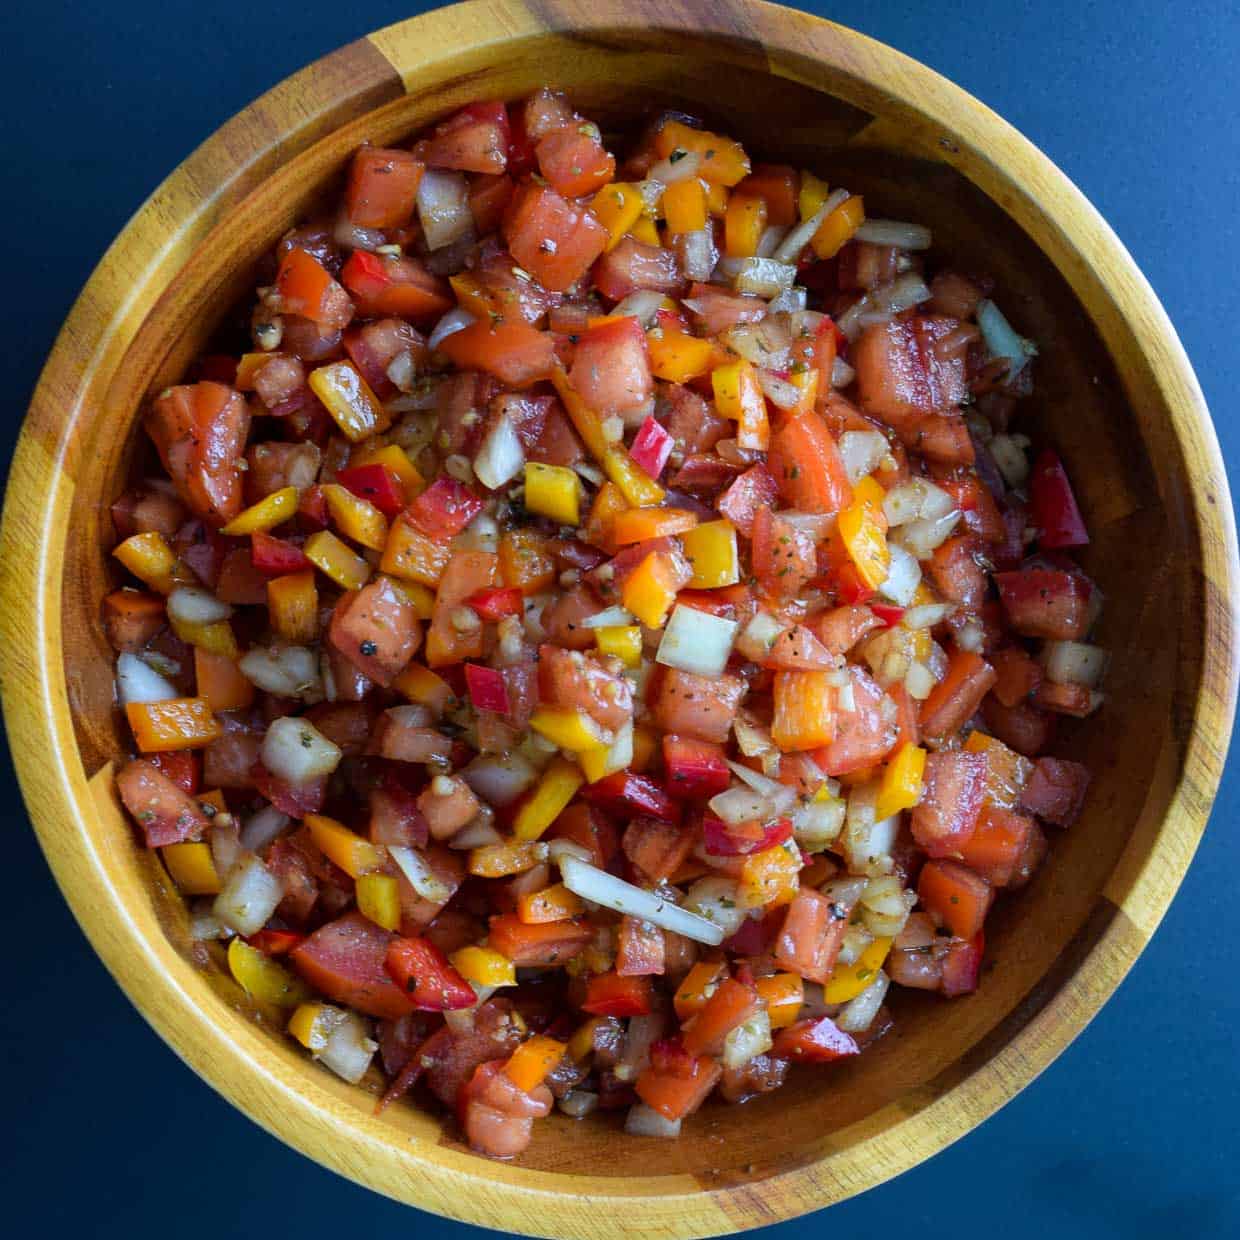 Mix together all ingredients, serve on sliced bread and enjoy! (Calories for bread not included.) Store in an airtight container in the refrigerator for up to 3 days. It's a perfect snack to have on hand when you're in a hurry but still want a healthy and light treat!
 Looking for more light, healthy, weight watcher friendly snacks? Check out these garlic and parmesan roasted chickpeas, these zucchini garlic and herb bites and these butternut squash "fries" with magic sauce!

Bruschetta with Mini Peppers
- Prep Time: 10 mins
- Total Time: 10 mins
- Yield: 6 servings 1x
- Category: Appetizer
- Method: Diced and mixed
- Cuisine: Italian
- Diet: Low Calorie
Description
A perfect quick and easy snack, an impressive holiday appetizer, or even a simple Netflix night nibble! Only 50 calories per serving! (Not counting the bread!)
Ingredients
- 2 medium-sized tomatoes, diced
- ¼ cup sweet onion, diced
- 3 sweet mini peppers, diced
- 1 tsp minced garlic
- 1 Tbsp olive oil
- 1 Tbsp balsamic vinegar
- ½ tsp oregano
- ½ tsp dried basil
- Salt and pepper to taste
Instructions
- Add 2 diced tomatoes, ¼ C diced sweet onion and 3 diced sweet mini peppers into a bowl then add in 1 teaspoon minced garlic, 1 tablespoon olive oil, 1 tablespoon balsamic vinegar, ½ teaspoon oregano, ½ teaspoon basil, and salt and pepper to taste. Add more or less seasonings to your preference.
- Mix together all ingredients, serve on sliced bread and enjoy!
Notes
Store in an airtight container in the refrigerator for up to 3 days.

What do you think? Did this recipe make the cut for you or did it crumble? What would you do differently? Leave a comment below! 🙂
PS: Since I want my blog to be about learning and improving, I wanted to include one of my original images, next to an updated image. Thank you to the Pinch of Yum Food Photography Ebook for these lessons! (Bless my poor, innocent, newbie blogger heart. The original pictures were HORRIFIC!!! Haha!)