
Classic American burgers smoked to perfection and seared until crispy! Made with freshly ground chuck roast, once you try these smoked burgers you'll never want to eat them any other way!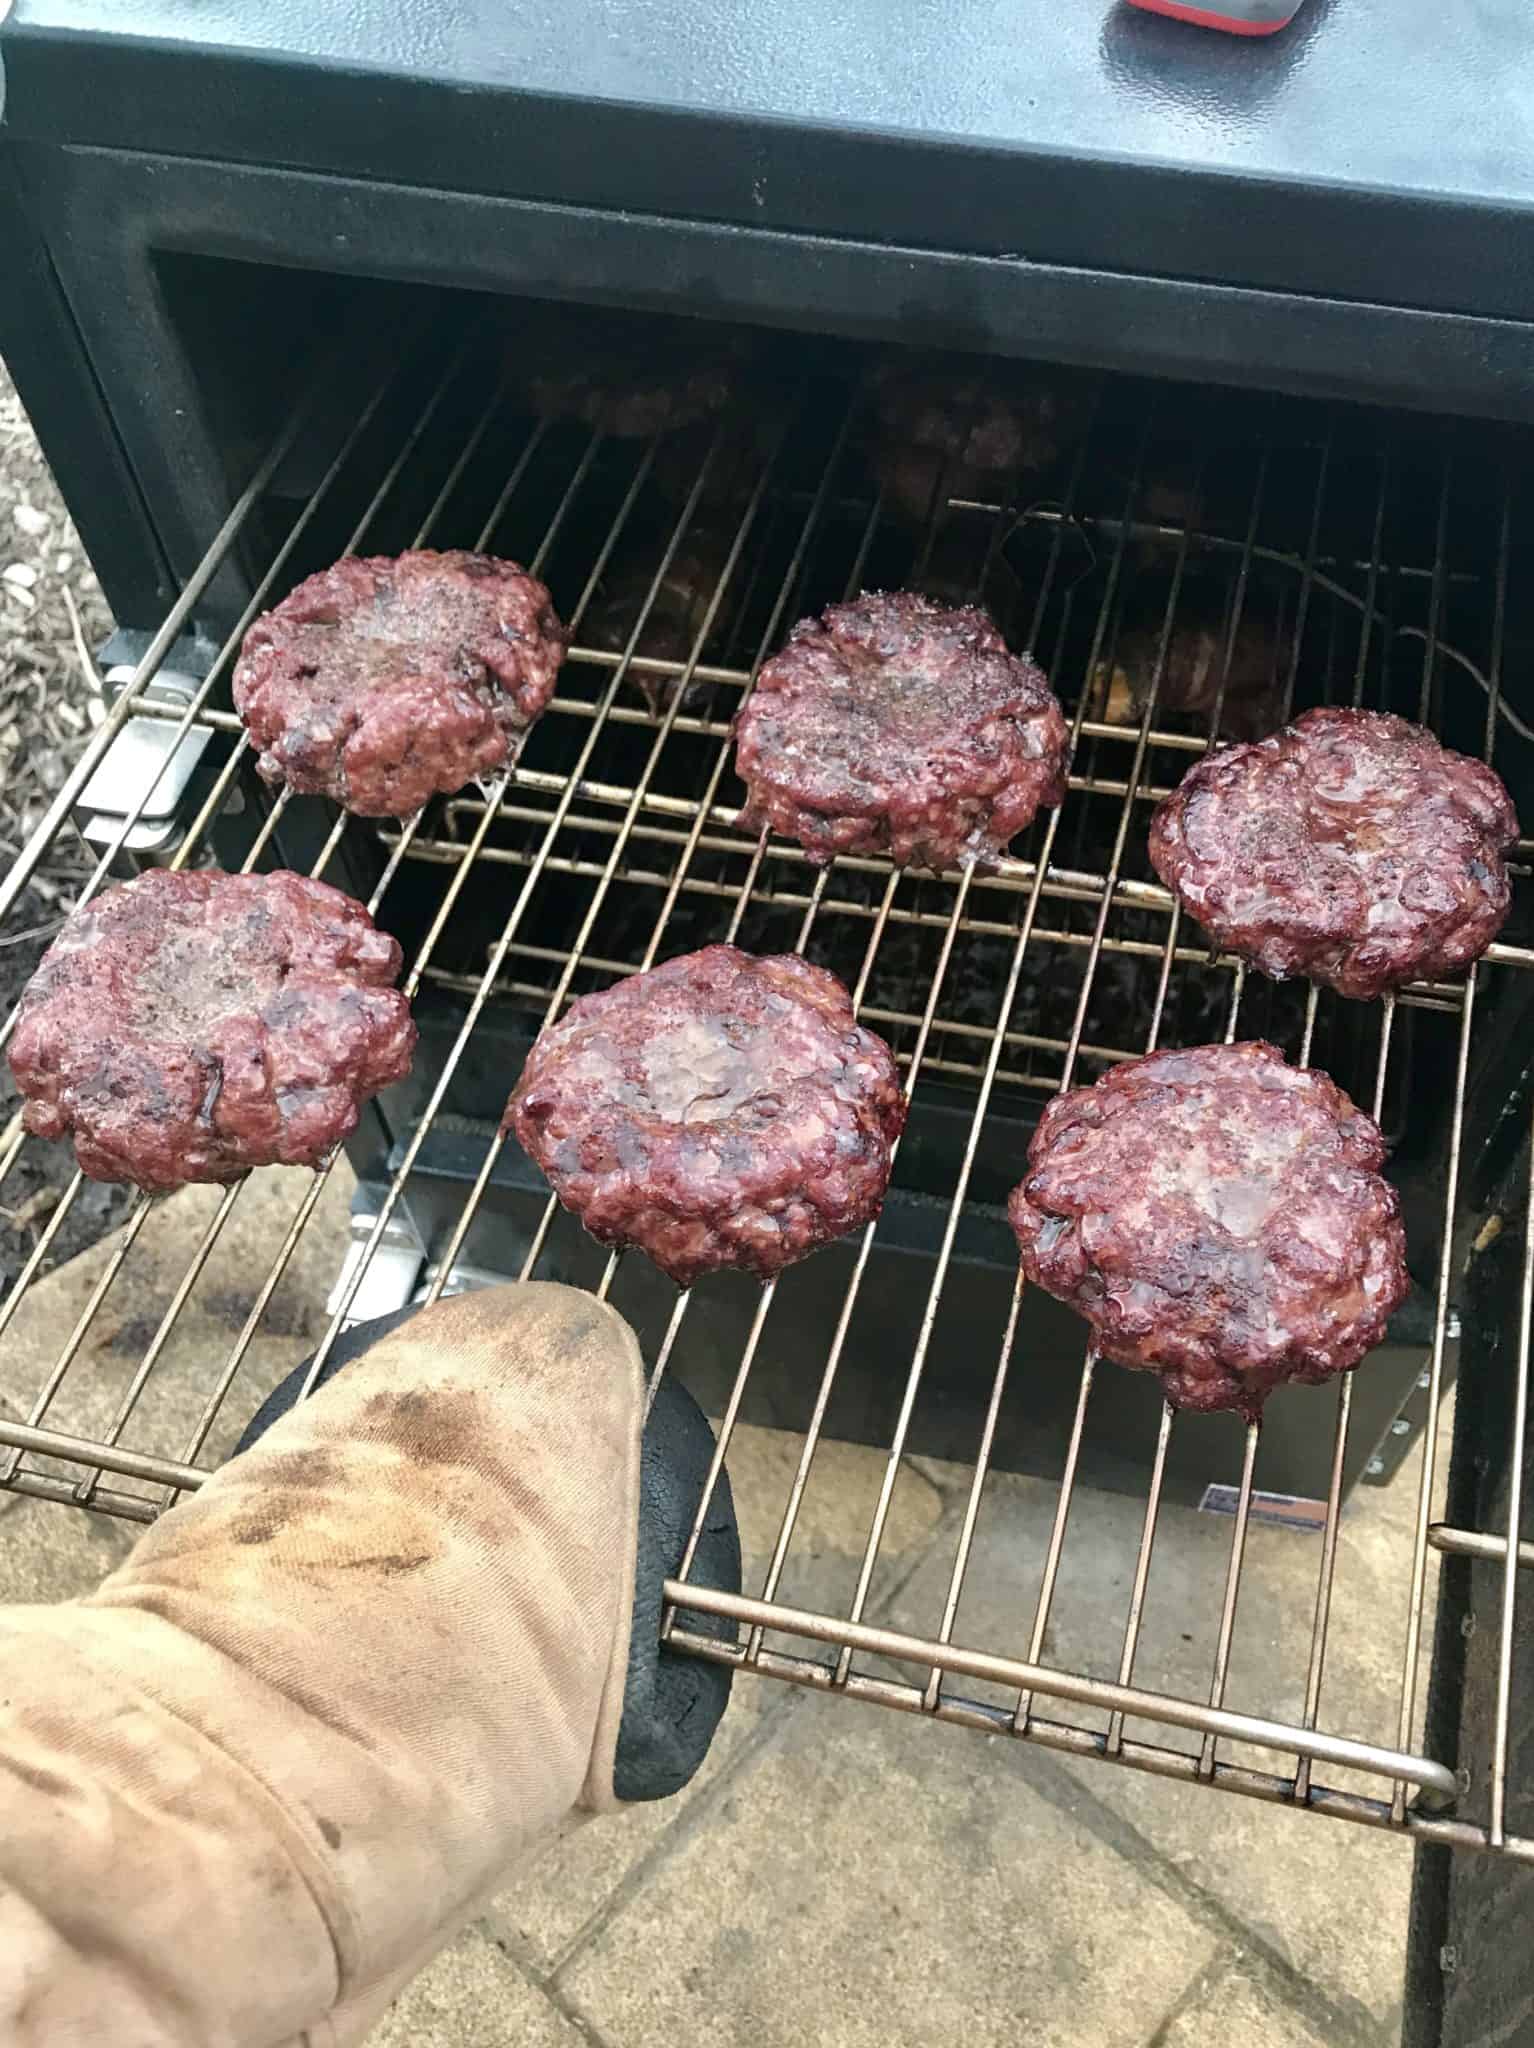
**Post written by The BBQ Brothers. For all meat prep, grill set up, temperature and humidity control, recommended tools, and techniques for The BBQ Brothers recipes, check out The BBQ Brothers Beginner’s Guide To Grilling first, then get to cookin!
Well BBQ boys and girls, the time has finally come! Old man winter finally got his ass out of Ohio and it’s time to go back outside. I don’t know about any of you, but when we bust out the smoker for the first time each Spring I usually completely forget everything that I learned from the last year. So I like to start out on the simple side, and what’s simpler and more delicious than a good old-fashioned American burger? I’ll tell you what, a good old-fashioned SMOKED burger! And I know I said we’d keep it simple, but I just can’t help myself, so we’re going to grind our own meat for these burgers. You can always use store-bought ground beef, but if you do you’ll want to get it as freshly ground as you can.
Disclaimer: This post contains Amazon affiliate links, meaning I will get a small portion of any sales that result from readers clicking my links. This is of no cost to you but is greatly appreciated by me! Thank you! And thank you for trying these products that I love!
SMOKED BURGERS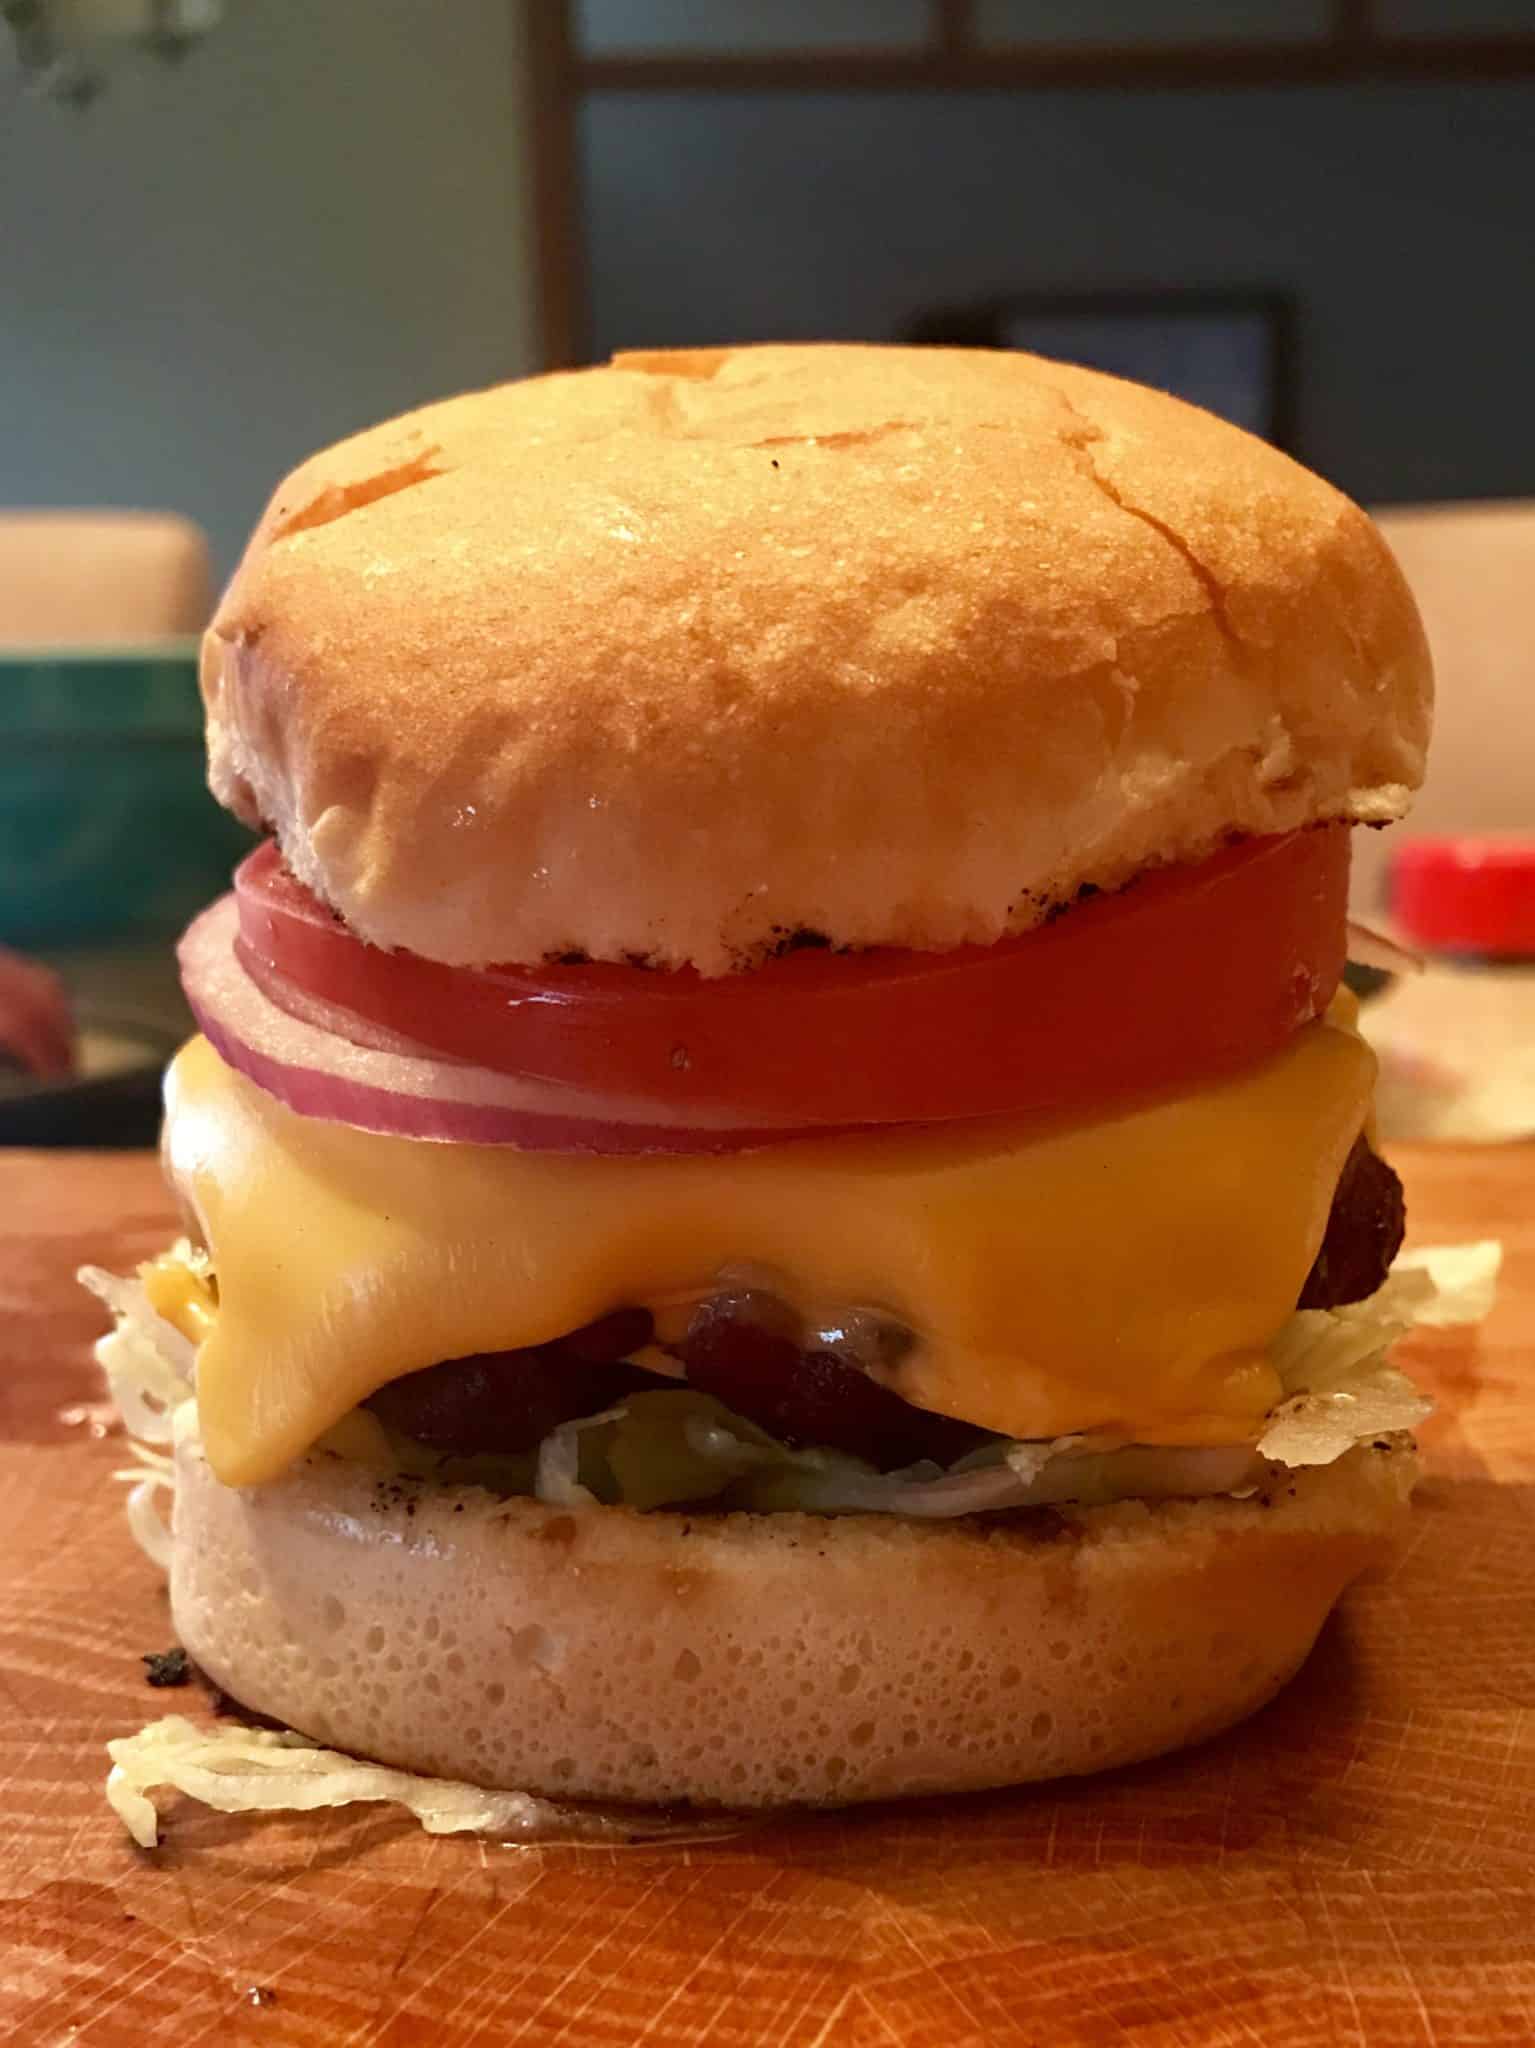
If you’re going to grind your own meat, the first thing you’ll need is, you guessed it, a meat grinder! You can use any type of grinder that you choose. You can use a hand crank one that you attach the side of your countertop, an attachment to a Kitchenaid mixer
, or if you’re like me, a 30-year-old grinder attached to a janky motor. You know, whatever floats your boat. You can also use a food processor, but your results won’t be quite as uniform.
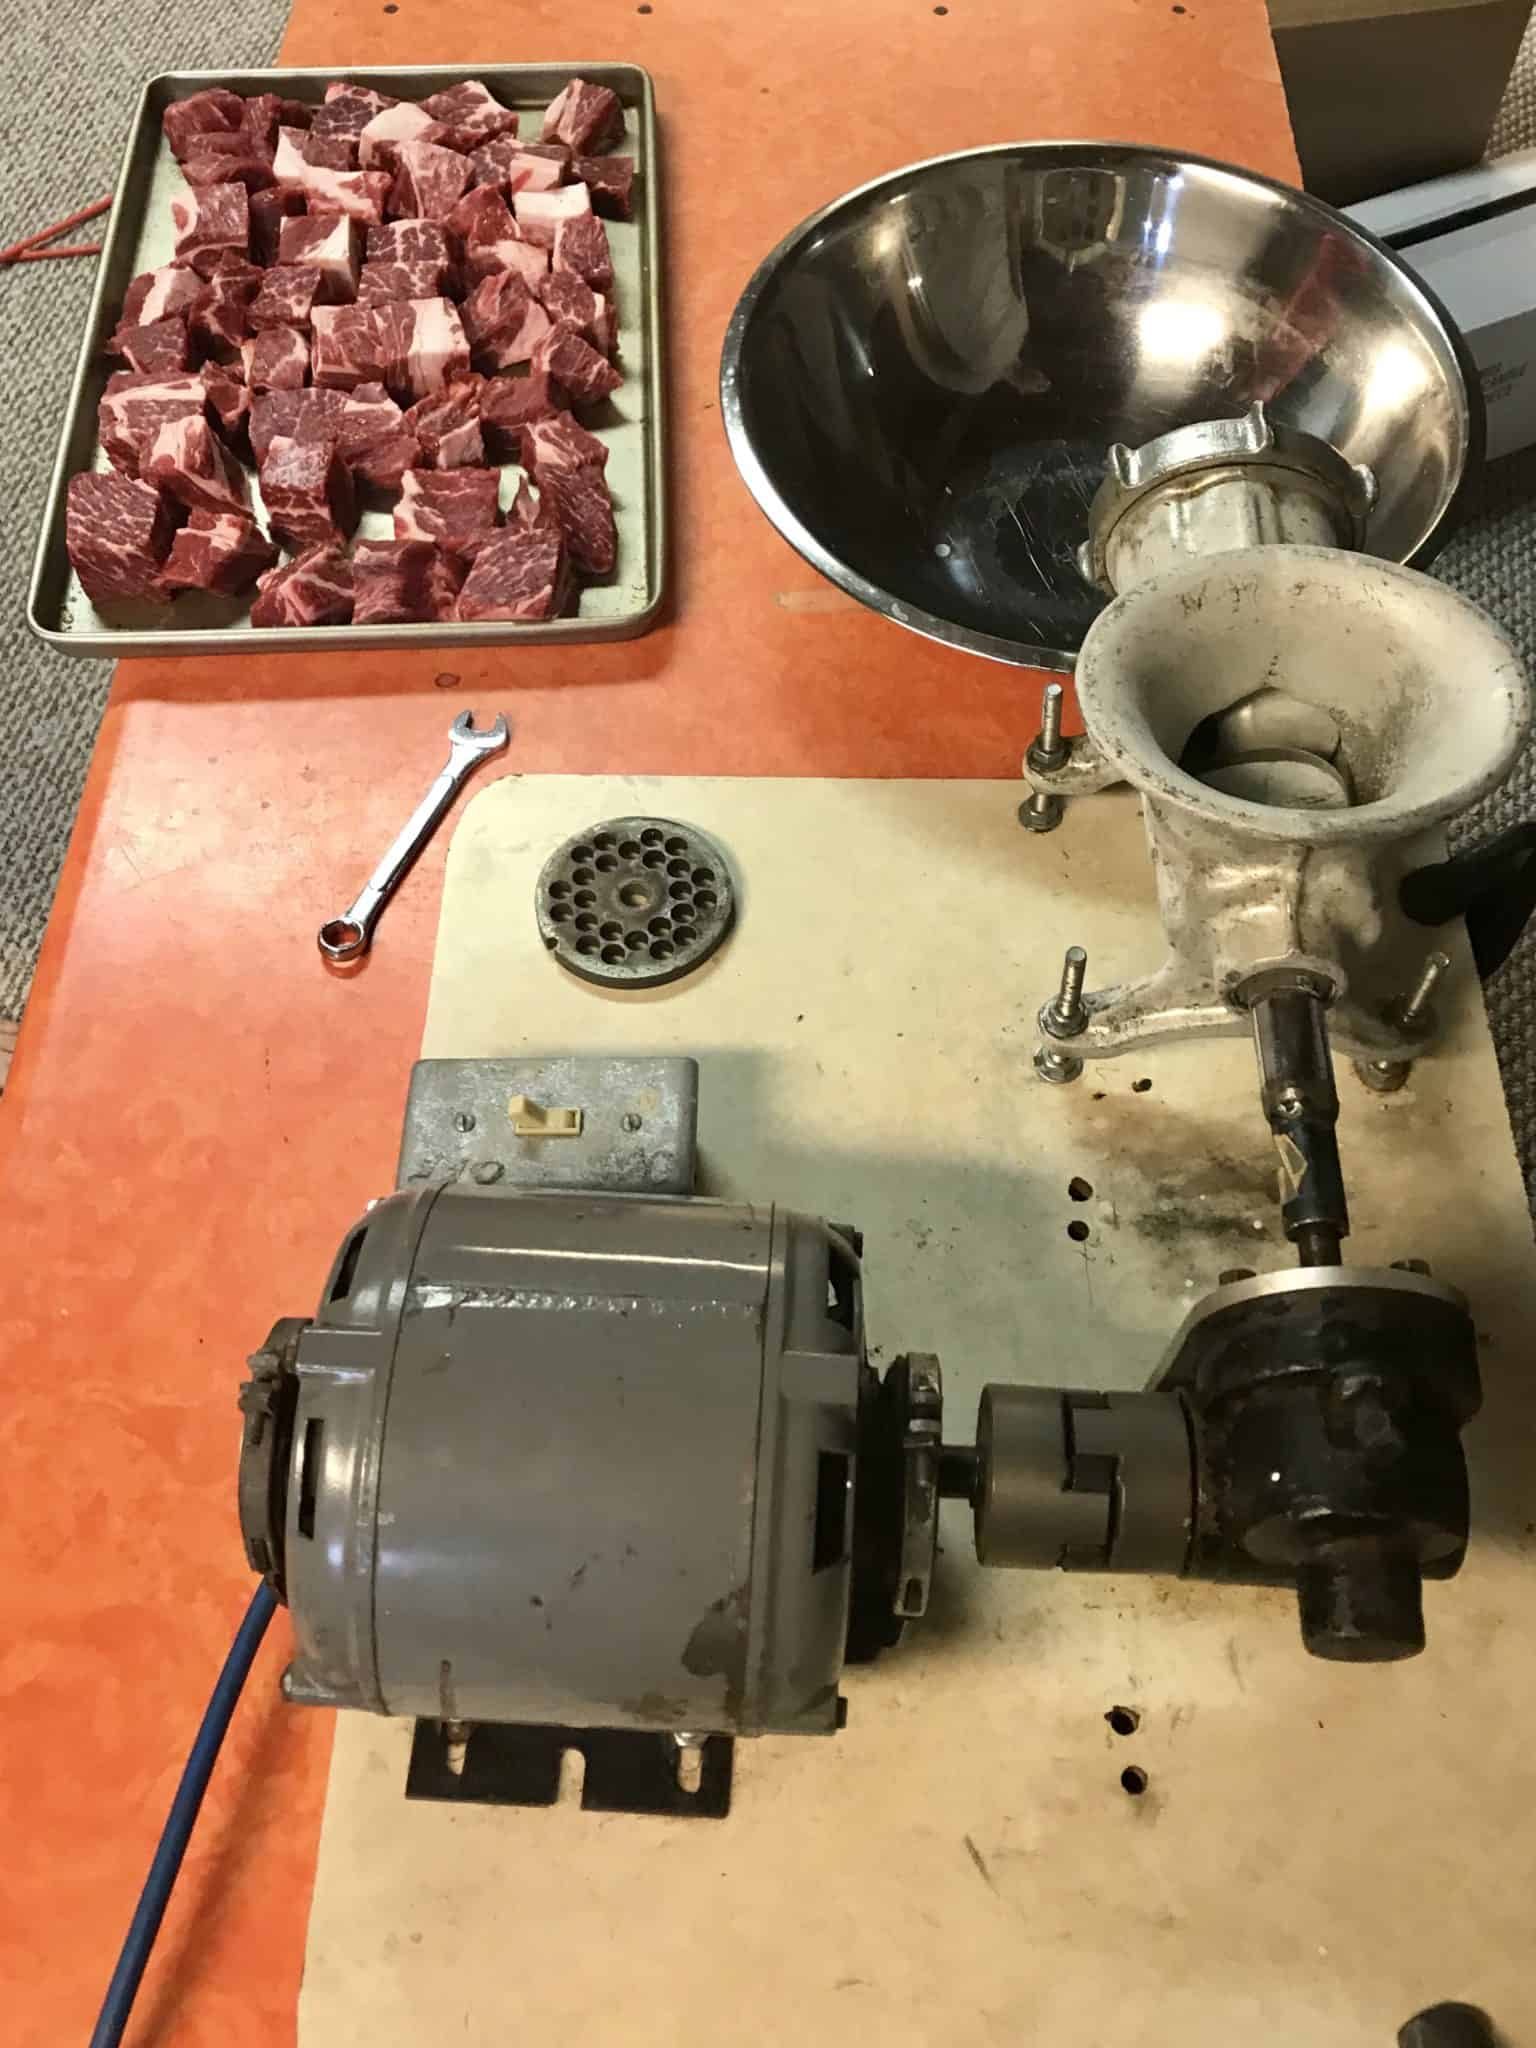 No matter what grinder you’re going to use, the first step is to put the whole grinder into the freezer. We’re going to do this in order to make sure that the fat in our meat doesn’t heat up during the grinder process and turn into a jelly which, you know, is pretty gross.
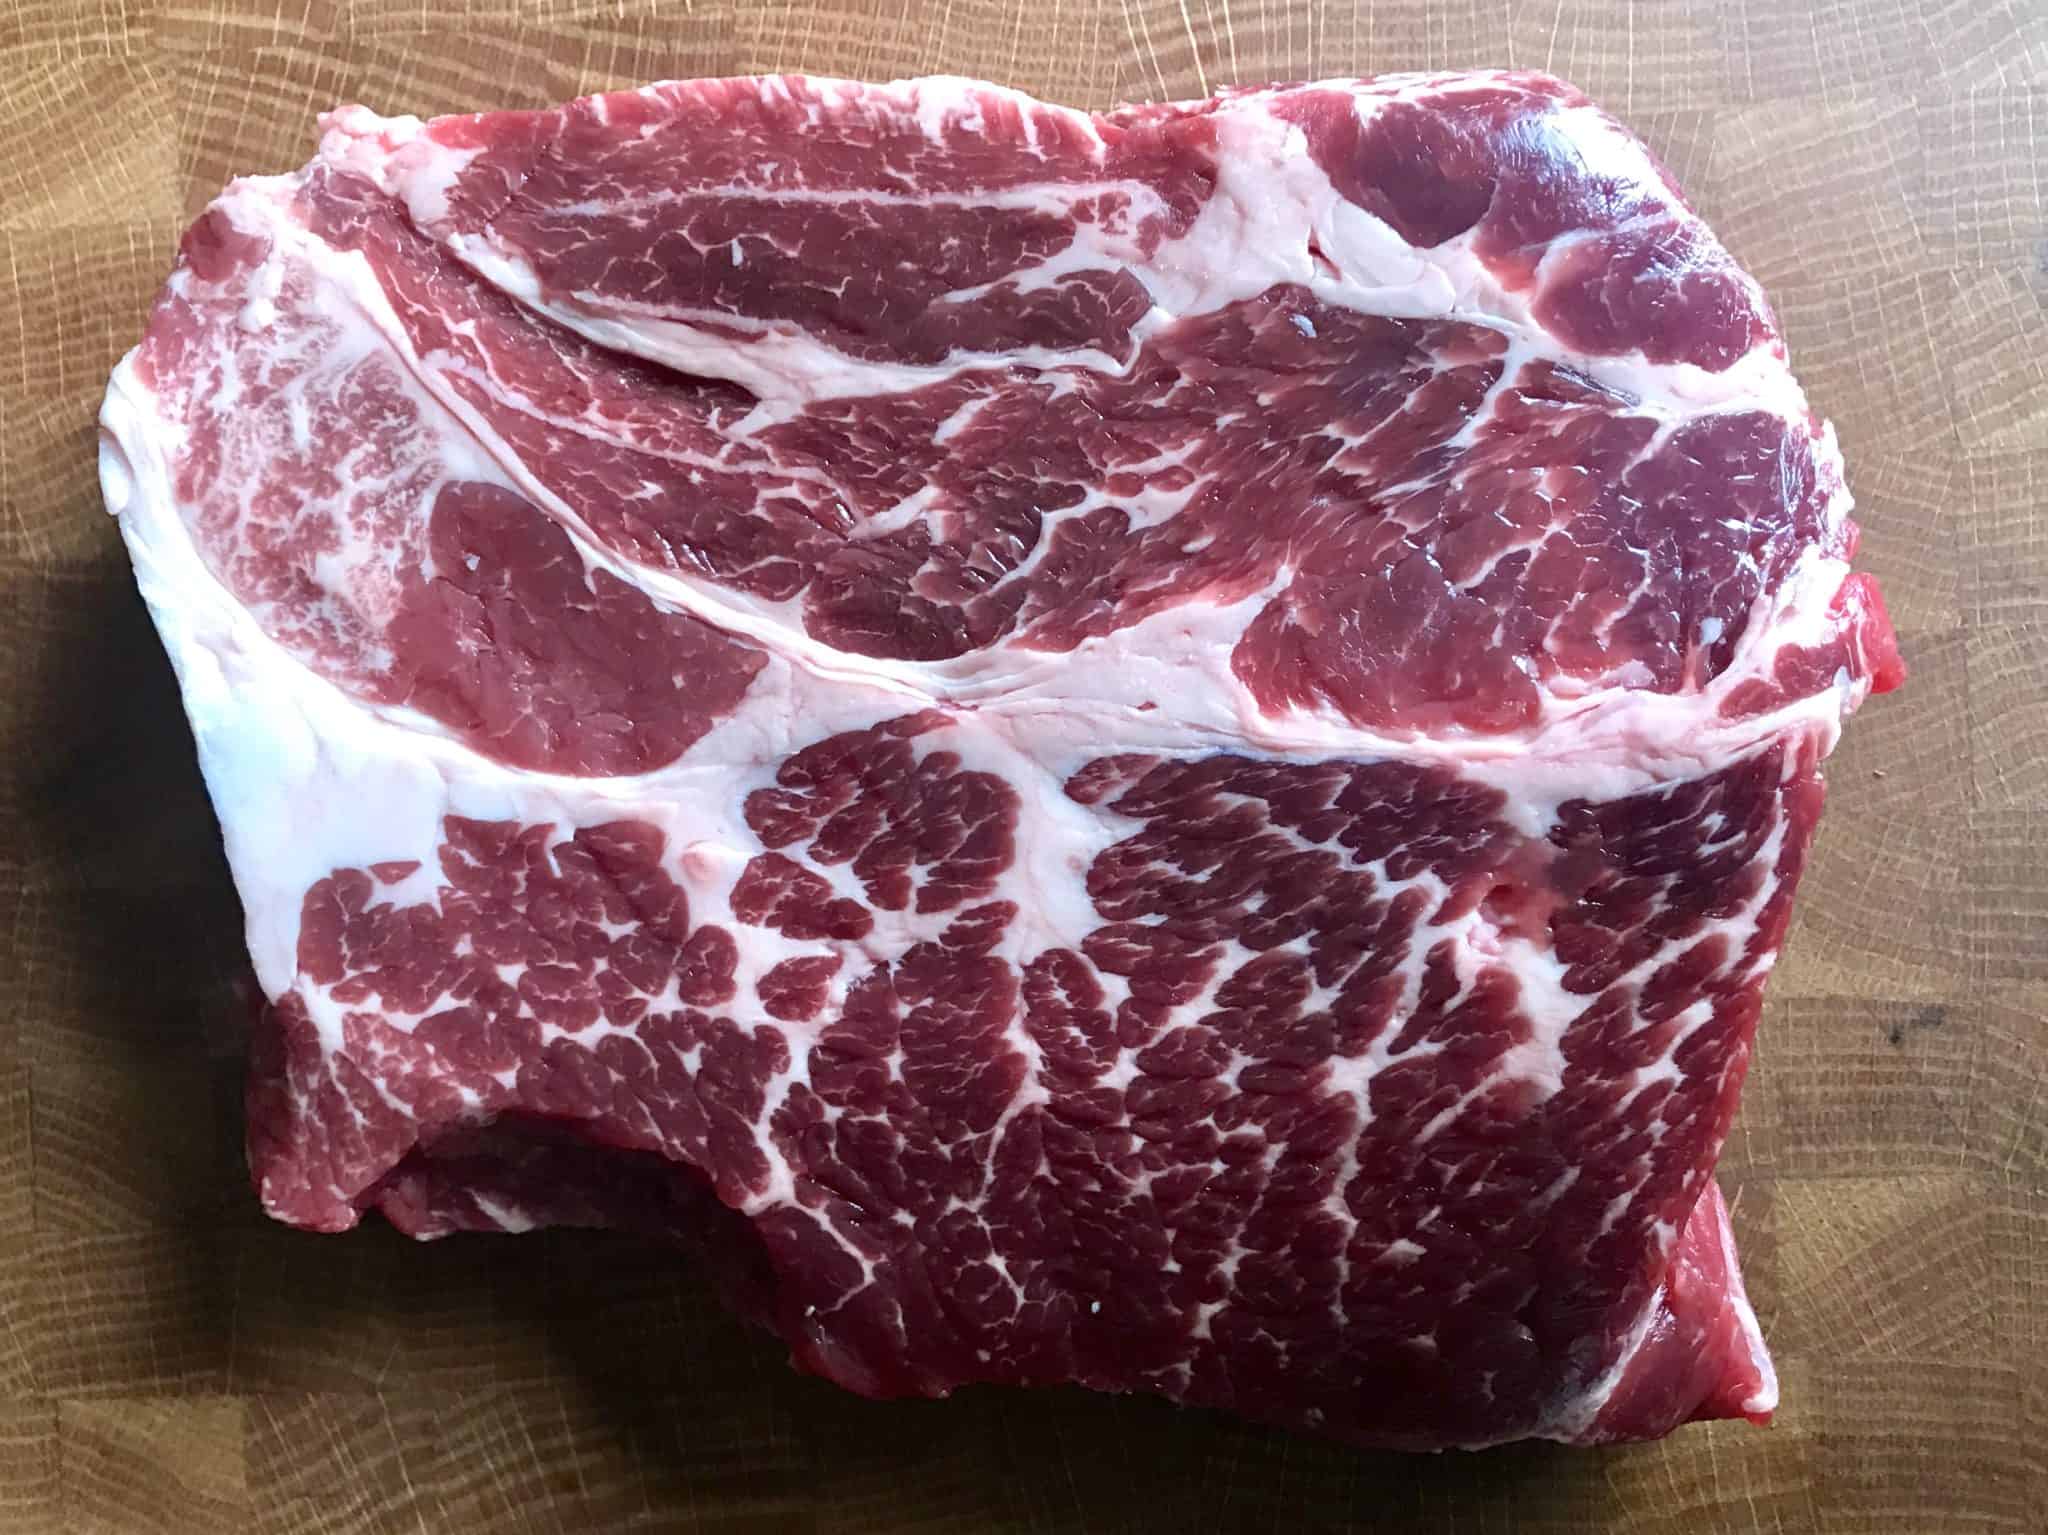 Next comes the star of the show, the meat! For burgers, we want to make sure that we have some good fat content and the default choice for us is chuck. This is going to give you somewhere around an 80-20 mix of lean to fat which is perfect for burgers. So you’ll want to take about a 4-5 pound chuck roast and cut it into one inch cubes, which will make it easier for your grinder.
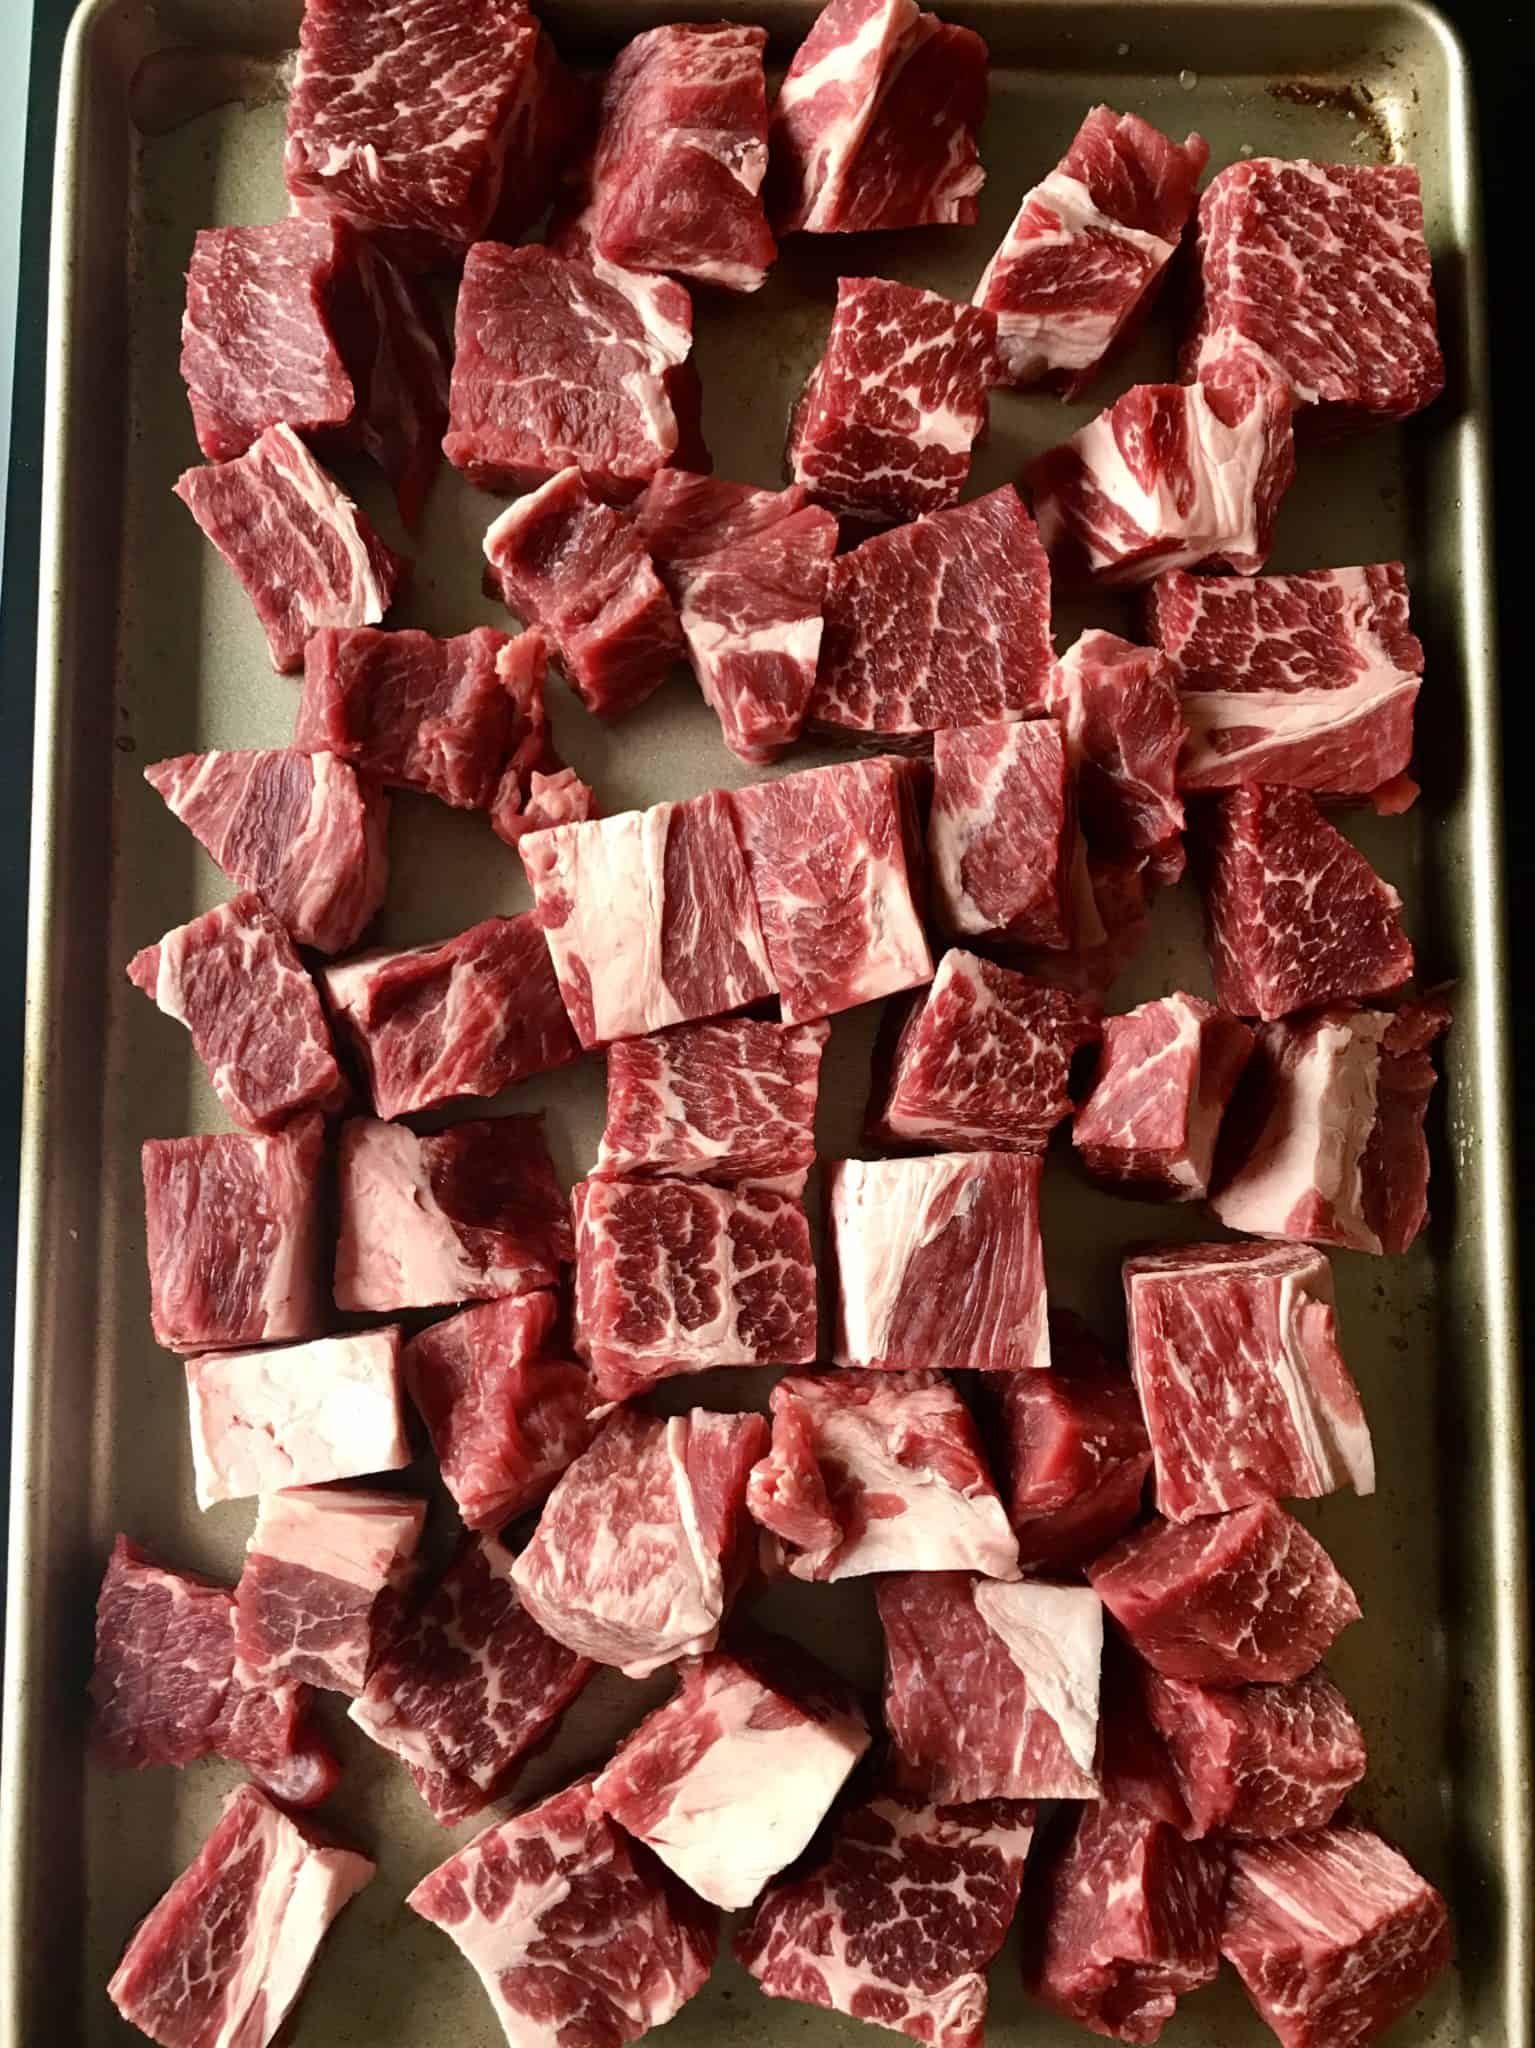 You’ll want to place these cubes on a baking sheet and pop these into the freezer for 15-30 minutes. You don’t want them to freeze solid but instead just firm up.
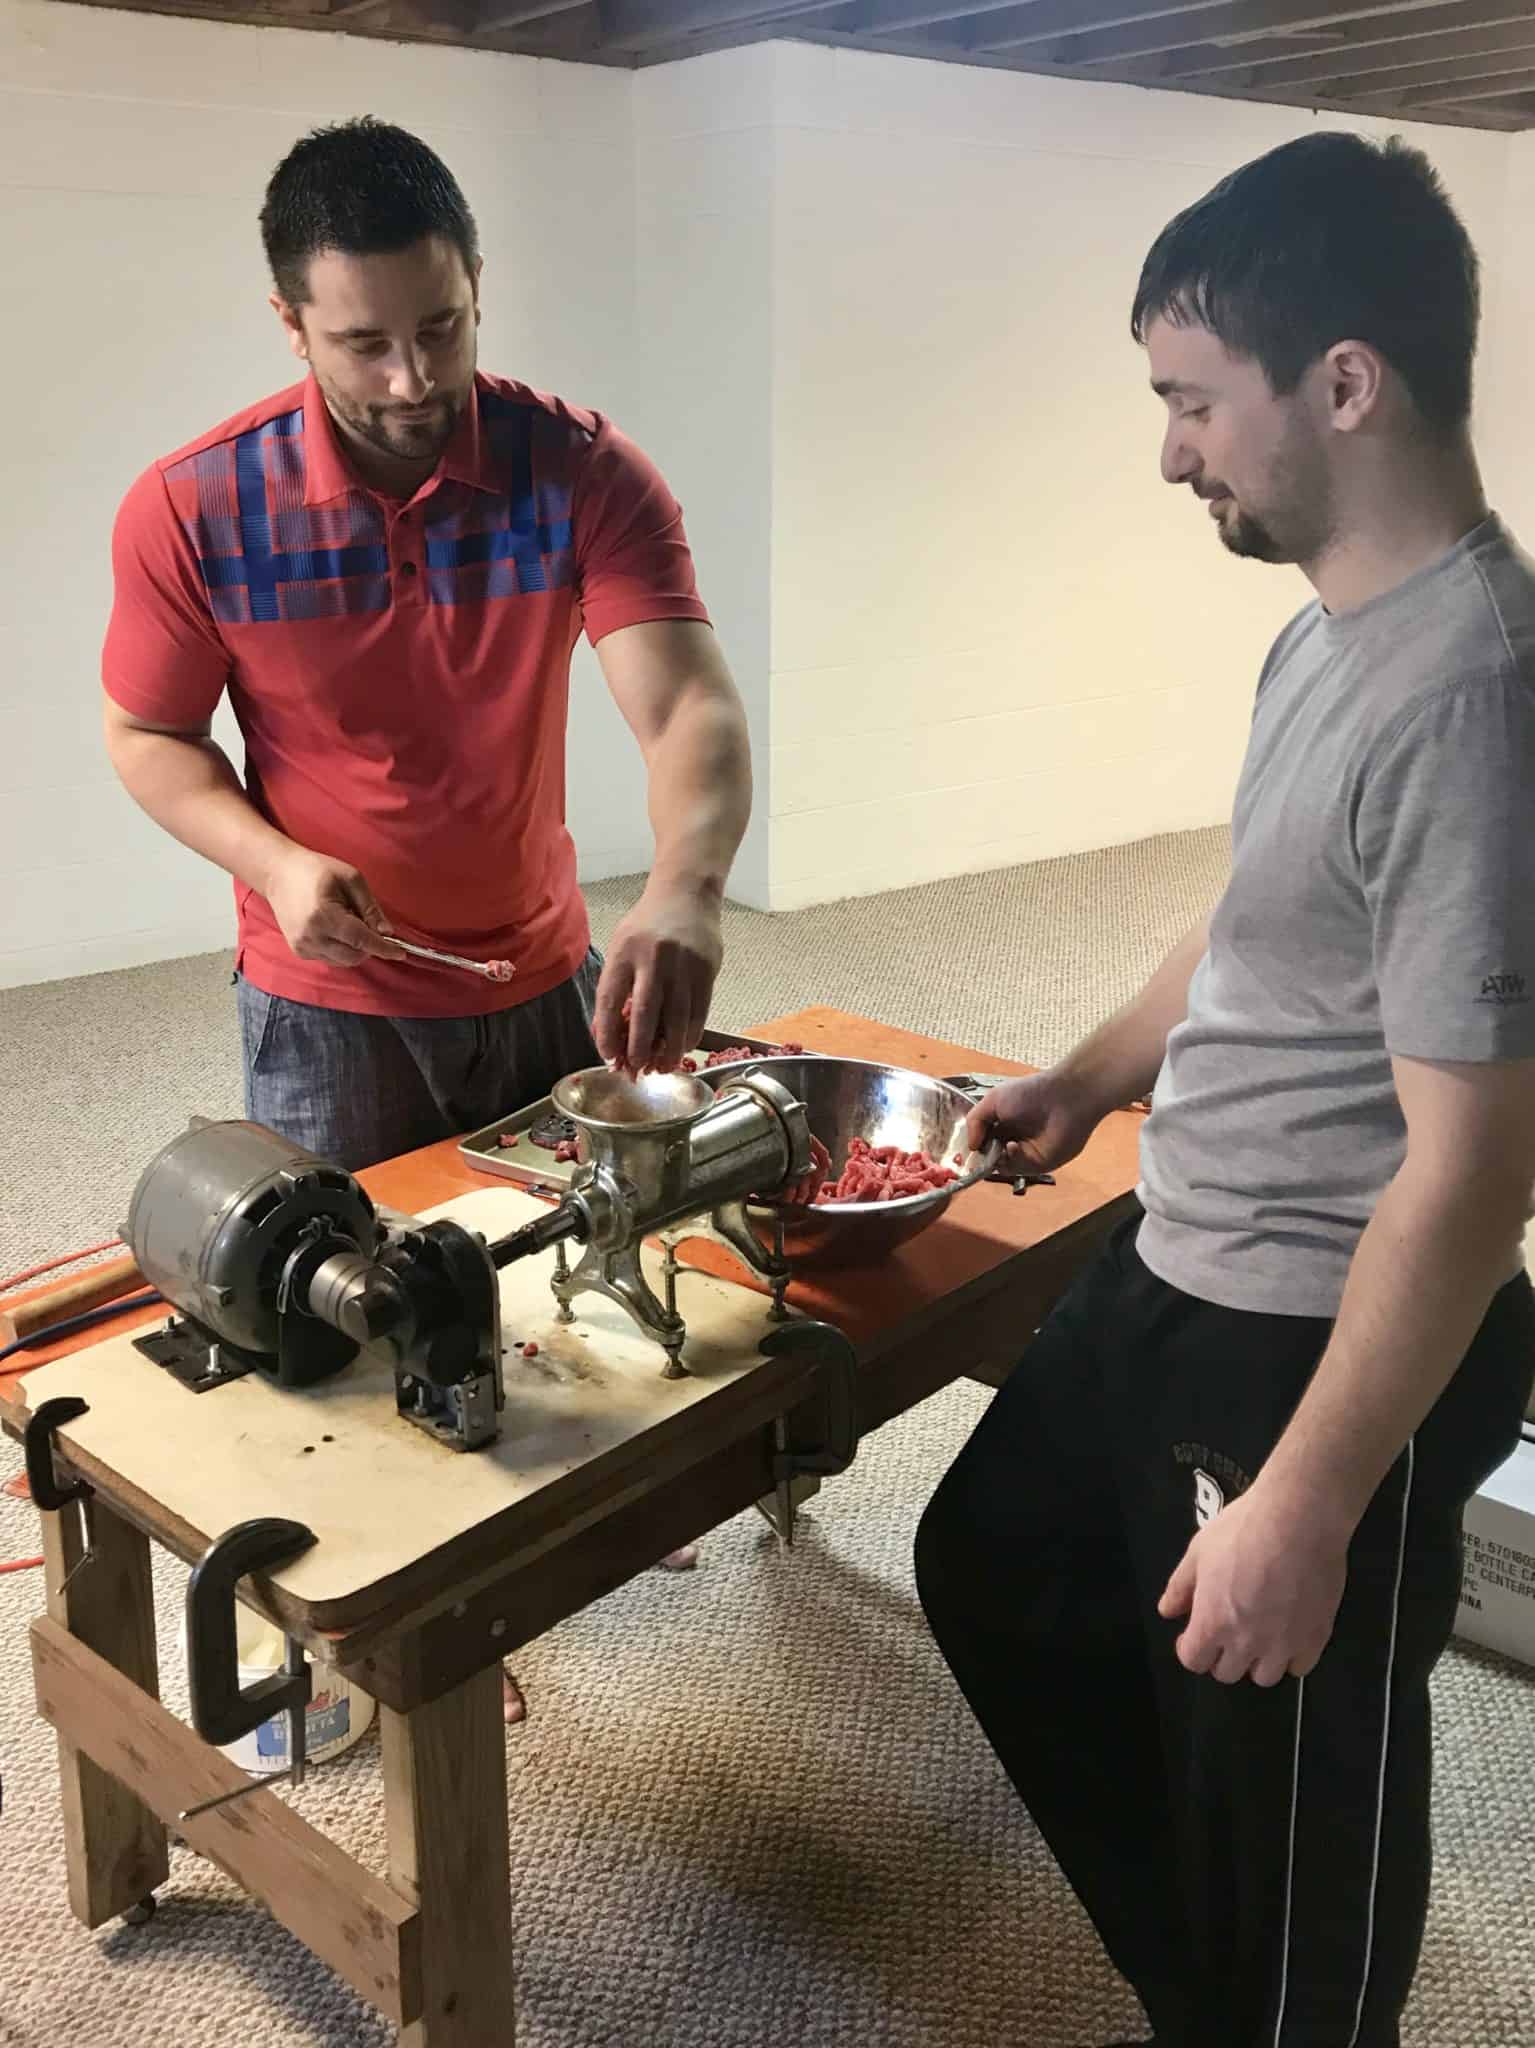 Once you’re ready to grind, you’ll want to assemble the grinder of your choice with your ½ inch die (the part with the holes) attached. At this point, it’s as easy as popping those little meat cubes into your grinder and have them come out as meat spaghetti on the other side.
 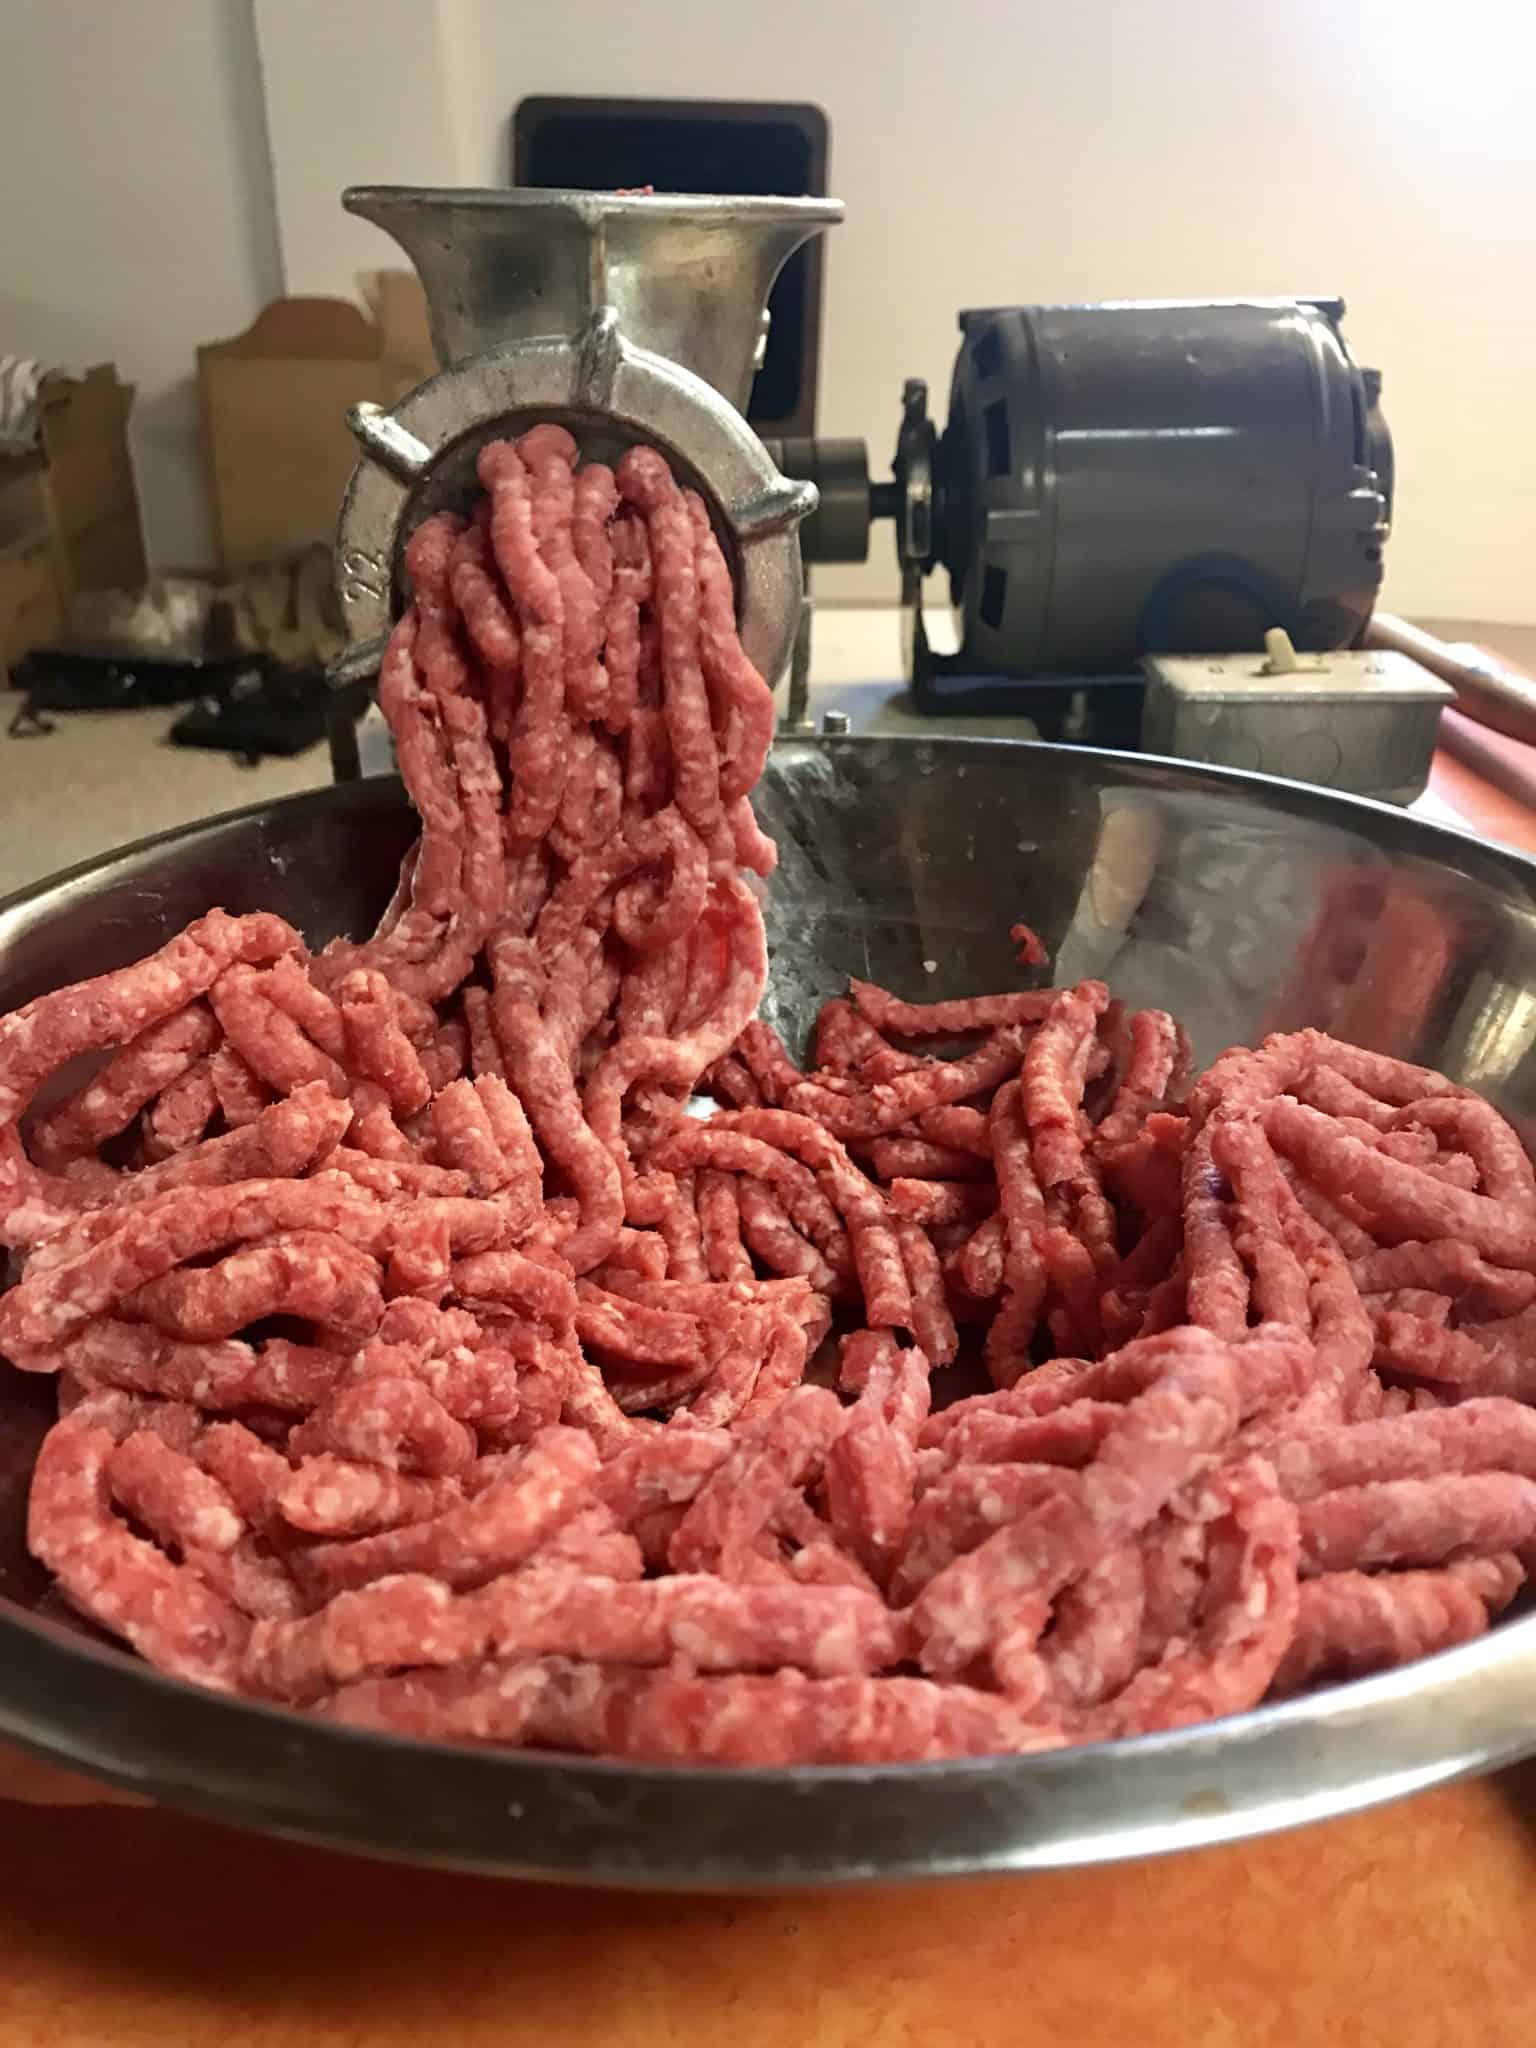 Once you’ve ground up all your meat we like to grind it a second time, this time using your ¼ inch die. This makes for a more uniform and malleable final product without being too rough on your grinder going straight from cubes to ¼ inch.
Congratulations! You have freshly ground beef! Now’s the part where we add eggs, breadcrumbs, spices and Worcestershire sauce right? WRONG! It’s totally unnecessary and can lead you to overwork your meat, leading to a less juicy burger.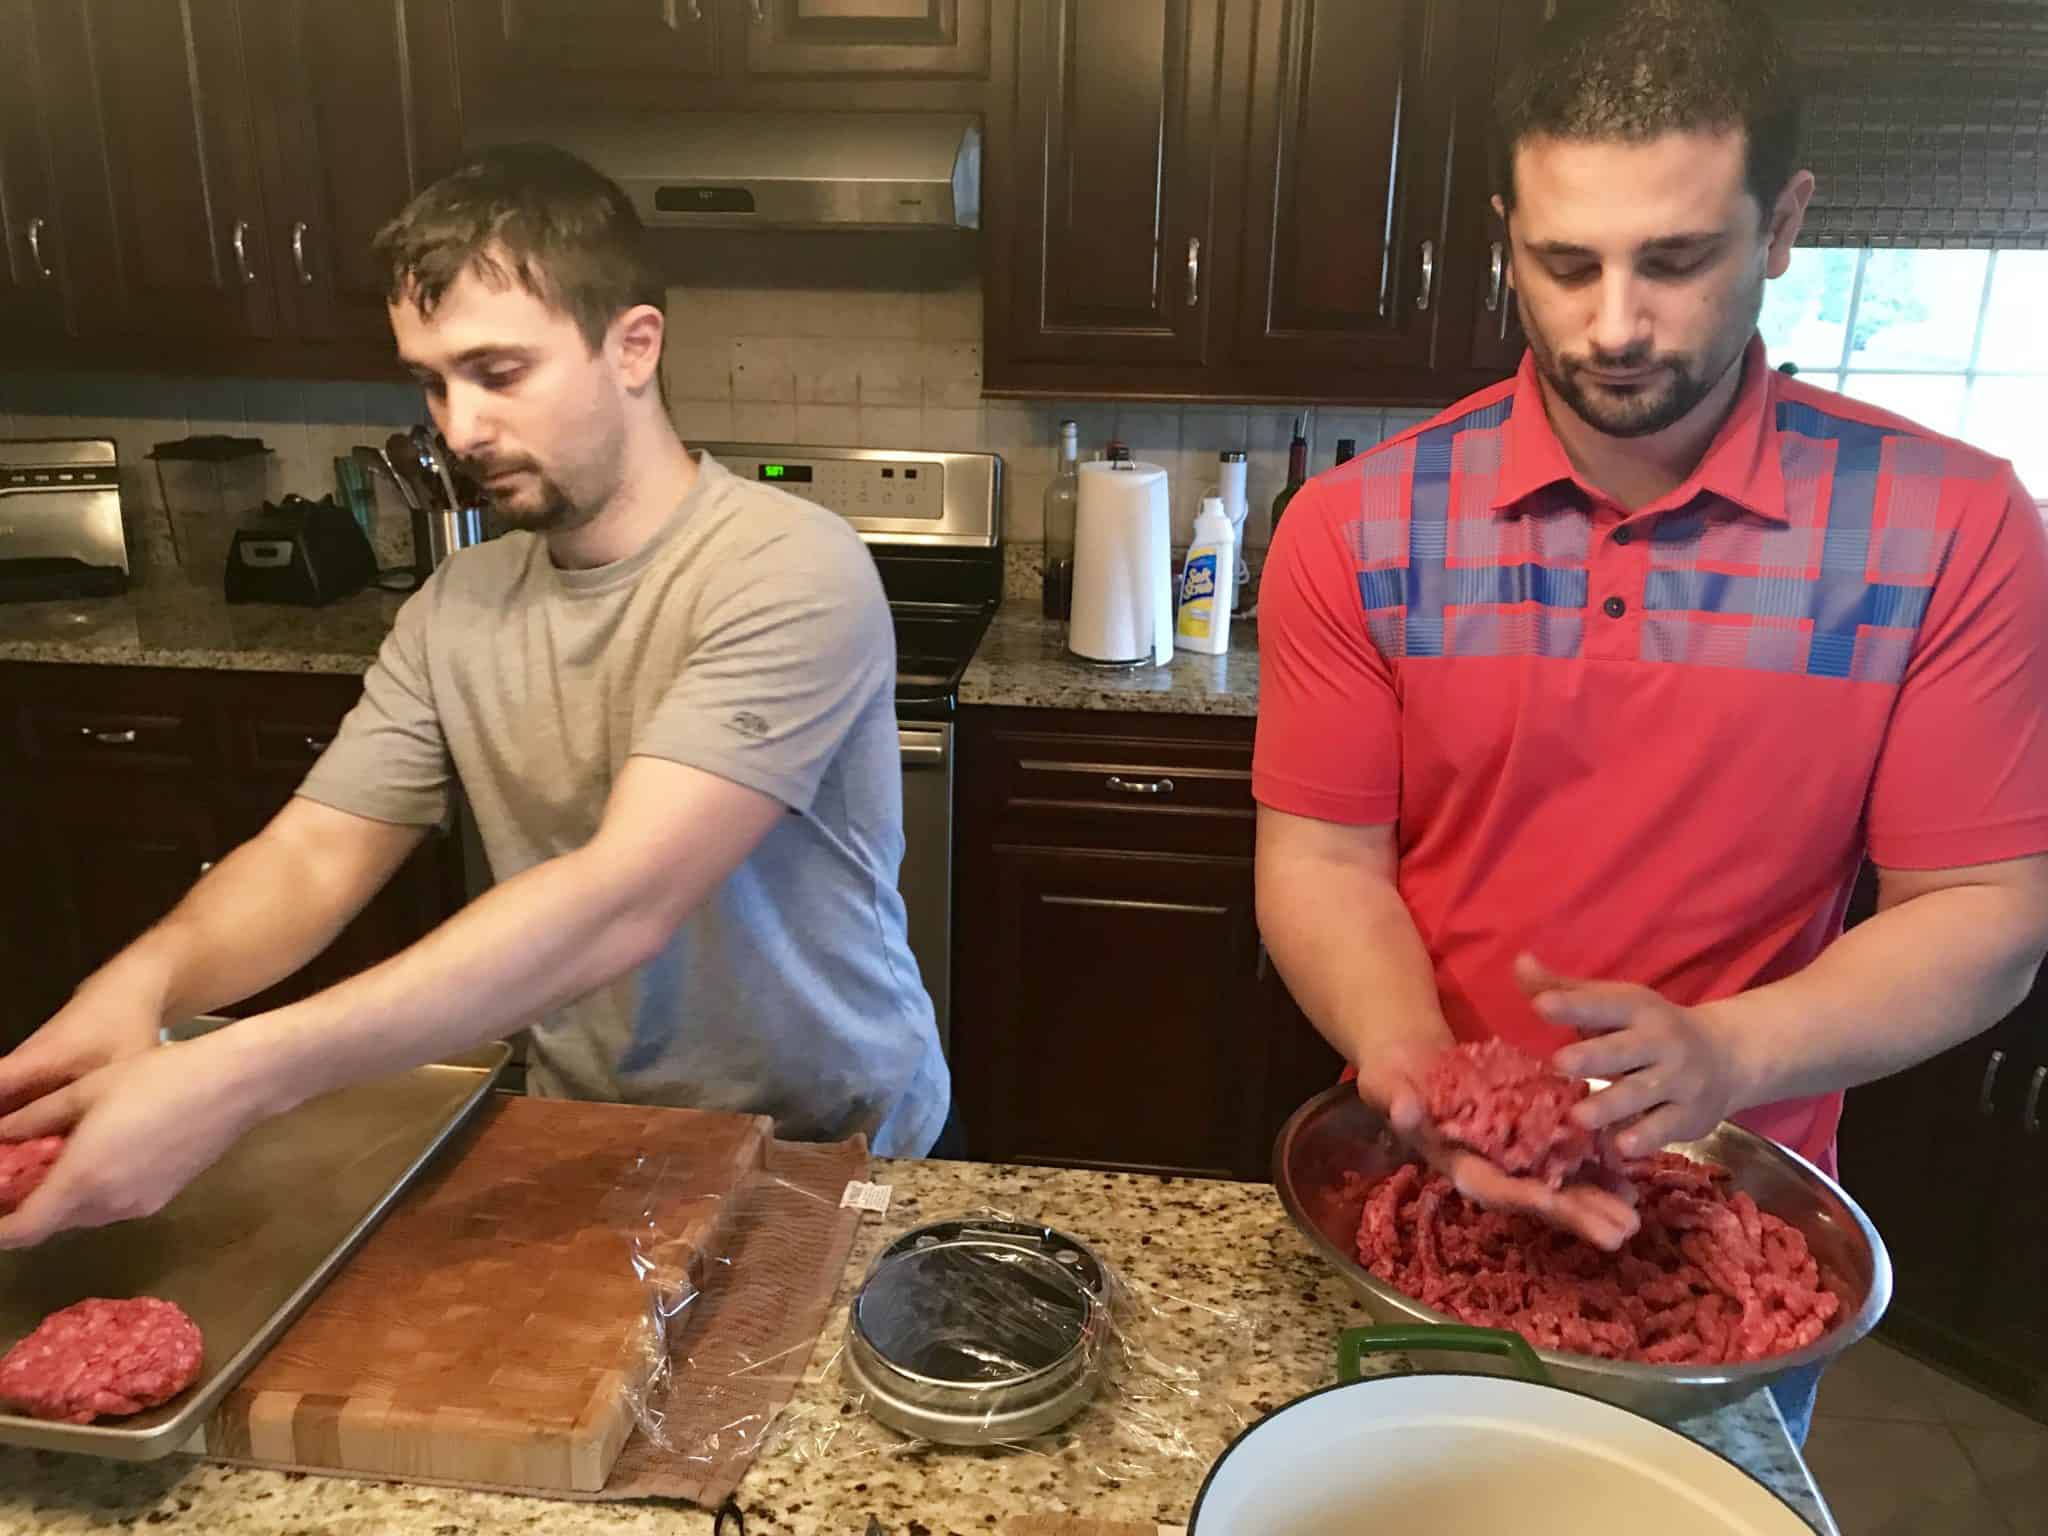 Instead of all those fancy add ins, all we’re going to do is take 6 oz of meat, loosely pack them into patties and lightly season them with salt and pepper. You want to work the meat as little as possible, so they retain their shape and juiciness.
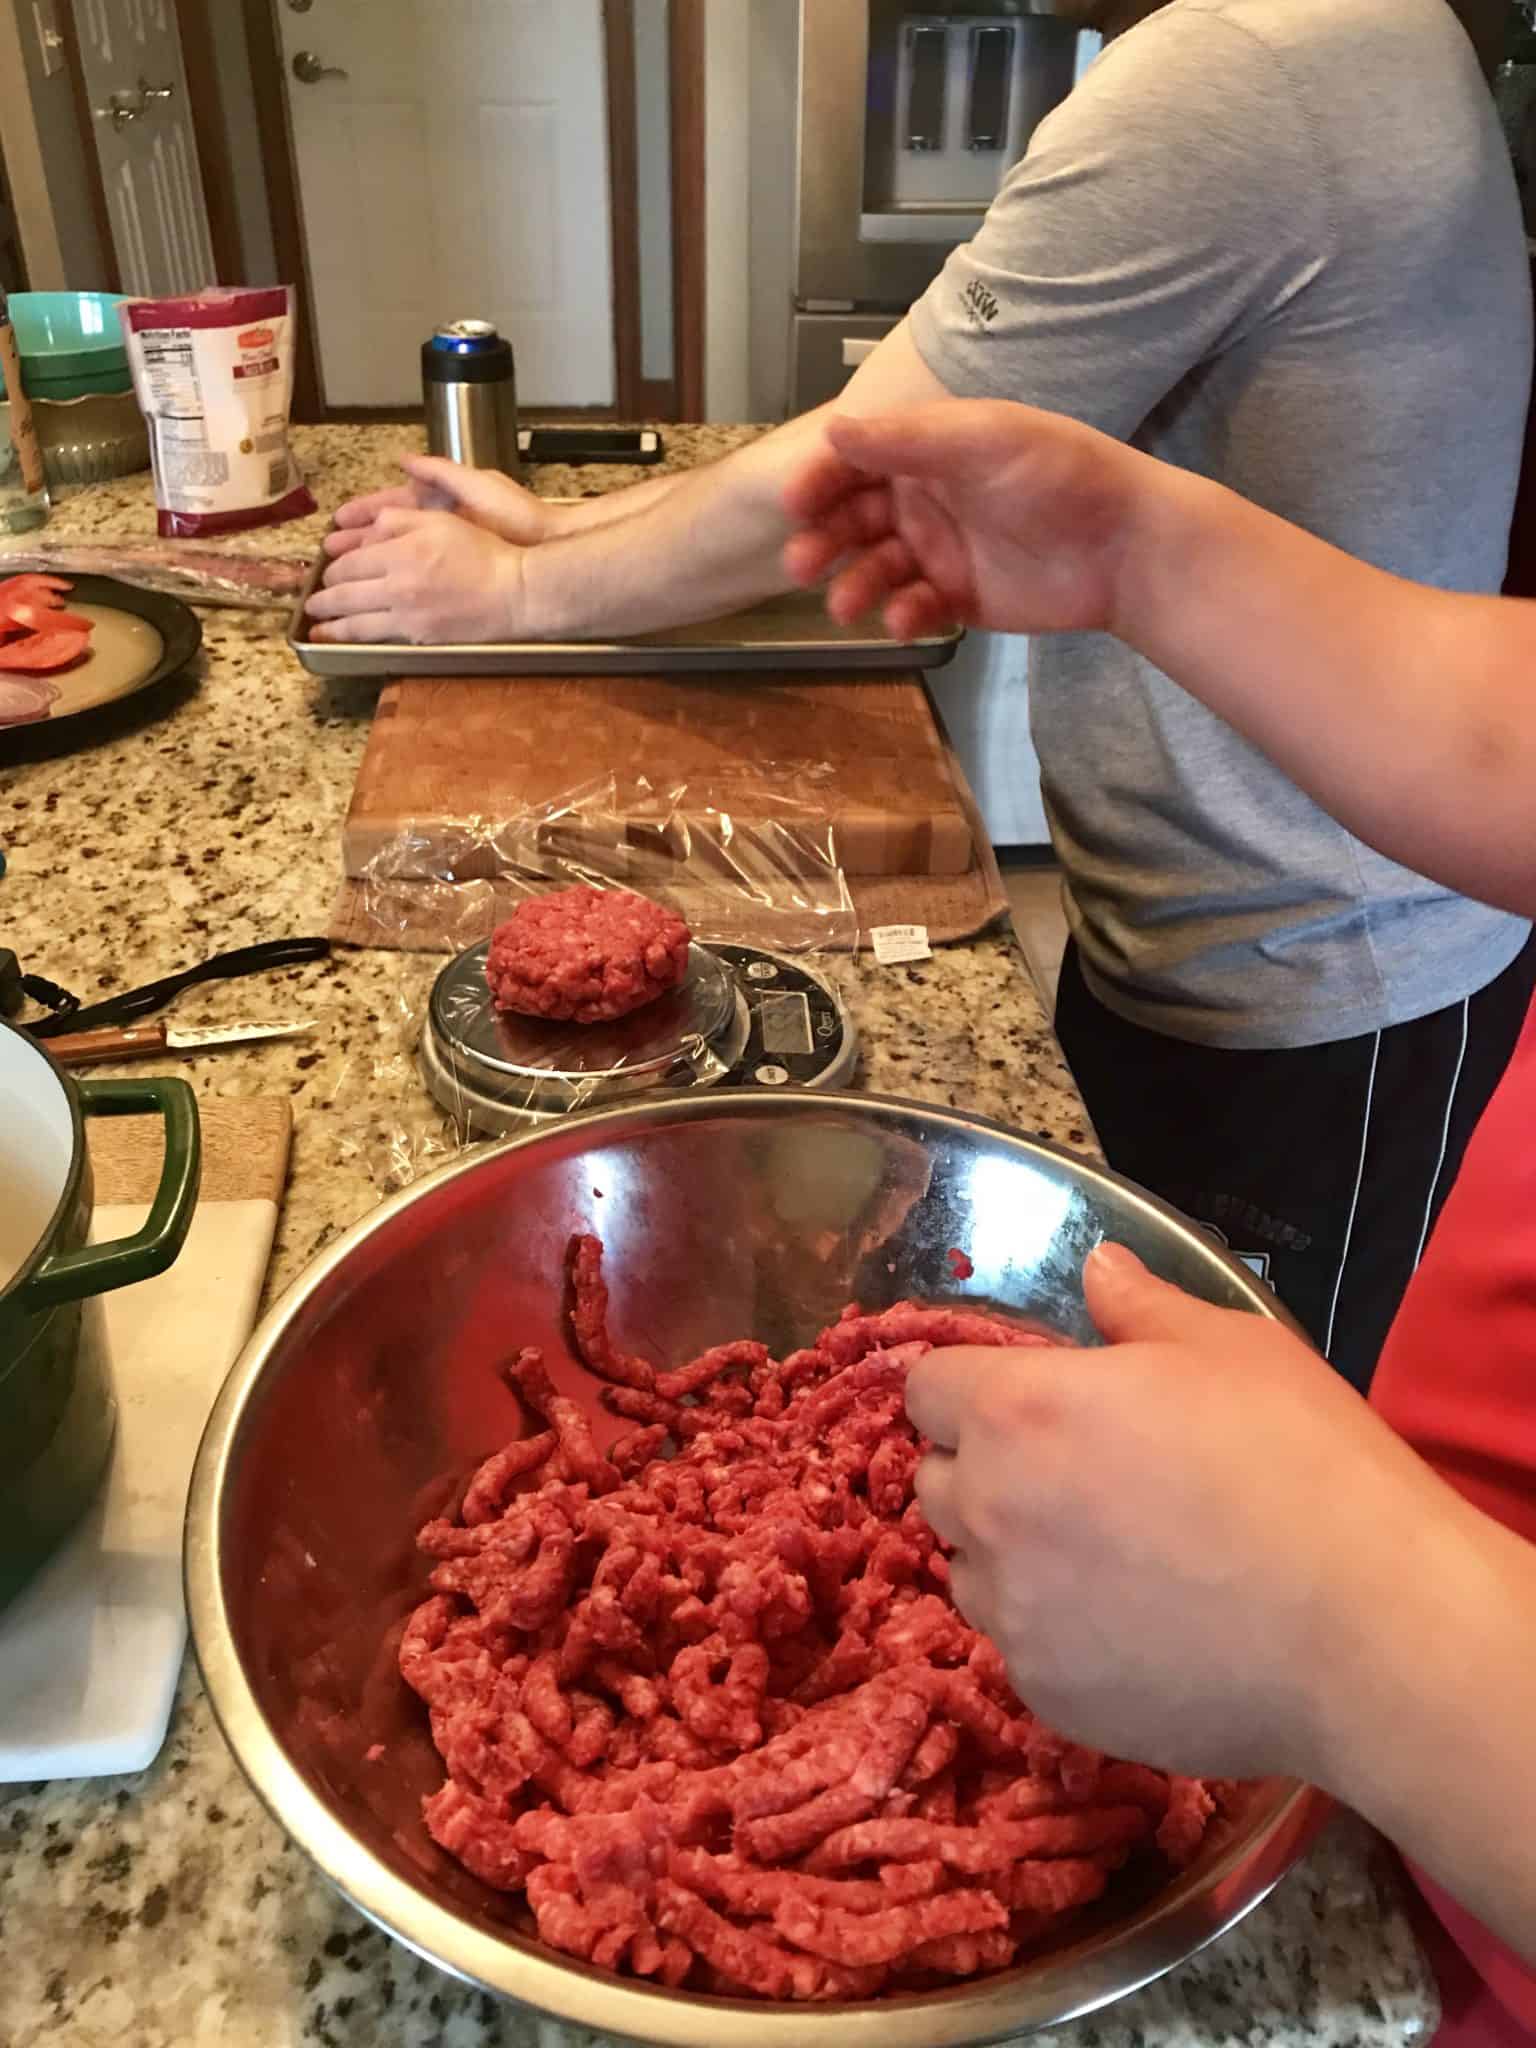 We recommend using a cheap kitchen scale
 to measure out your 6 oz patties. This ensures that you are making uniform sized burgers.
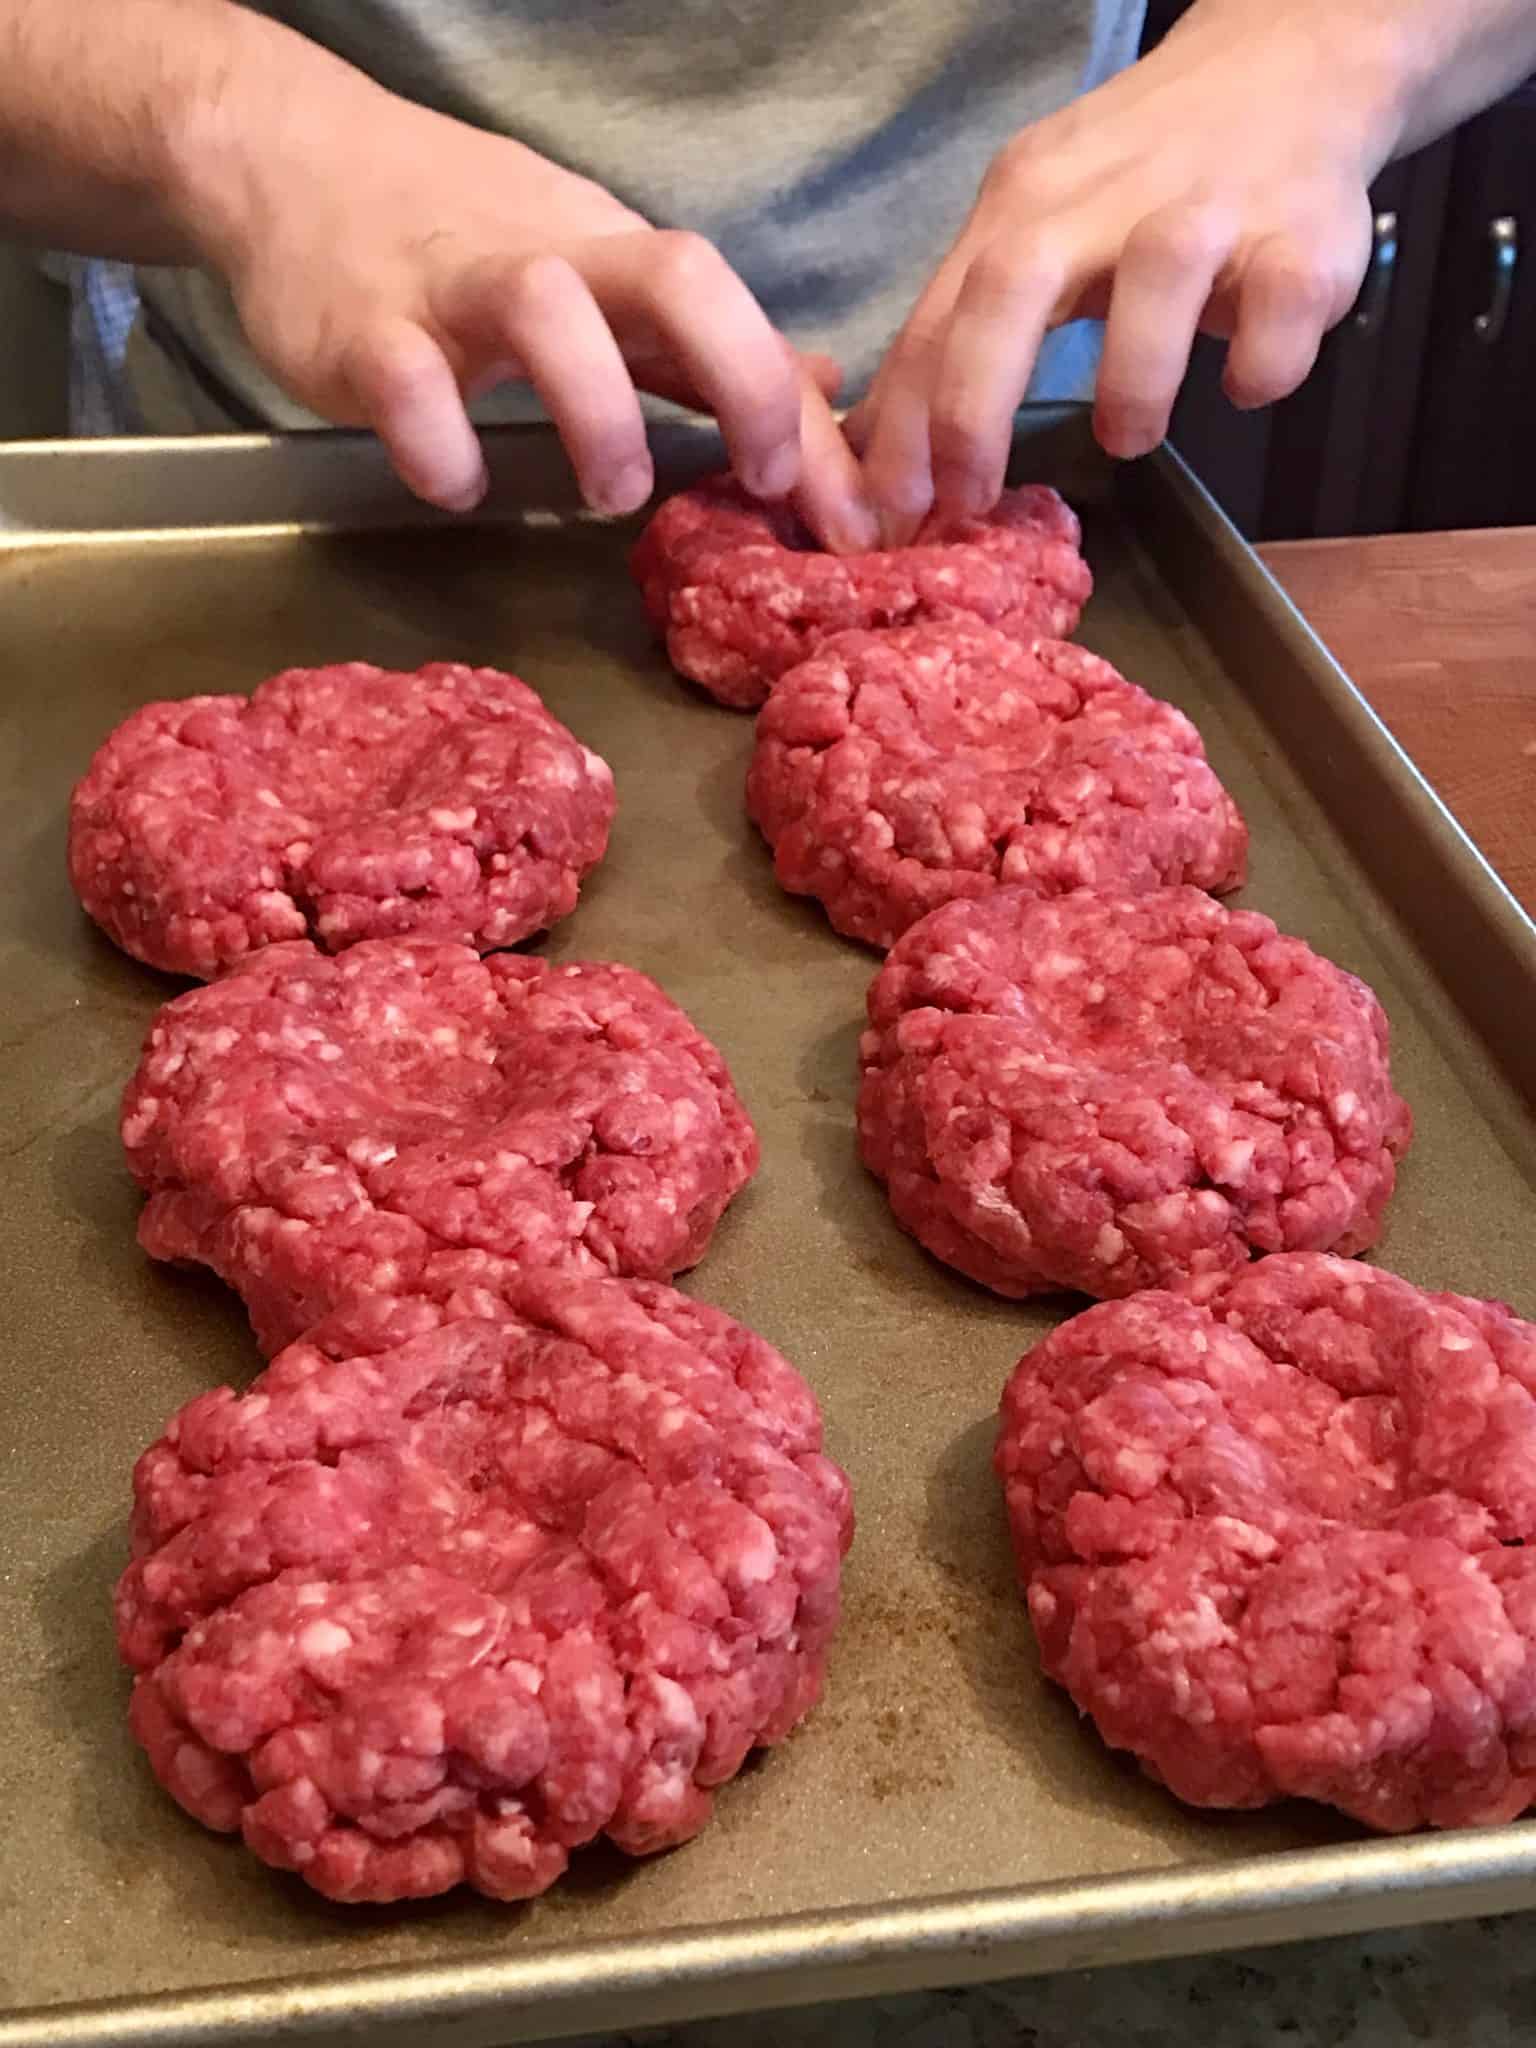 The last thing you’ll do is make a thumb sized dimple on the top of each patty. This will keep them flatter, so they don’t plump up and become little hockey pucks.
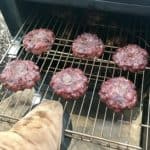
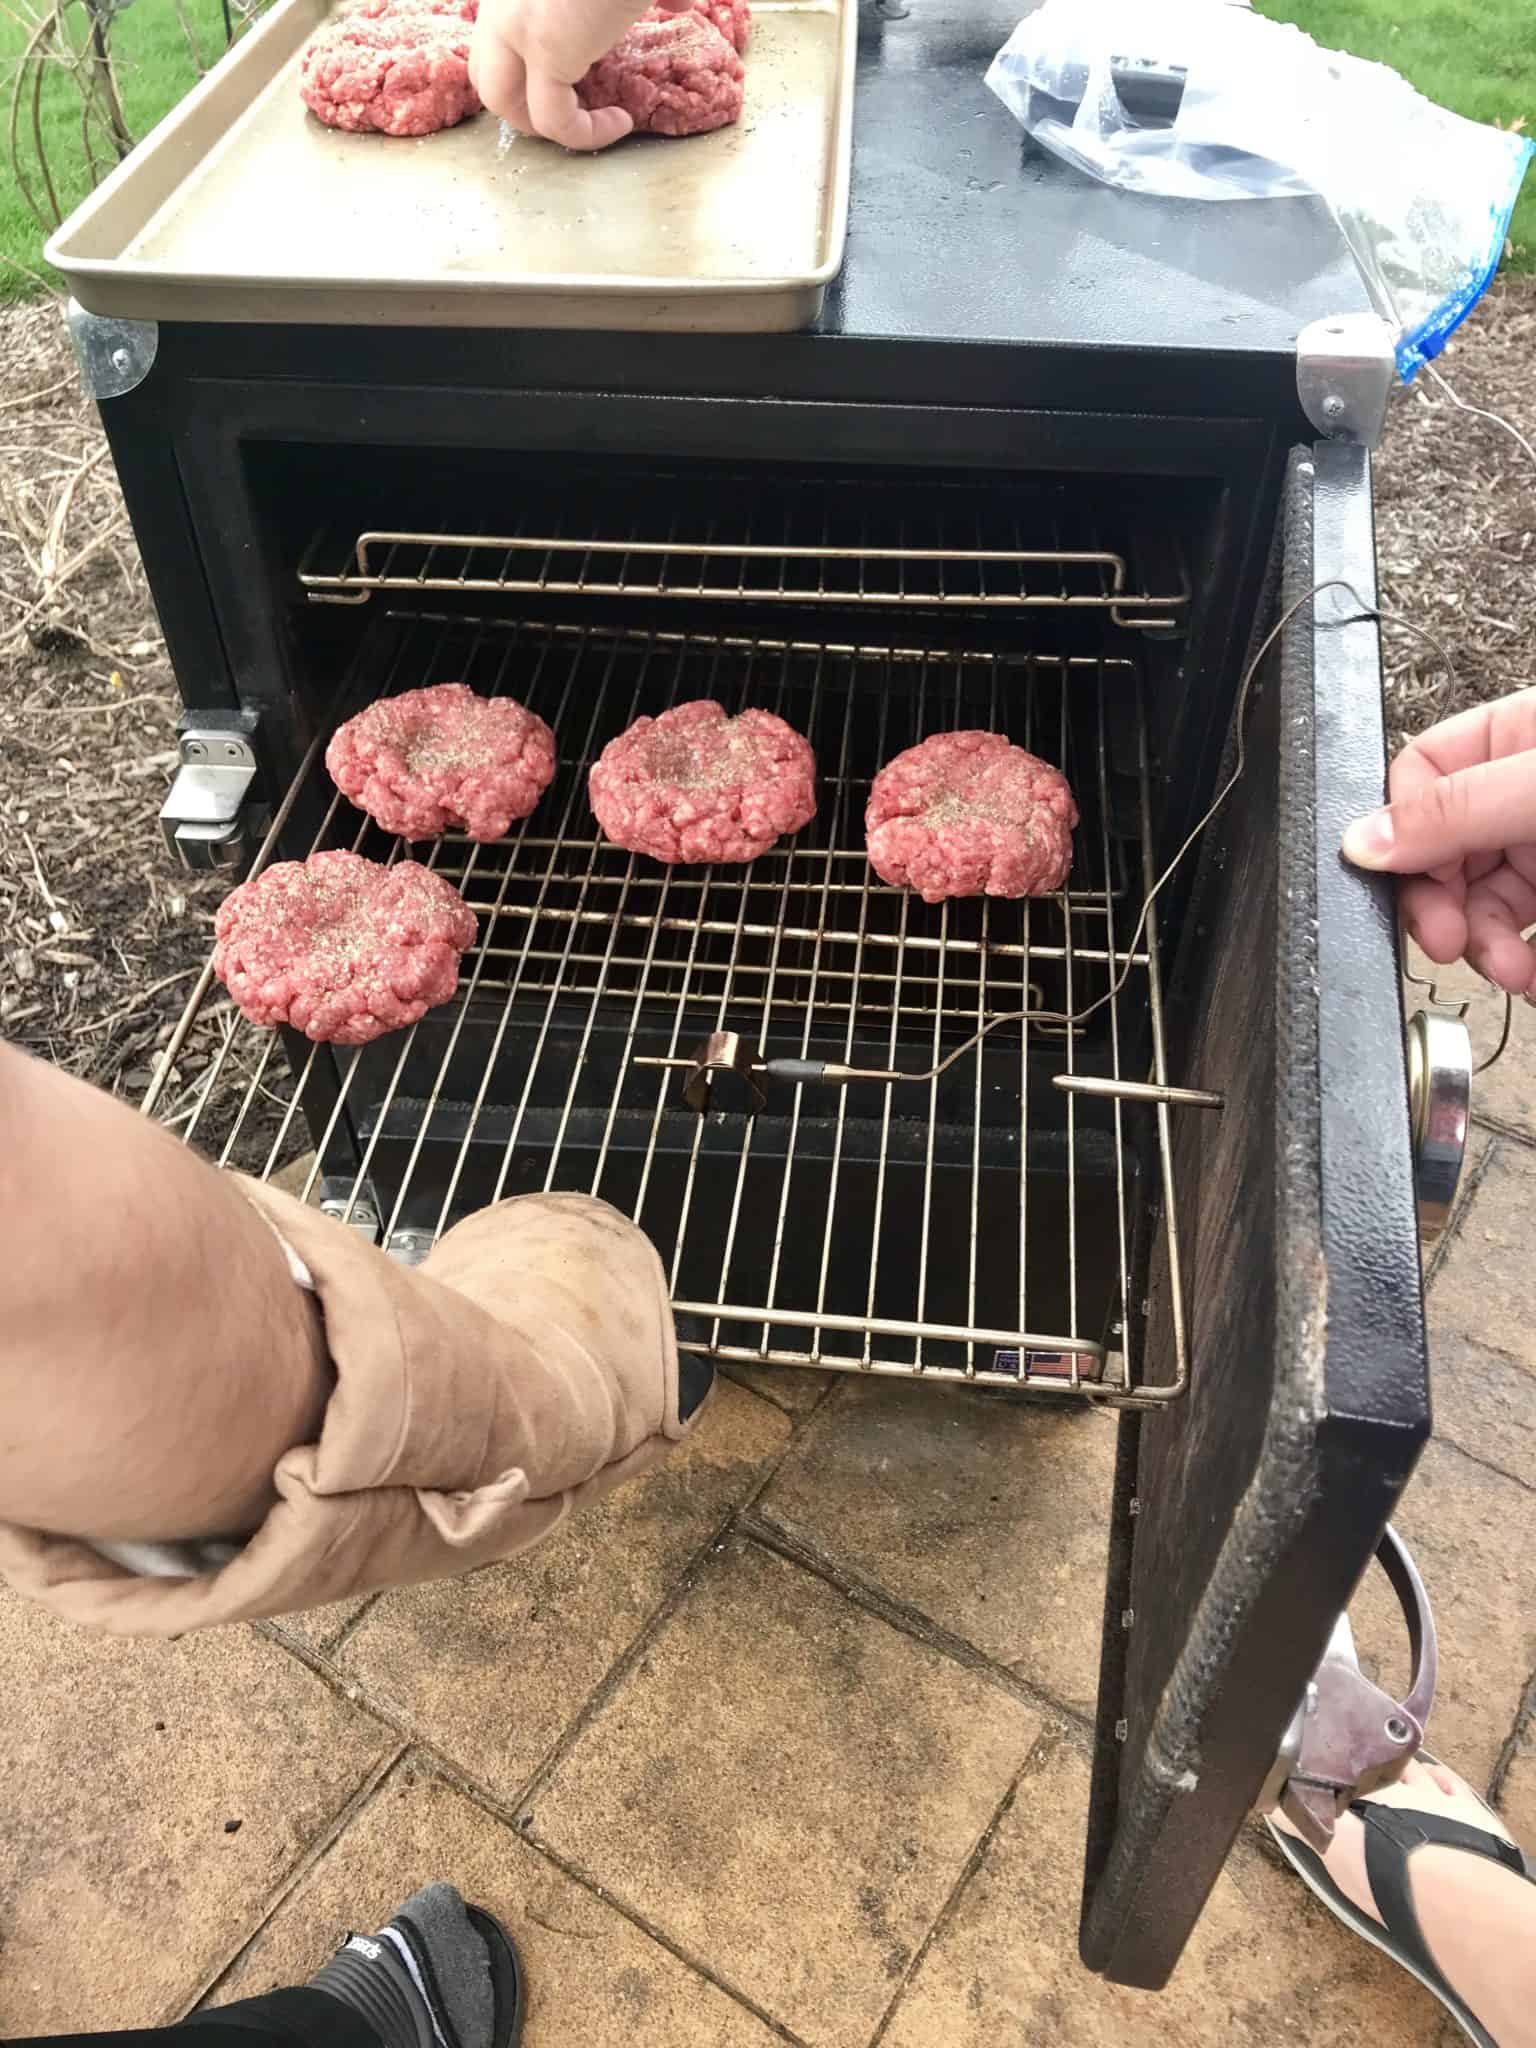 Now all that’s left is smoking our burgers. Just like most of the things we smoke, we’re going to set our smoker to 225-250 degrees. For this smoke we used maple, but just about any wood works well with beef whether that’s a light fruit wood or a heavier hickory or mesquite. For a medium burger, you’ll want to let it get to about 150 degrees internal temp which will take around 1-1 ½hrs.
 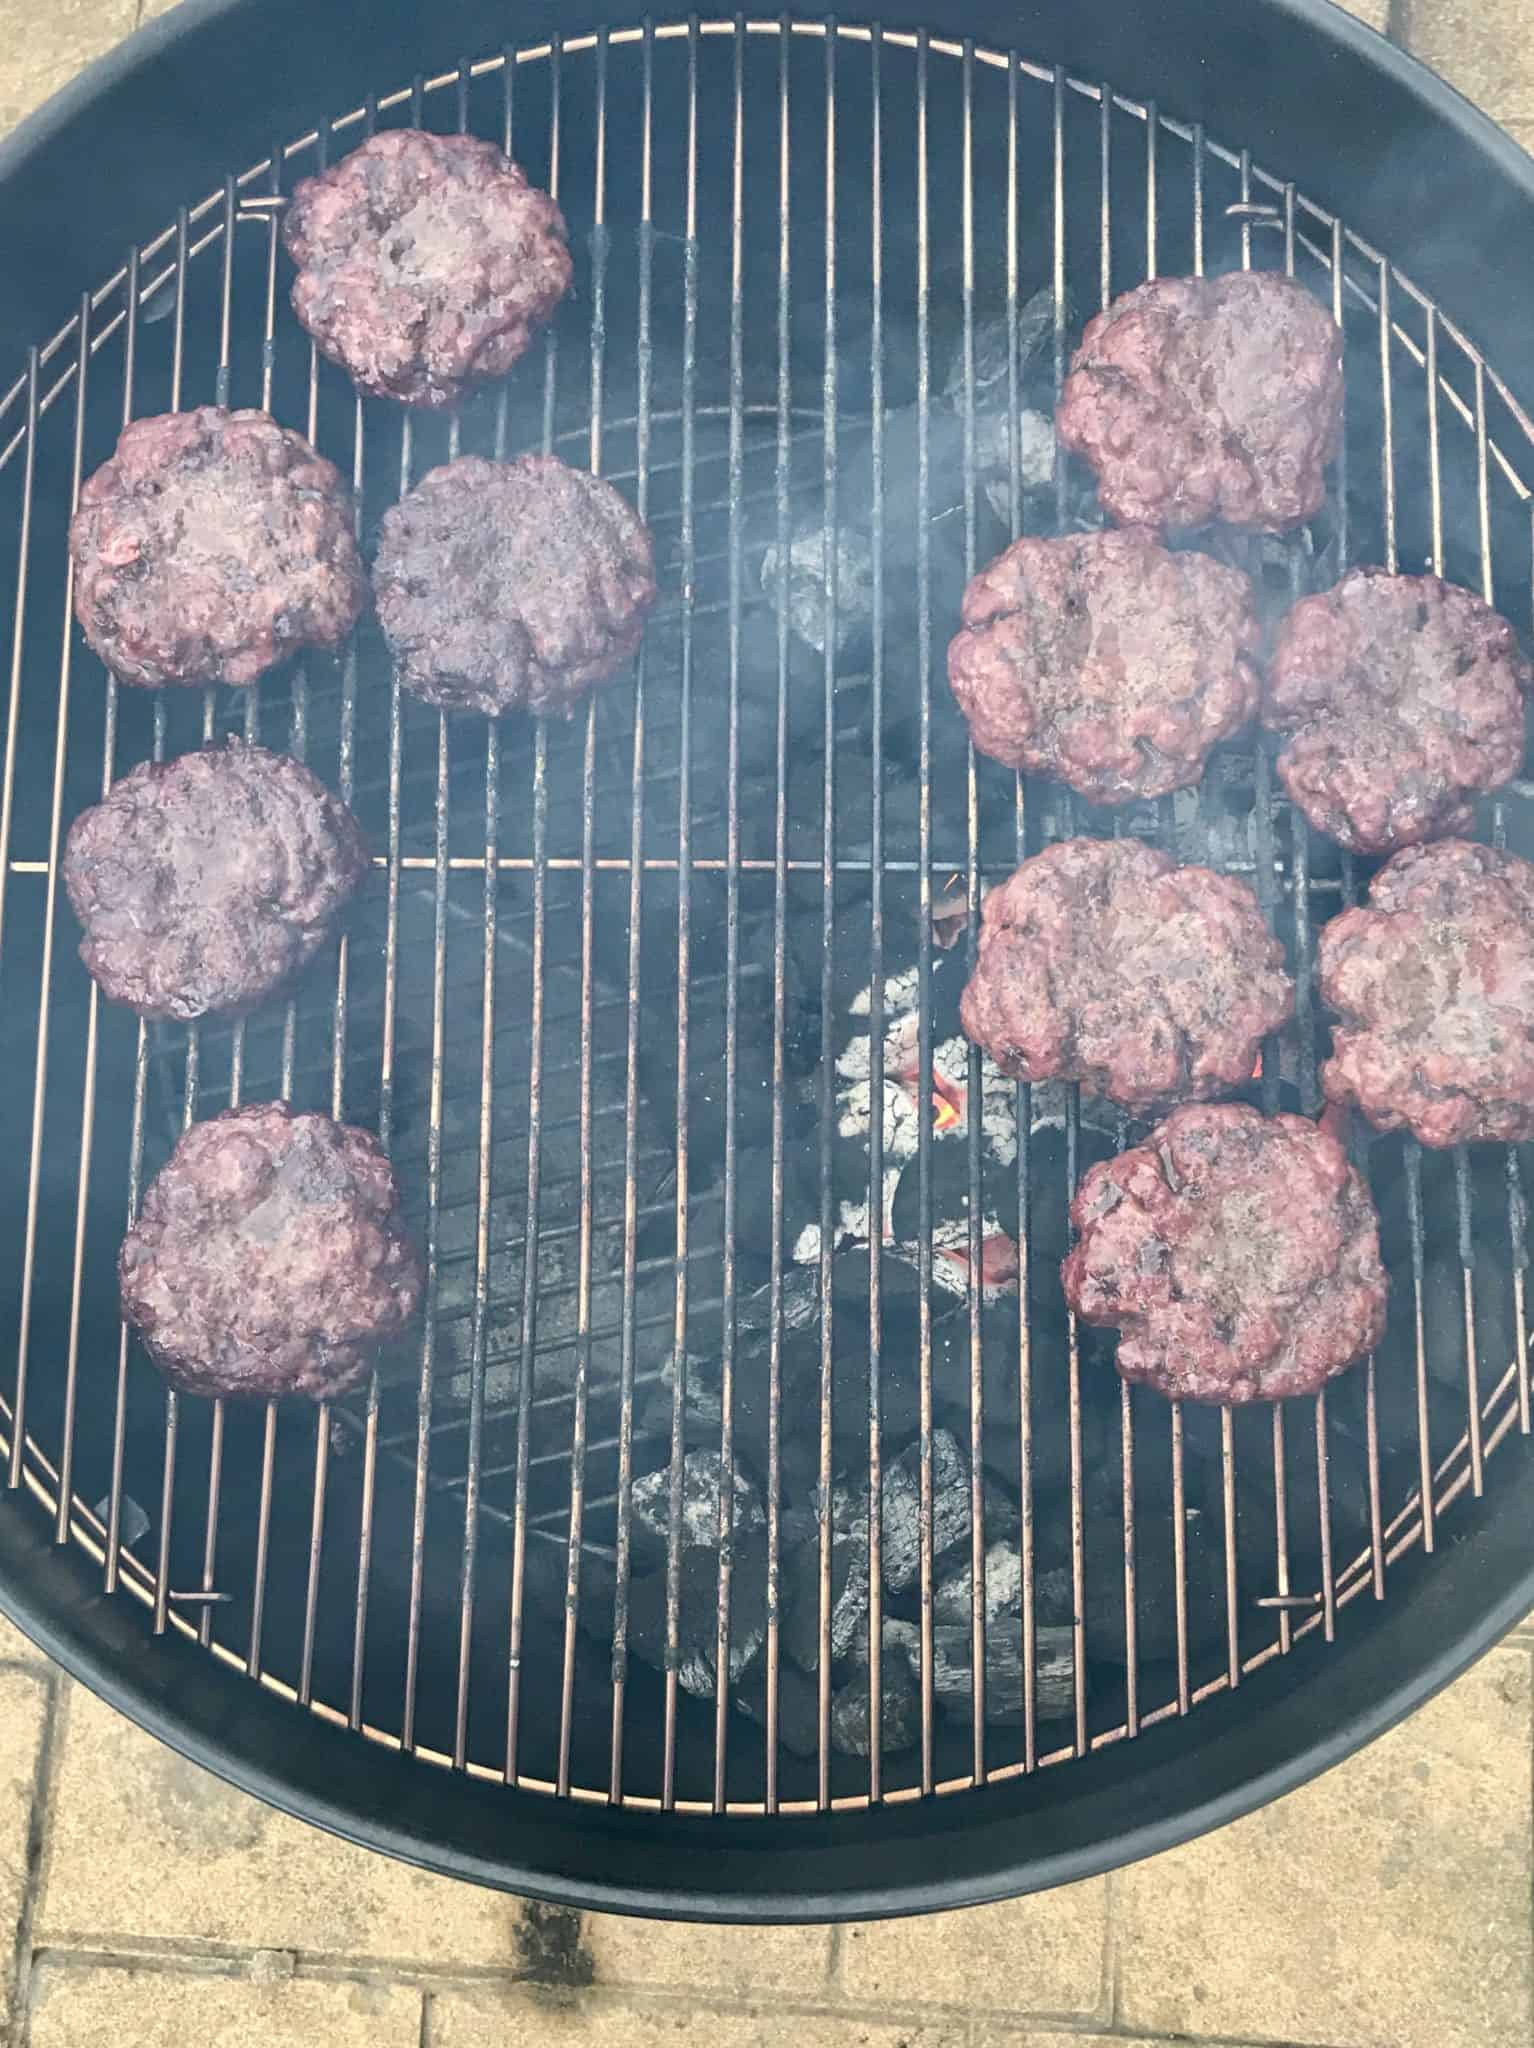 Once the burgers have reached their target temperature, you'll want to sear them over direct heat (either on the smoker or in a hot pan) for about 30 seconds on each side. This will add a nice crunch to the outside of the burgers.
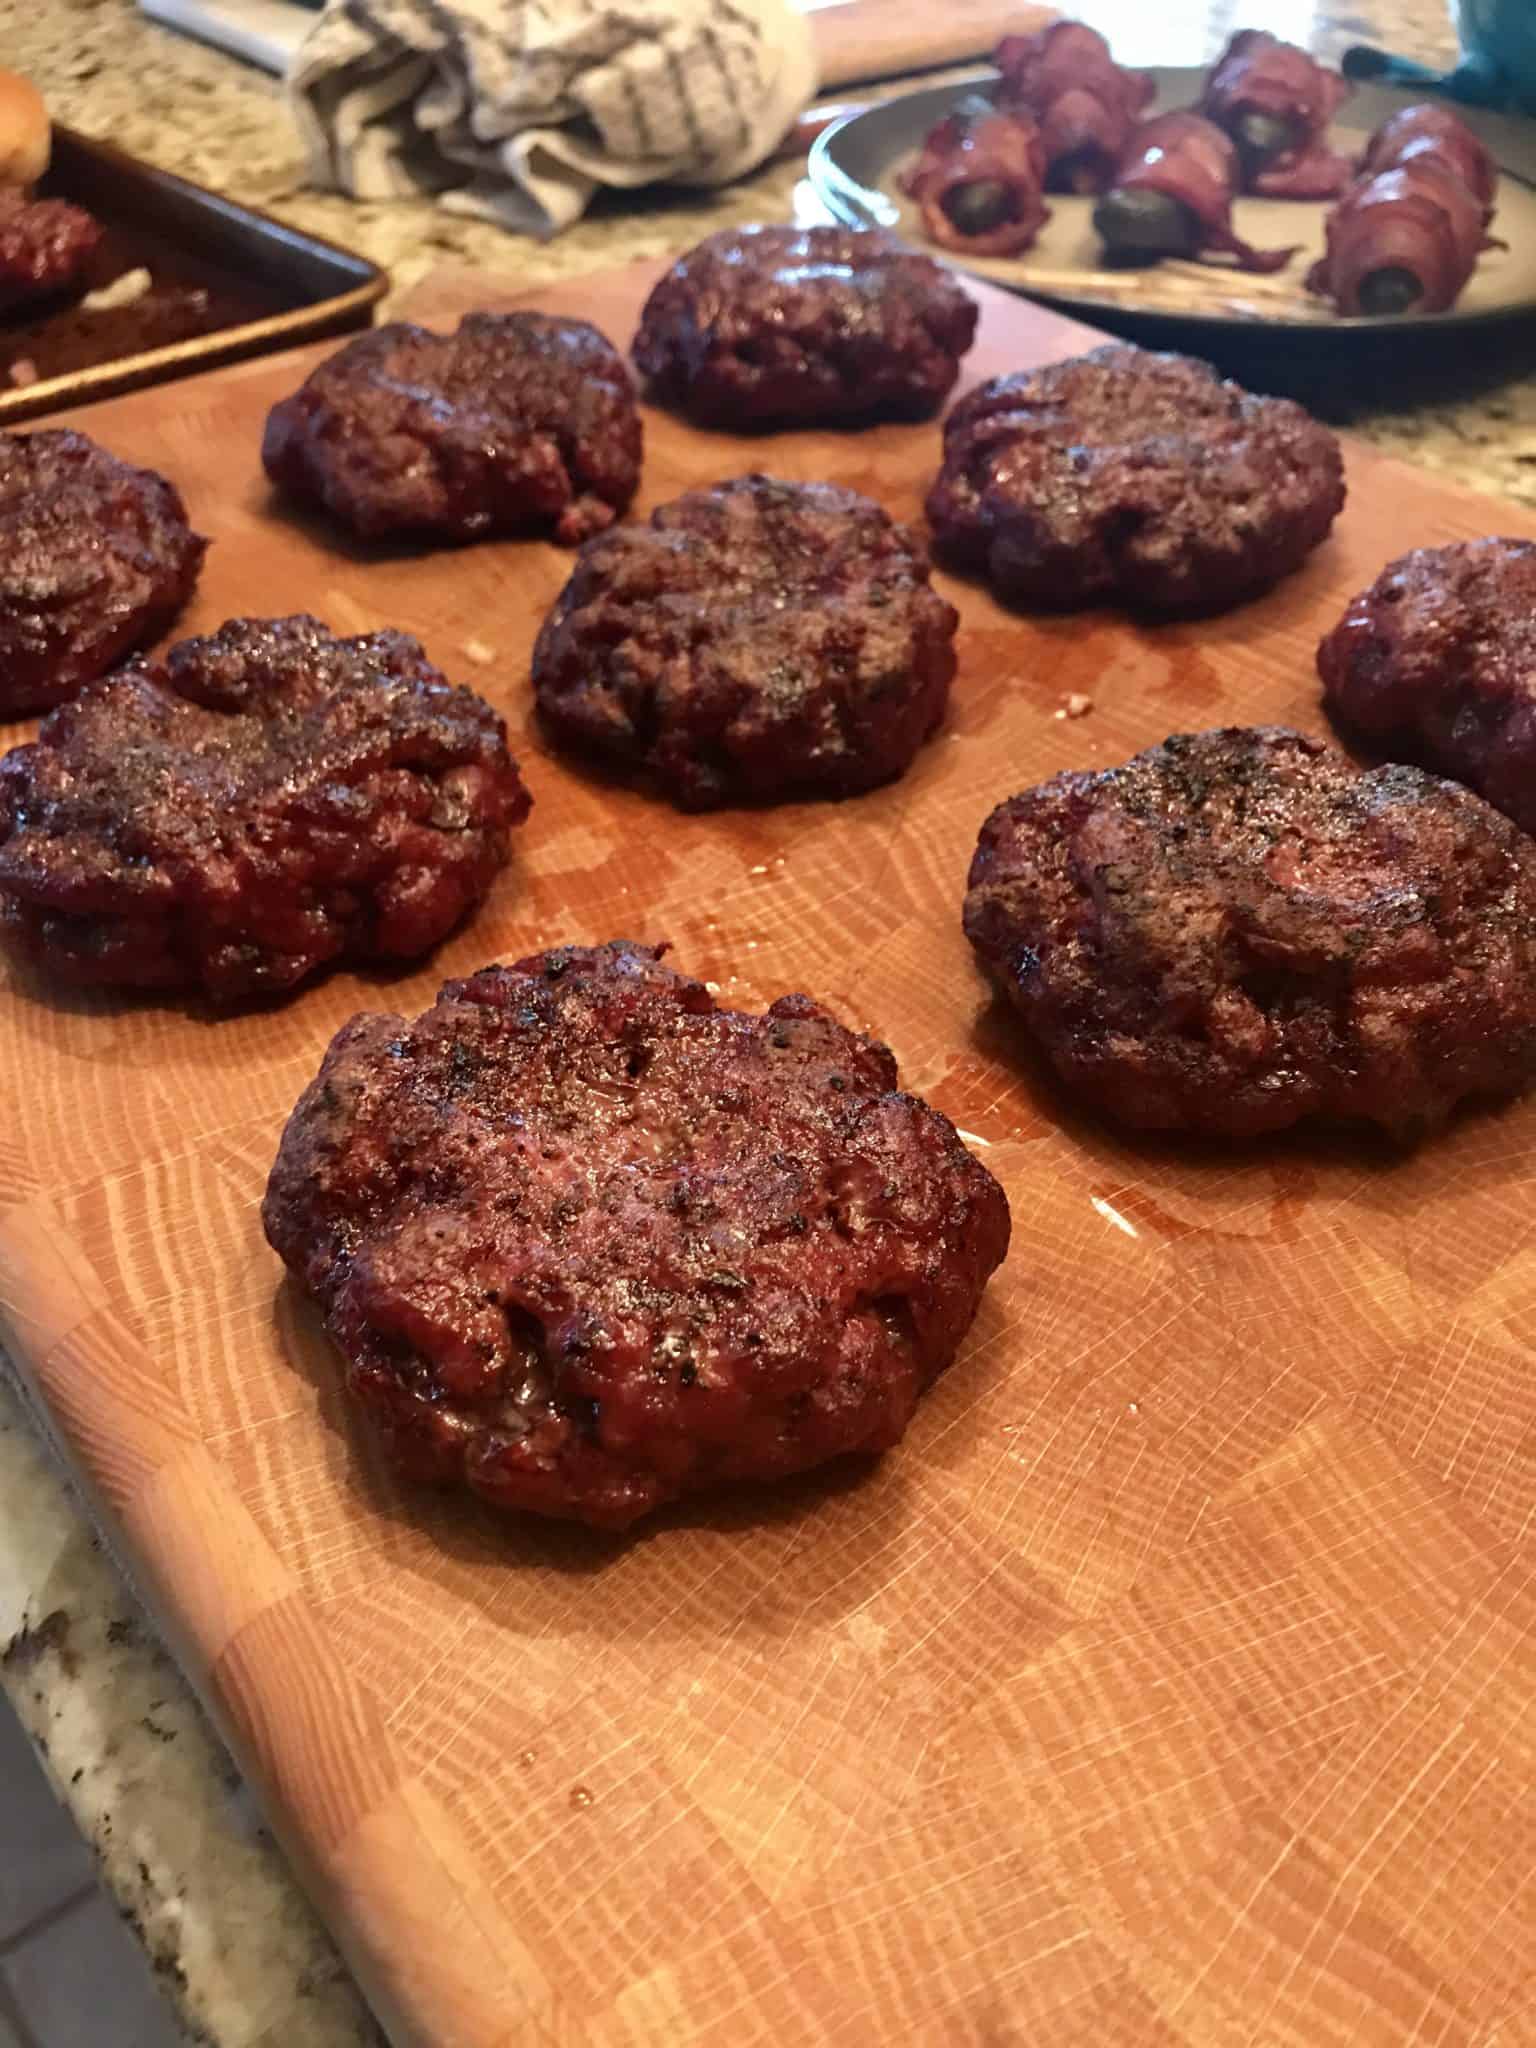 After searing the burgers, you can plop on a slice of cheese of your choice to get it nice and melty. We went with cheddar and American, but you can use any melting cheese you like. At this point, you can pull them off and load up your burger with whatever fixin's you like. We kept it simple with shredded iceberg lettuce, red onion, and tomato. But feel free to go nuts and use whatever you like. So smoke out old man winter and start your spring with some juicy delicious burgers!
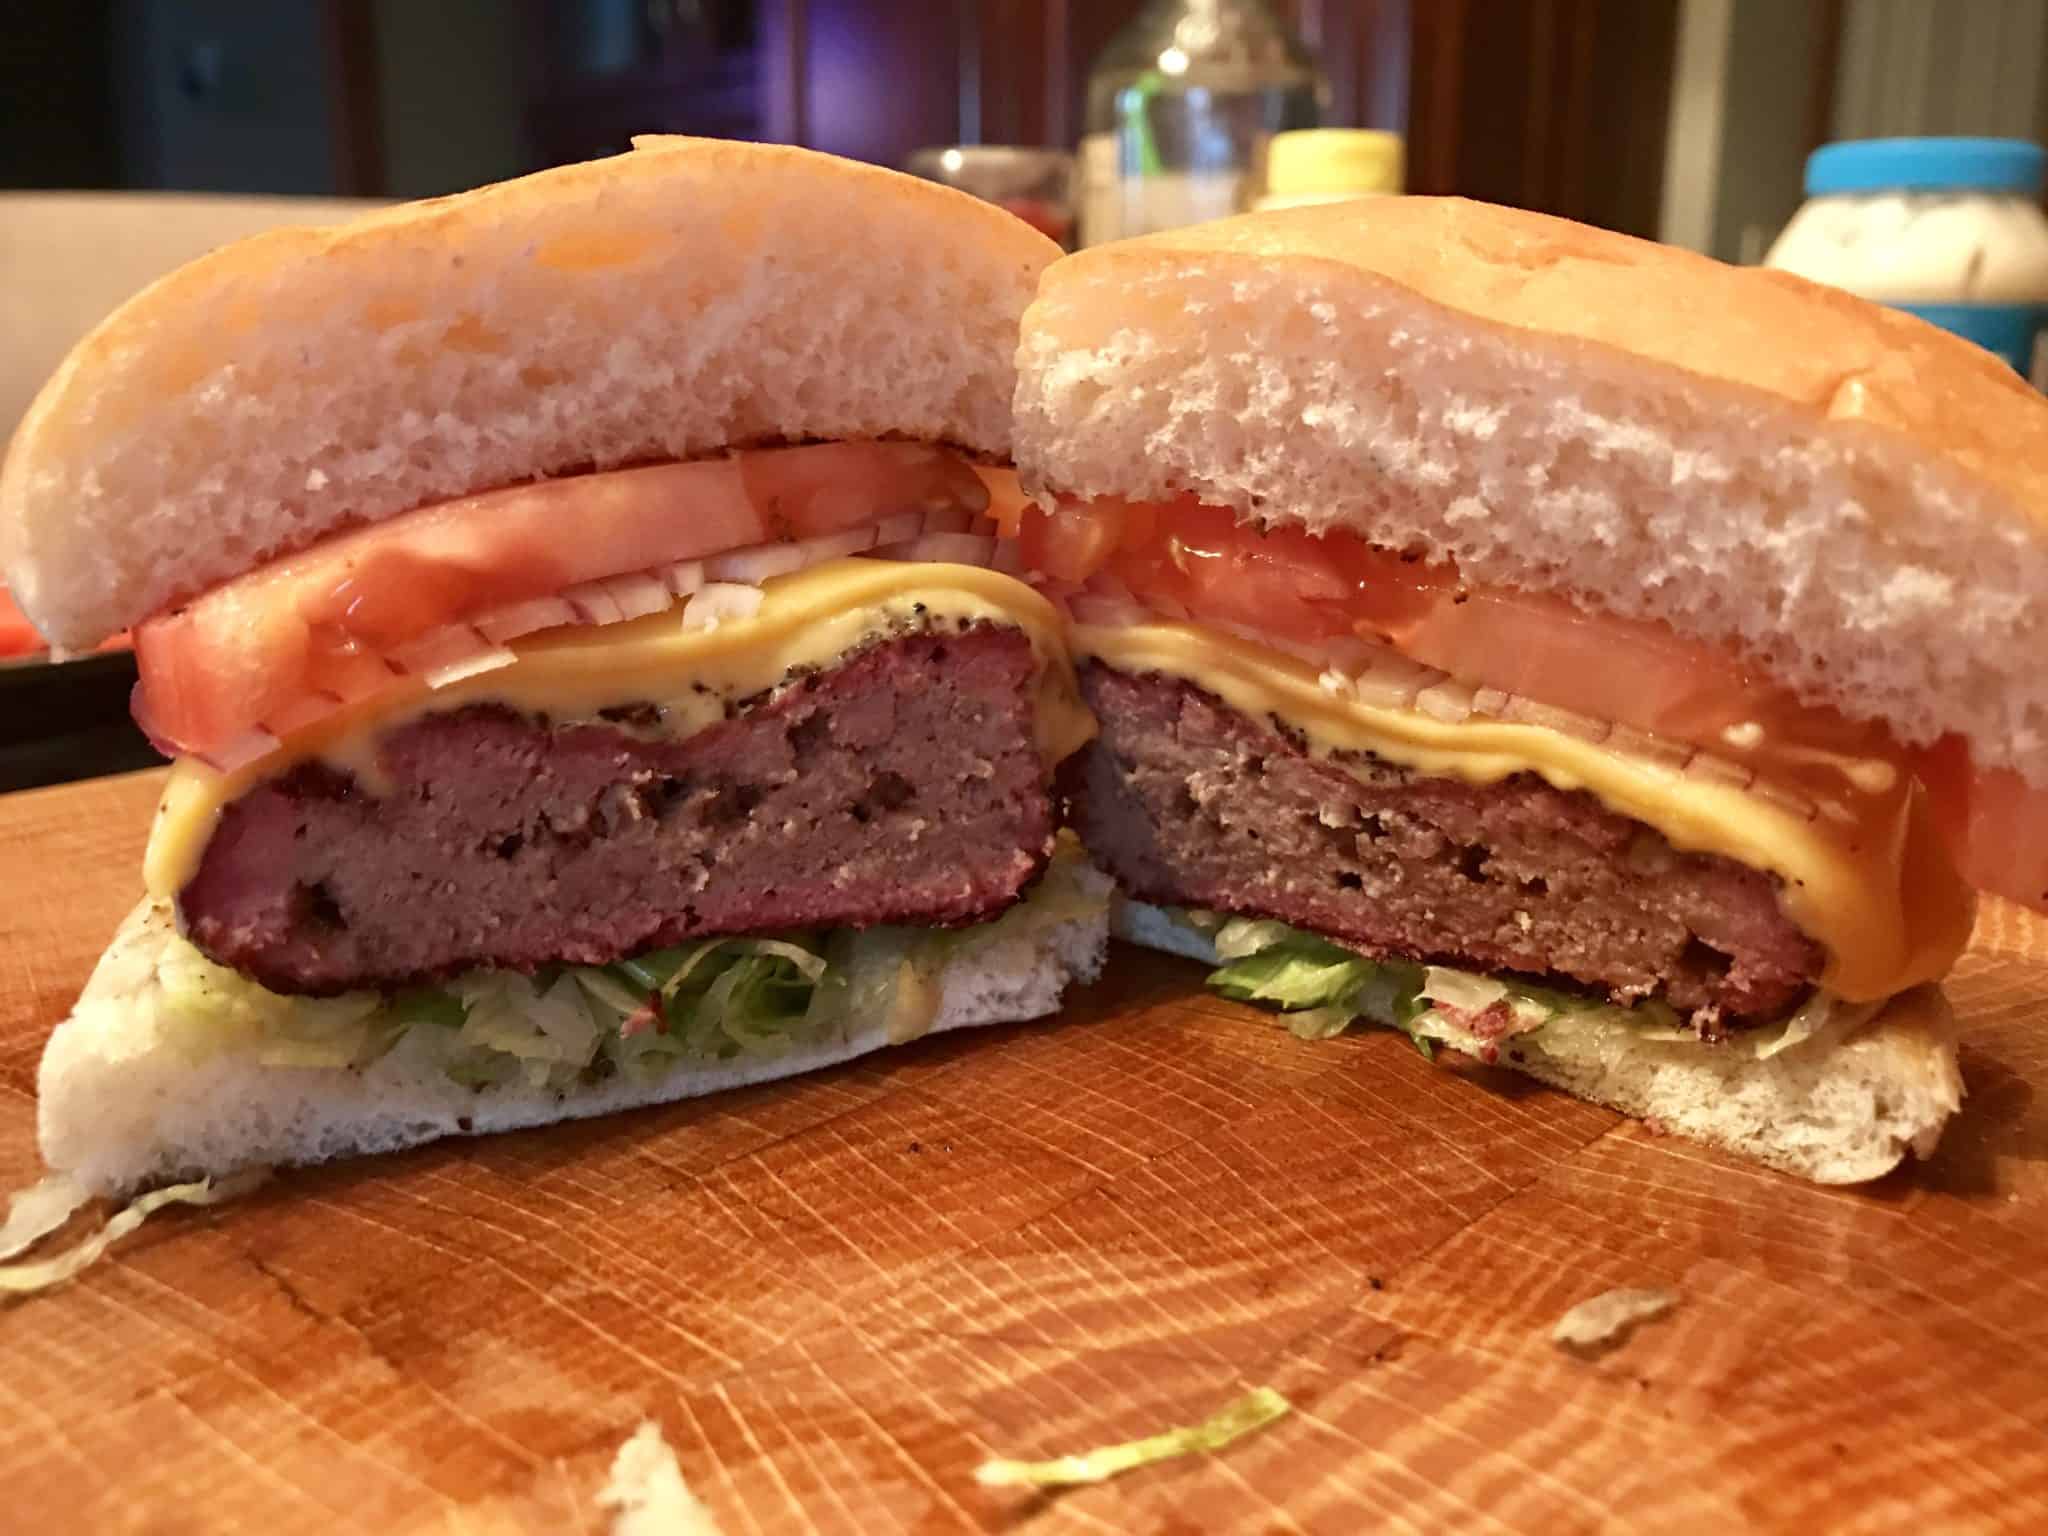 If you're looking for some killer side dishes, check out our smoked corn on the cob, smoked mac and cheese, or if you want to add some healthy fries as a side to your burgers then try out these butternut squash "fries"!
Smoked Burgers
- Prep Time: 1 hour
- Cook Time: 2 hours
- Total Time: 3 hours
Description
Classic American burgers smoked to perfection and seared until crispy! Made with freshly ground chuck roast, once you try these smoked burgers you'll never want to eat them any other way!
Ingredients
Meat used: 4-5 lb chuck roast
Other ingredients: Any burger toppings you'd like (cheese, onion, lettuce, tomato, mustard, ketchup....you get the gist)
Seasoning: Salt and pepper
Wood Used: Maple
Grill Temperature: ~225 to 250 F, indirect heat
Meat Temperature: 150 F
Smoke time: ~1 to 1 ½ hours
Instructions
- If you’re going to grind your own meat, the first thing you’ll need is, you guessed it, a meat grinder! You can use any type of grinder that you choose. You can use a hand crank one
that you attach the side of your countertop, an attachment to a Kitchenaid mixer
, or if you’re like me, a 30-year-old grinder attached to a janky motor. You know, whatever floats your boat. You can also use a food processor, but your results won’t be quite as uniform.
- No matter what grinder you’re going to use, the first step is to put the whole grinder into the freezer. We’re going to do this in order to make sure that the fat in our meat doesn’t heat up during the grinder process and turn into a jelly which, you know, is pretty gross.
- Next comes the star of the show, the meat! For burgers, we want to make sure that we have some good fat content and the default choice for us is chuck. This is going to give you somewhere around an 80-20 mix of lean to fat which is perfect for burgers. So you’ll want to take about a 4-5 pound chuck roast and cut it into one inch cubes, which will make it easier for your grinder.
- You’ll want to place these cubes on a baking sheet and pop these into the freezer for 15-30 minutes. You don’t want them to freeze solid but instead just firm up.
- Once you’re ready to grind, you’ll want to assemble the grinder of your choice with your ½ inch die (the part with the holes) attached. At this point, it’s as easy as popping those little meat cubes into your grinder and have them come out as meat spaghetti on the other side.
- Once you’ve ground up all your meat we like to grind it a second time, this time using your ¼ inch die. This makes for a more uniform and malleable final product without being too rough on your grinder going straight from cubes to ¼ inch.
- Congratulations! You have freshly ground beef! Now’s the part where we add eggs, breadcrumbs, spices and Worcestershire sauce right? WRONG! It’s totally unnecessary and can lead you to overwork your meat, leading to a less juicy burger.
- Instead of all those fancy add ins, all we’re going to do is take 6 oz of meat, loosely pack them into patties and lightly season them with salt and pepper. You want to work the meat as little as possible, so they retain their shape and juiciness.
- We recommend using a cheap kitchen scale
to measure out your 6 oz patties. This ensures that you are making uniform sized burgers.
- The last thing you’ll do is make a thumb sized dimple on the top of each patty. This will keep them flatter, so they don’t plump up and become little hockey pucks.
- Now all that’s left is smoking our burgers. Just like most of the things we smoke, we’re going to set our smoker to 225-250 degrees. For this smoke we used maple, but just about any wood works well with beef whether that’s a light fruit wood or a heavier hickory or mesquite. For a medium burger, you’ll want to let it get to about 150 degrees internal temp which will take around 1-1 ½hrs.
- Once the burgers have reached their target temperature, you'll want to sear them over direct heat (either on the smoker or in a hot pan) for about 30 seconds on each side. This will add a nice crunch to the outside of the burgers.
- After searing the burgers, you can plop on a slice of cheese of your choice to get it nice and melty. We went with cheddar and American, but you can use any melting cheese you like. At this point, you can pull them off and load up your burger with whatever fixin's you like. We kept it simple with shredded iceberg lettuce, red onion, and tomato. But feel free to go nuts and use whatever you like. So smoke out old man winter and start your spring with some juicy delicious burgers!

So let us know what you think….did this recipe smoke the competition or go up in flames?
Jim says
Where did you get the transmission for the electric motor to grinder shaft? Looks interesting!
cutsandcrumbles says
Hey Jim! Oh man it is ancient! The BBQ brothers have had it passed down to them from older generations 🙂 They are searching for a more modern alternative to recommend, though!