
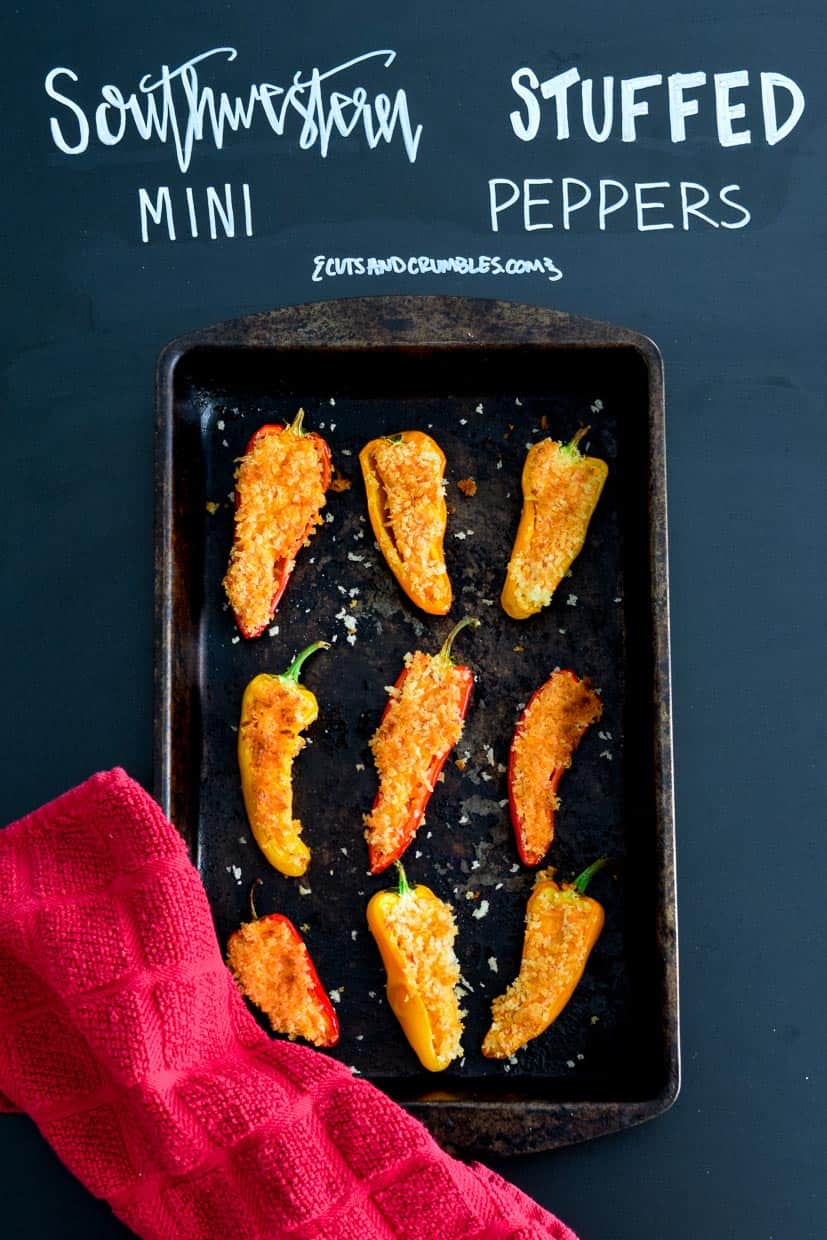
A savory, low calorie, Mexican snack for only 100 calories for 2 pepper halves! Delicious warm or cold and super easy to make!
 I can't even tell you how many times I have made these tasty little Mexican morsels. They're sooo good. And they make for a quick and simple lunch, which is pretty much how I gauge the value of all recipes 🙂
They're super easy to make and if you're feeling extra lazy, you can even skip half the steps and ingredients and they're STILL delicious! Whaaat?
Yes, it's true. These are really good topped with breadcrumbs, cooked, and served warm. They're also just as good if you skip the breadcrumbs, skip the oven, and just fill the peppers with the cheese mixture. Or hey, if you're feeling extraordinarily lazy, you can just whip up the cheese mixture and dip the peppers into it rather than stuffing them. The world is your oyster! Or maybe, in this case, it's more like your really lazy sloth.
Whenever I make this recipe I always end up with extra cheese mixture. Yet I never adjust the amounts because of one reason: I always end up with extra cheese mixture. Duh! I love to eat it with crackers or mix in a little salsa to make it dippable with tortilla chips. I'm a dip fanatic so there's no chance that I would miss out on the opportunity to make a dip out of extra ingredients!
SOUTHWESTERN STUFFED MINI PEPPERS
100 calories for 2 pepper halves

Before we start this recipe, let's learn more about how to choose the right peppers (and store them, if needed!)
how do i choose good peppers?
- Choose peppers that are firm and glossy and have a deep, vivid color.
- Choose peppers that feel heavy for their size. They should be firm but give slightly when pressed.
- The stems should be fresh and bright green in color.
- Avoid peppers that have any wrinkles, sunken areas, cuts, dark spots or soft spots.
- If you want to eat the pepper raw, choose a female pepper (one with 4 points on the bottom). Although it will have more seeds, the flesh will be sweeter than a male pepper (one with 3 points on the bottom).
HOW DO I STORE peppers UNTIL I’M READY for them?
- Store in the refrigerator next to a damp cloth to help keep the pepper hydrated for up to 10 days.
- Store any unripe peppers at 65-70 degrees F for 2 weeks until ripe.
Tip: You can find more tips on seasonal produce selection and storage, plus tons of recipes from fellow food bloggers in my Monthly Seasonal Produce Guides!
great! SO how do i make this recipe?
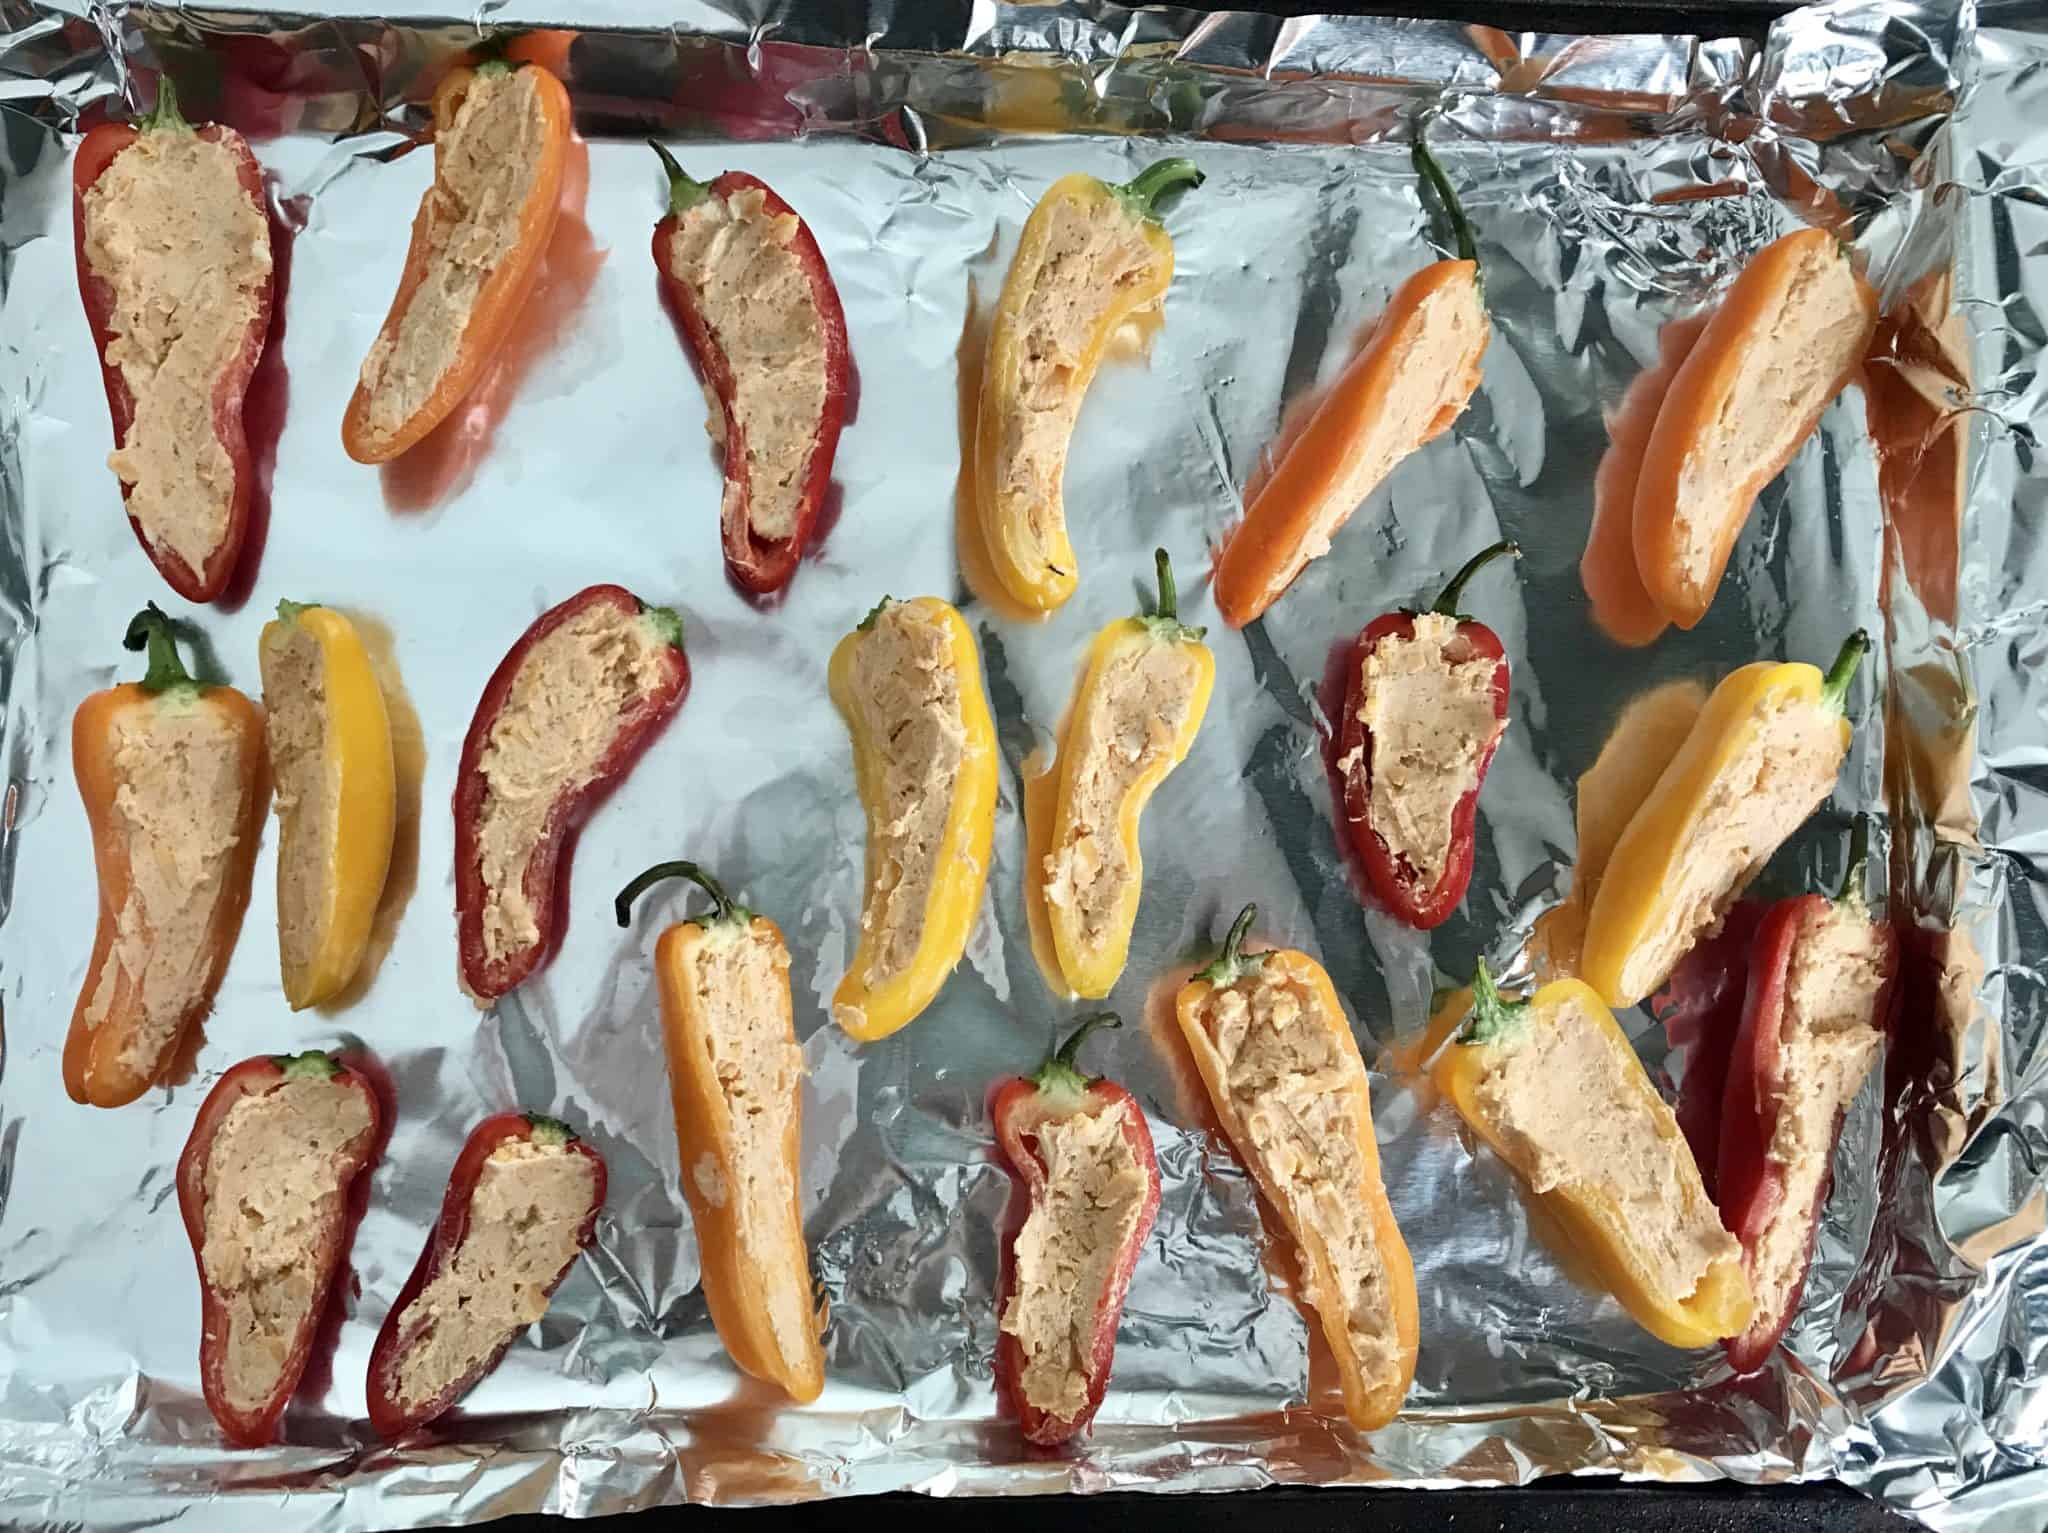
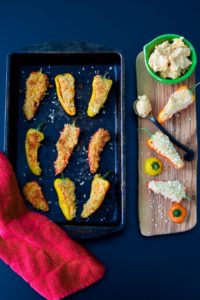
Start by preheating your oven to 350 degrees. Set out 8 oz of cream cheese to soften (I used Kraft Philadelphia ⅓ less fat). Slice 20 mini peppers in half lengthwise and remove seeds and ribs. (You can cut the tops off if you want, but I think they look cuter with them on and it gives me something to hold on to while I devour them!)
In a large mixing bowl, mix together the cream cheese, 1 C of grated, sharp cheddar cheese, and 2 tablespoon of taco seasoning (I used 40% less sodium by Ortega). Stuff each pepper half with a small amount of cheese mixture, until level with the top of each pepper.
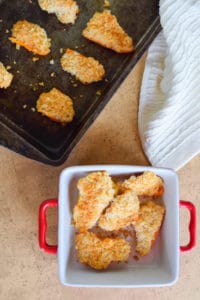
In a separate small, microwaveable, bowl, melt 1 tablespoon of unsalted butter then mix in ½ C of panko breadcrumbs. Dip each pepper half into the breadcrumb mixture and press down to adhere. (You may not use all of the breadcrumbs.) Place the pepper halves onto a foil lined baking sheet. In case you haven't noticed, I always line baking sheets with foil. I do enough dishes, why bother with having to clean a baking sheet too?!
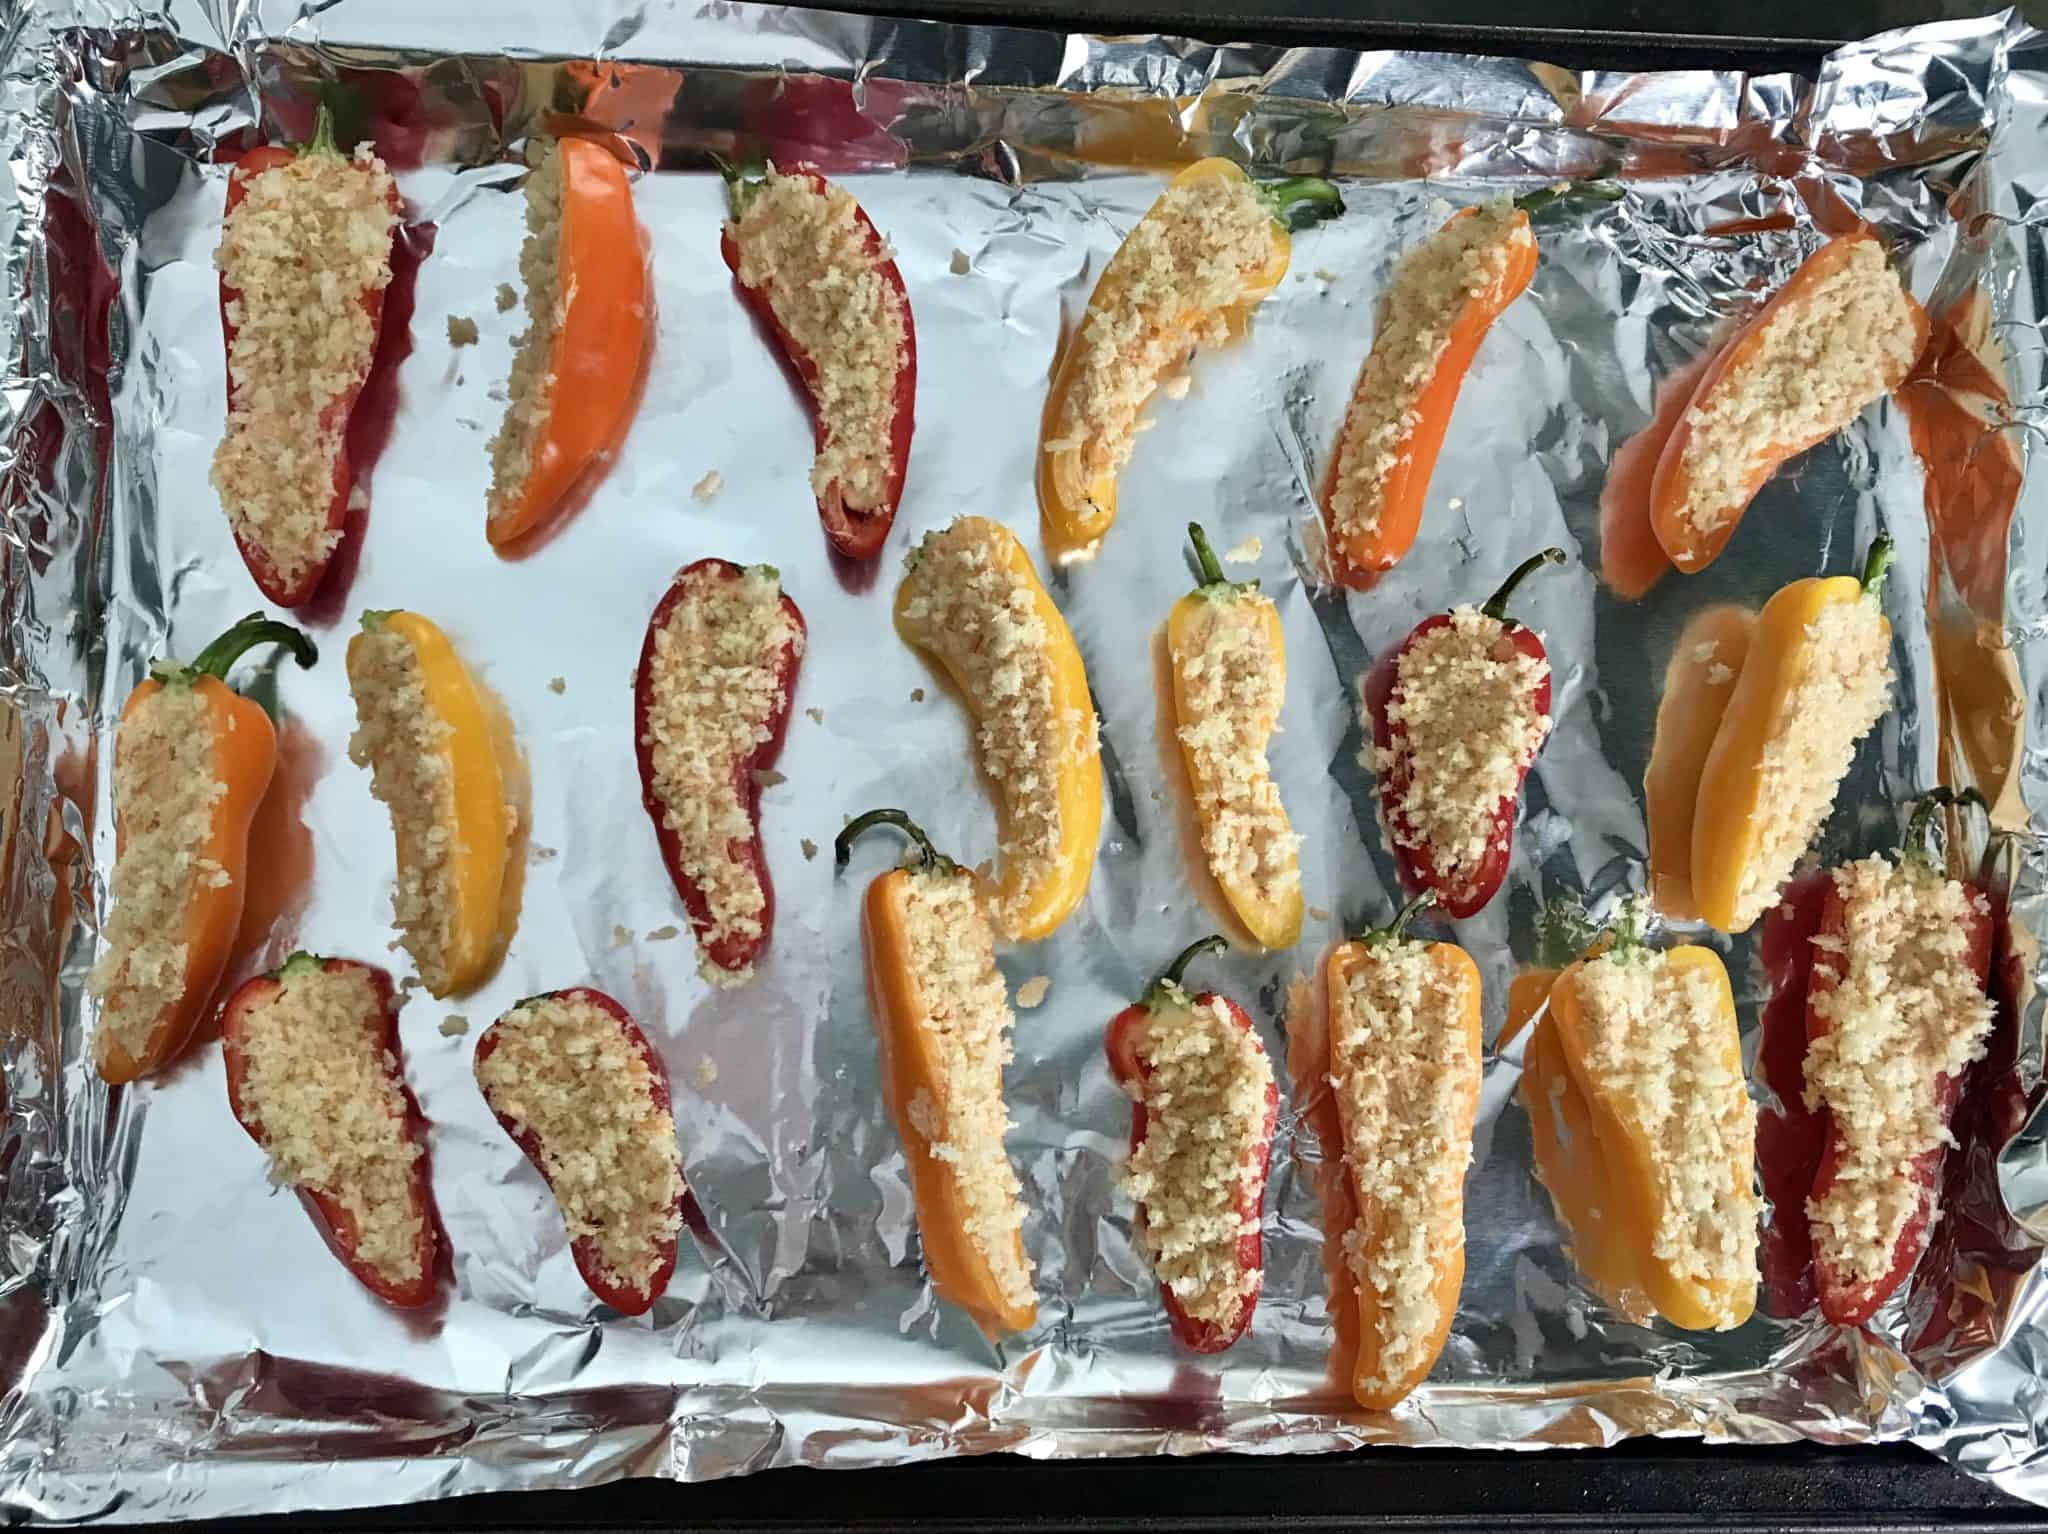
 Bake for 15 minutes then switch oven over to broil. Broil for 2-3 minutes, until browned. Watch closely to prevent burning! Allow to cool slightly then enjoy! These made for a great little appetizer for while I waited for my vegetarian 7-layer tostada to cook! Leftovers can be reheated in the microwave for about 45 seconds. Enjoy! 🙂
 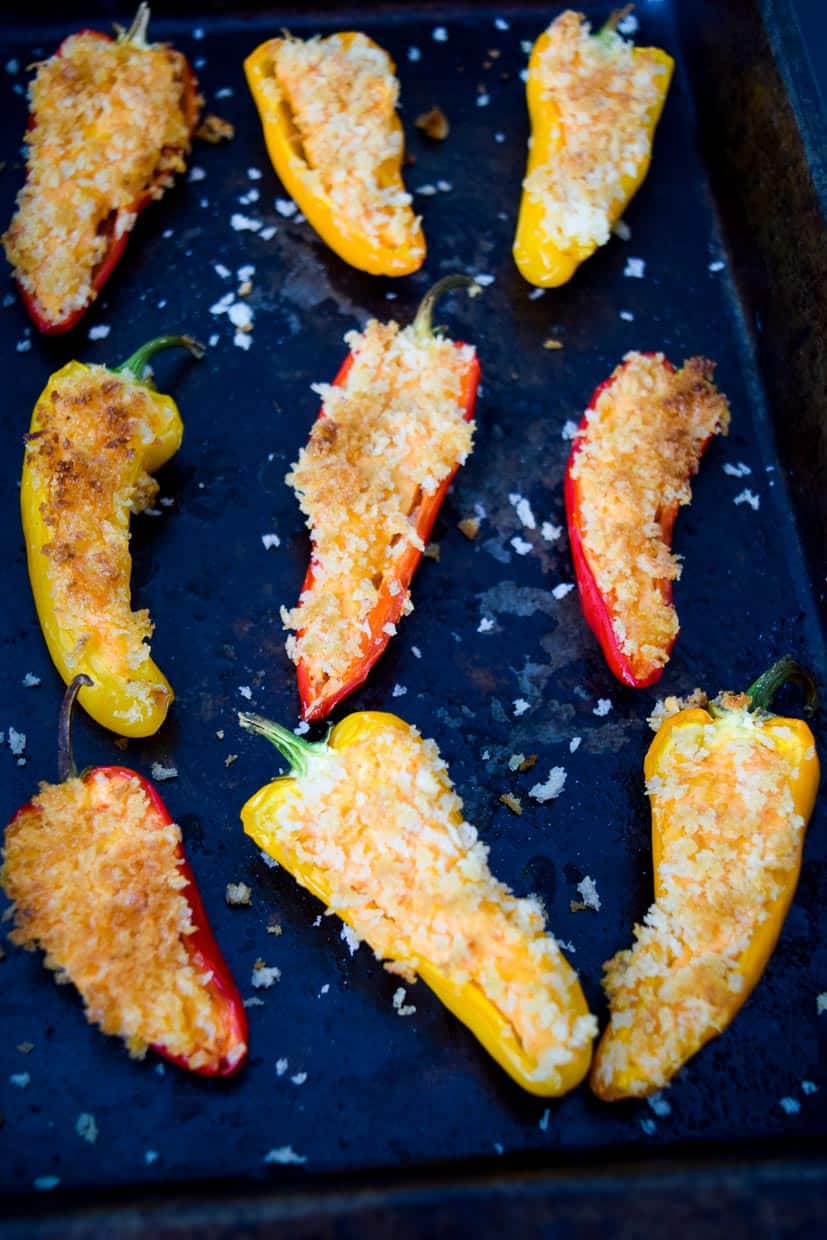 You can dip these into this easy restaurant style salsa or step it up a notch with this smoked salsa! Or if you're feeling cheesy, try out this cheesy guacamole! I like to dice them up then fill multigrain Tostitos with a little bit of refried beans and some mini peppers, then microwave for about 45 seconds. Top with some guac and salsa and you've got yourself some healthy nachos! 🙂

Southwestern Stuffed Mini Peppers
- Prep Time: 10 mins
- Cook Time: 18 mins
- Total Time: 28 mins
- Yield: 30 pepper halves (15 servings) 1x
- Category: Appetizer
- Method: Baked
- Cuisine: Mexican
- Diet: Low Calorie
Description
A savory, low calorie, Mexican snack for only 100 calories for 2 pepper halves! Delicious warm or cold and super easy to make!
Ingredients
- 15 mini sweet peppers
- 8 oz low-fat cream cheese, softened (I used ⅓ less fat)
- 1 C grated, sharp cheddar cheese
- 2 Tbsp taco seasoning (I used 40% less sodium)
- 1 Tbsp unsalted butter
- ½ C panko breadcrumbs
Instructions
- Preheat oven to 350 degrees.
- Slice 15 mini peppers in half lengthwise. Remove seeds and ribs. (You can cut tops off if you wish. I like to leave them on because it gives me something to hold on to while I devour them!)
- In a large mixing bowl, mix together 8 oz softened cream cheese, 1 C grated sharp cheddar cheese and 2 tablespoon taco seasoning until fully blended.
- Stuff each pepper with a small amount of cheese mixture, until level with the top of each pepper.
- In a separate, small, microwaveable, bowl, melt 1 tablespoon butter then mix in ½ C panko breadcrumbs.
- Dip each pepper half into the breadcrumb mixture and press down to adhere.
- Place peppers onto a foil lined baking sheet.
- Bake for 15 minutes then switch oven to broil.
- Broil for 2-3 minutes, until browned. Watch closely to prevent burning. Allow to cool then serve!
- Enjoy!!
Notes
Leftovers can be microwaved for about 45 seconds.

**Recipe adapted from Rachel Cooks
What do you think? Did this recipe make the cut for you or did it crumble? What would you do differently? Leave a comment below!
PS: Since I want my blog to be about learning and improving, I wanted to include one of my original images, next to an updated image. Thank you to the Pinch of Yum Food Photography Ebook for these lessons!
Rachel at Rachel Cooks says
"Whenever I make this recipe I always end up with extra cheese mixture. Yet I never adjust the amounts because of one reason: I always end up with extra cheese mixture. "
I love it! Thanks for making this recipe - so glad you like it! <3
cutsandcrumbles says
No, thank YOU for sharing it!! It is definitely one of my go-to recipes! Delicious! ?