

What you're looking at is my childhood. Or my teenagehood. I can't remember the difference. Either way this recipe is from my one and only mother, who is a baking extraordinaire!
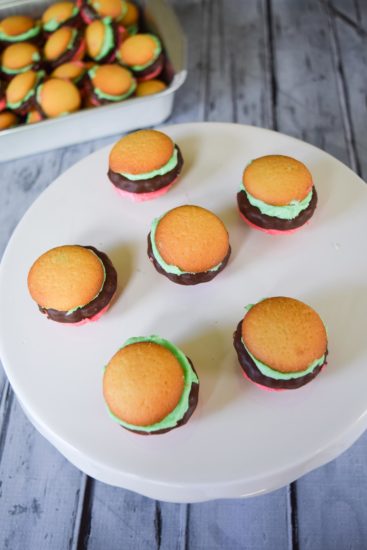
These cookies are simple, delicious, adorable, and perfect for a cook out, class party, or any occasion that calls for miniature hamburger-looking food items. (Or a "Krabby Patty" as the kids call it these days 😛 )
Side note: Don't worry vegetarians, there is no meat in these cookies! That'd be weird. And disgusting.
"HAMBURGER" COOKIES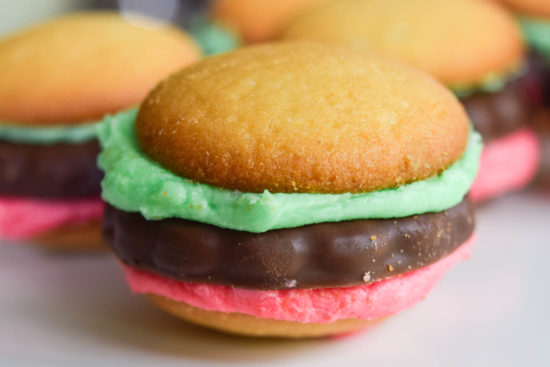
Seriously....have you ever seen a cuter cookie? I haven't. And I'm the type of person who has seen a lot of cookies. They taste even better than they look. but get your sweet tooth ready because these have been lovingly explained as "little sugar bombs!" 🙂
To make these cuties you're going to need vanilla wafers for the buns (off brand is best) and Keebler Grasshoppers for the burger. The "lettuce" and "ketchup" is an icing made of shortening, powdered sugar, vanilla, milk and food coloring. You can use whatever colors you want; sometimes we use yellow for cheeseburgers or mustard, but I prefer the red and green look!
 Start by creaming ⅔ C shortening in a medium sized bowl. Add in 1 lb of powdered sugar, 1 teaspoon of vanilla and 2 tablespoon of milk. Using a hand mixer, beat until smooth and well blended. If the icing seems too thick, add in about 1 more tablespoon of milk, until decorating consistency (easily spreadable yet still stiff).
Split the icing in half and transfer into separate bowls. Stir in food coloring until desired color. I used about 3 drops of green and around 15 of red.
Empty out 1 box of off brand vanilla wafers into a large bowl or pan (to make for easier prepping) and 1 box of Keebler Grasshoppers into another. Spread half of the vanilla wafers with your red icing. Press one grasshopper into each half. Then spread the other half of the wafers with the green icing and top each grasshopper cookie. Press down slightly to give hamburger appearance and help the cookie hold together.
If you have any extra wafers and icing left over, create some "vegetarian" burgers to snack on! 😛
Store cookies in a sealed container for at least 1 day before serving. This will give the vanilla wafer time to soften so the cookies can be eaten more easily. Otherwise all of your fillings will pop out when you try to bite into it!
Enjoy!! Cookies get better with time so don't worry about having too many leftover! 🙂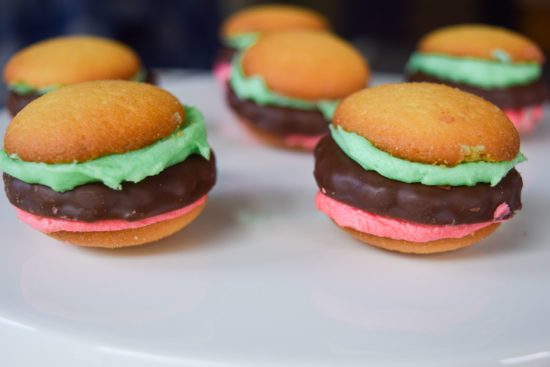

"Hamburger" Cookies
- Prep Time: 15 mins
- Total Time: 15 mins
- Category: Dessert
Ingredients
- 1 box of off brand vanilla wafers
- 1 box of Keebler Grasshopper cookies
- ⅔ C shortening
- 1 tsp vanilla
- 1 lb powdered sugar
- 2-3 tablespoon milk
- Desired food coloring (red for ketchup, green for lettuce, yellow for mustard or cheese, etc)
Instructions
- Cream ⅔ C shortening in a medium sized bowl.
- Add in powdered sugar, vanilla and 2 tablespoon of milk. Using a hand mixer, beat until smooth and well blended. If the icing seems too thick, add in about 1 more tablespoon of milk, until decorating consistency (easily spreadable yet still stiff).
- Split the icing in half and transfer into separate bowls. Stir in food coloring until desired color.
- Empty out 1 box of off brand vanilla wafers into a large bowl or pan (to make for easier prepping) and 1 box of Keebler Grasshoppers into another.
- Spread half of the vanilla wafers with your red icing.
- Press one grasshopper into each half.
- Then spread the other half of the wafers with the green icing and top each grasshopper cookie.
- Press down slightly to give hamburger appearance and ensure the cookie holds together.
- Store in a sealed container for at least 1 day before serving. This will give the vanilla wafer time to soften so the cookies can be easily eaten.

**Recipe from my mom! 🙂
What do you think? Did this recipe make the cut for you or did it crumble? What would you do differently? I look forward to reading your opinions! ![]()
Kathy E. says
"Where's the Beef?" is what my husband said when I showed him the photos! These are just too cute! I'm pinning them to take to my next get-together with friends. Thanks so much!
cutsandcrumbles says
Hahaha oh my gosh Kathy that's too funny! I hope you guys love them! They're always a huge hit! 🙂